Plan address space visually — no account required, shareable links, persist to LightMesh when ready
Subnet Planner
Design CIDR address space visually with the LightMesh subnet planner — no account required. Share plans with colleagues via a link, and persist a plan into your LightMesh account, where it becomes managed subnet records with the full IPAM lifecycle.
Overview
The LightMesh subnet planner is a visual canvas for designing CIDR address space. Anyone can open it — no LightMesh account required — to create a parent block, divide it into child subnets, name and resize them, and plan address space for a variety of use-cases: a home lab, a network proposal for a client, study or exam preparation, or production address planning. Open the planner at https://next.lightmesh.com/planner.
Plans can be shared with colleagues via a link, and a shared plan can be viewed and persisted into the recipient’s own LightMesh account. Persisting a plan is what gives it a life beyond the canvas: the planned blocks become subnet records in LightMesh that take on the full IPAM lifecycle — assigning IPs, handling requests, and synchronizing with discovery sources such as DHCP, ping polls, SNMP, AWS, and Azure. Using the planner also prevents IP conflicts, because every child block is validated against the parent CIDR and sibling subnets as you work, and saved plans can be reconciled against live imported state before you provision a single VPC or VNet.
Open the planner
No account or existing LightMesh setup is needed to start planning. Open https://next.lightmesh.com/planner and you will land on an empty planning canvas, ready for a new design.
Sign in with a LightMesh account — or create a free one at https://next.lightmesh.com/register — when you are ready to share a plan with colleagues or persist it into your account, where it becomes part of your managed IPAM.
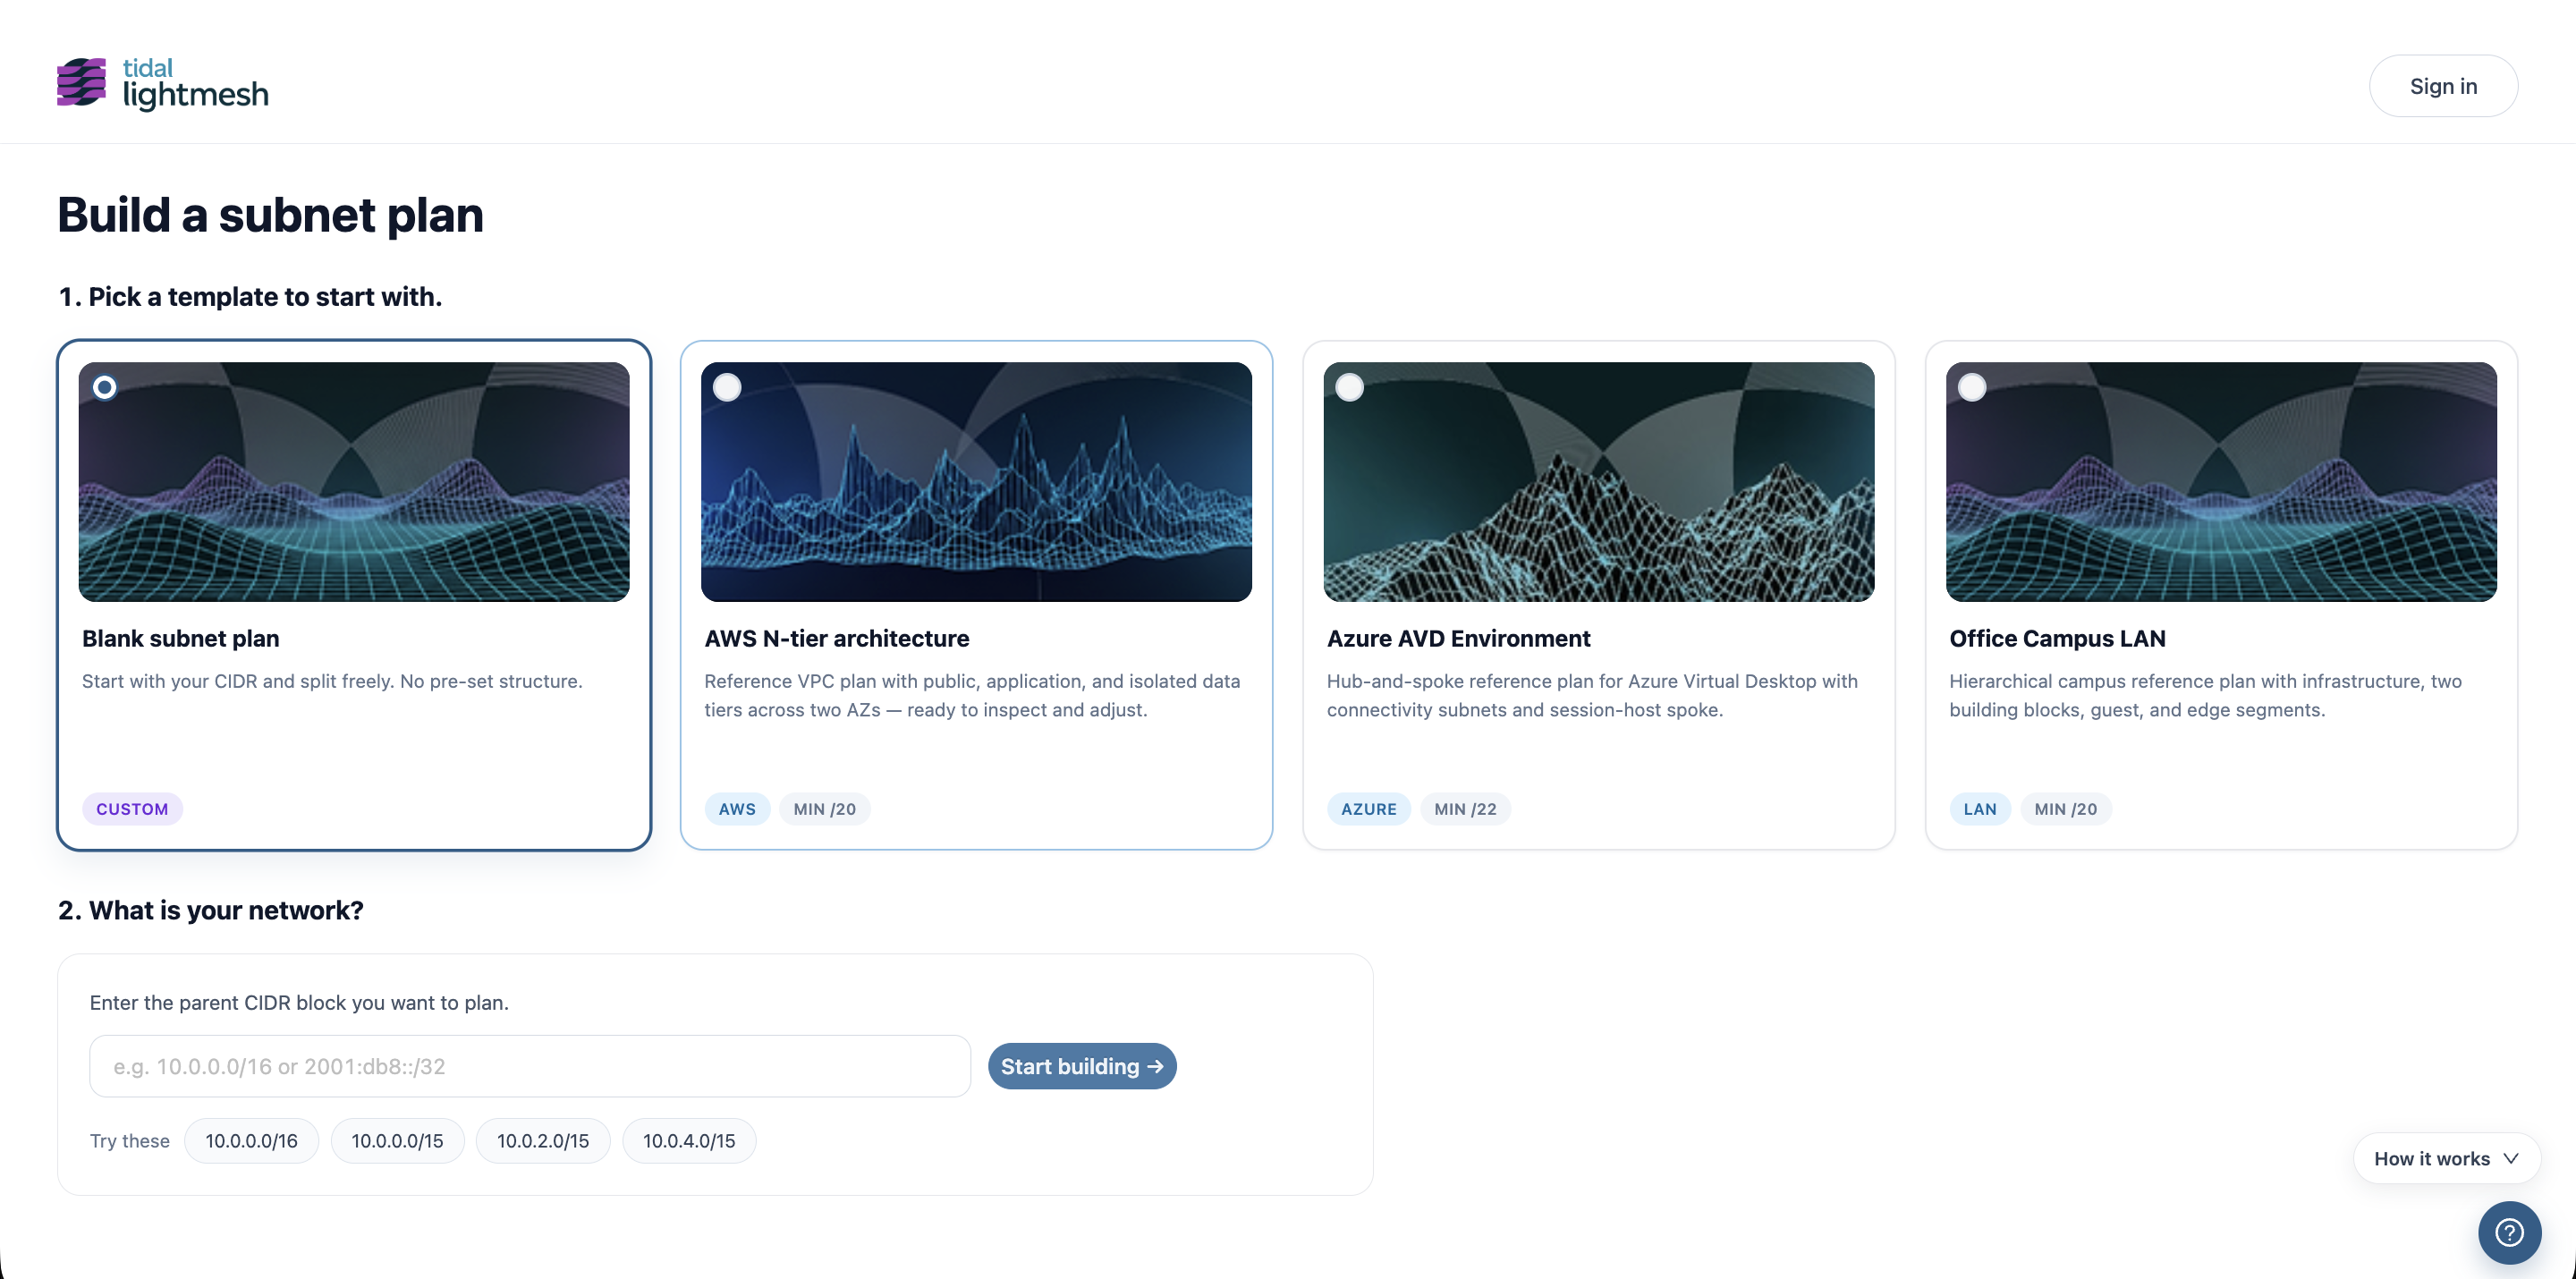
Build a plan visually
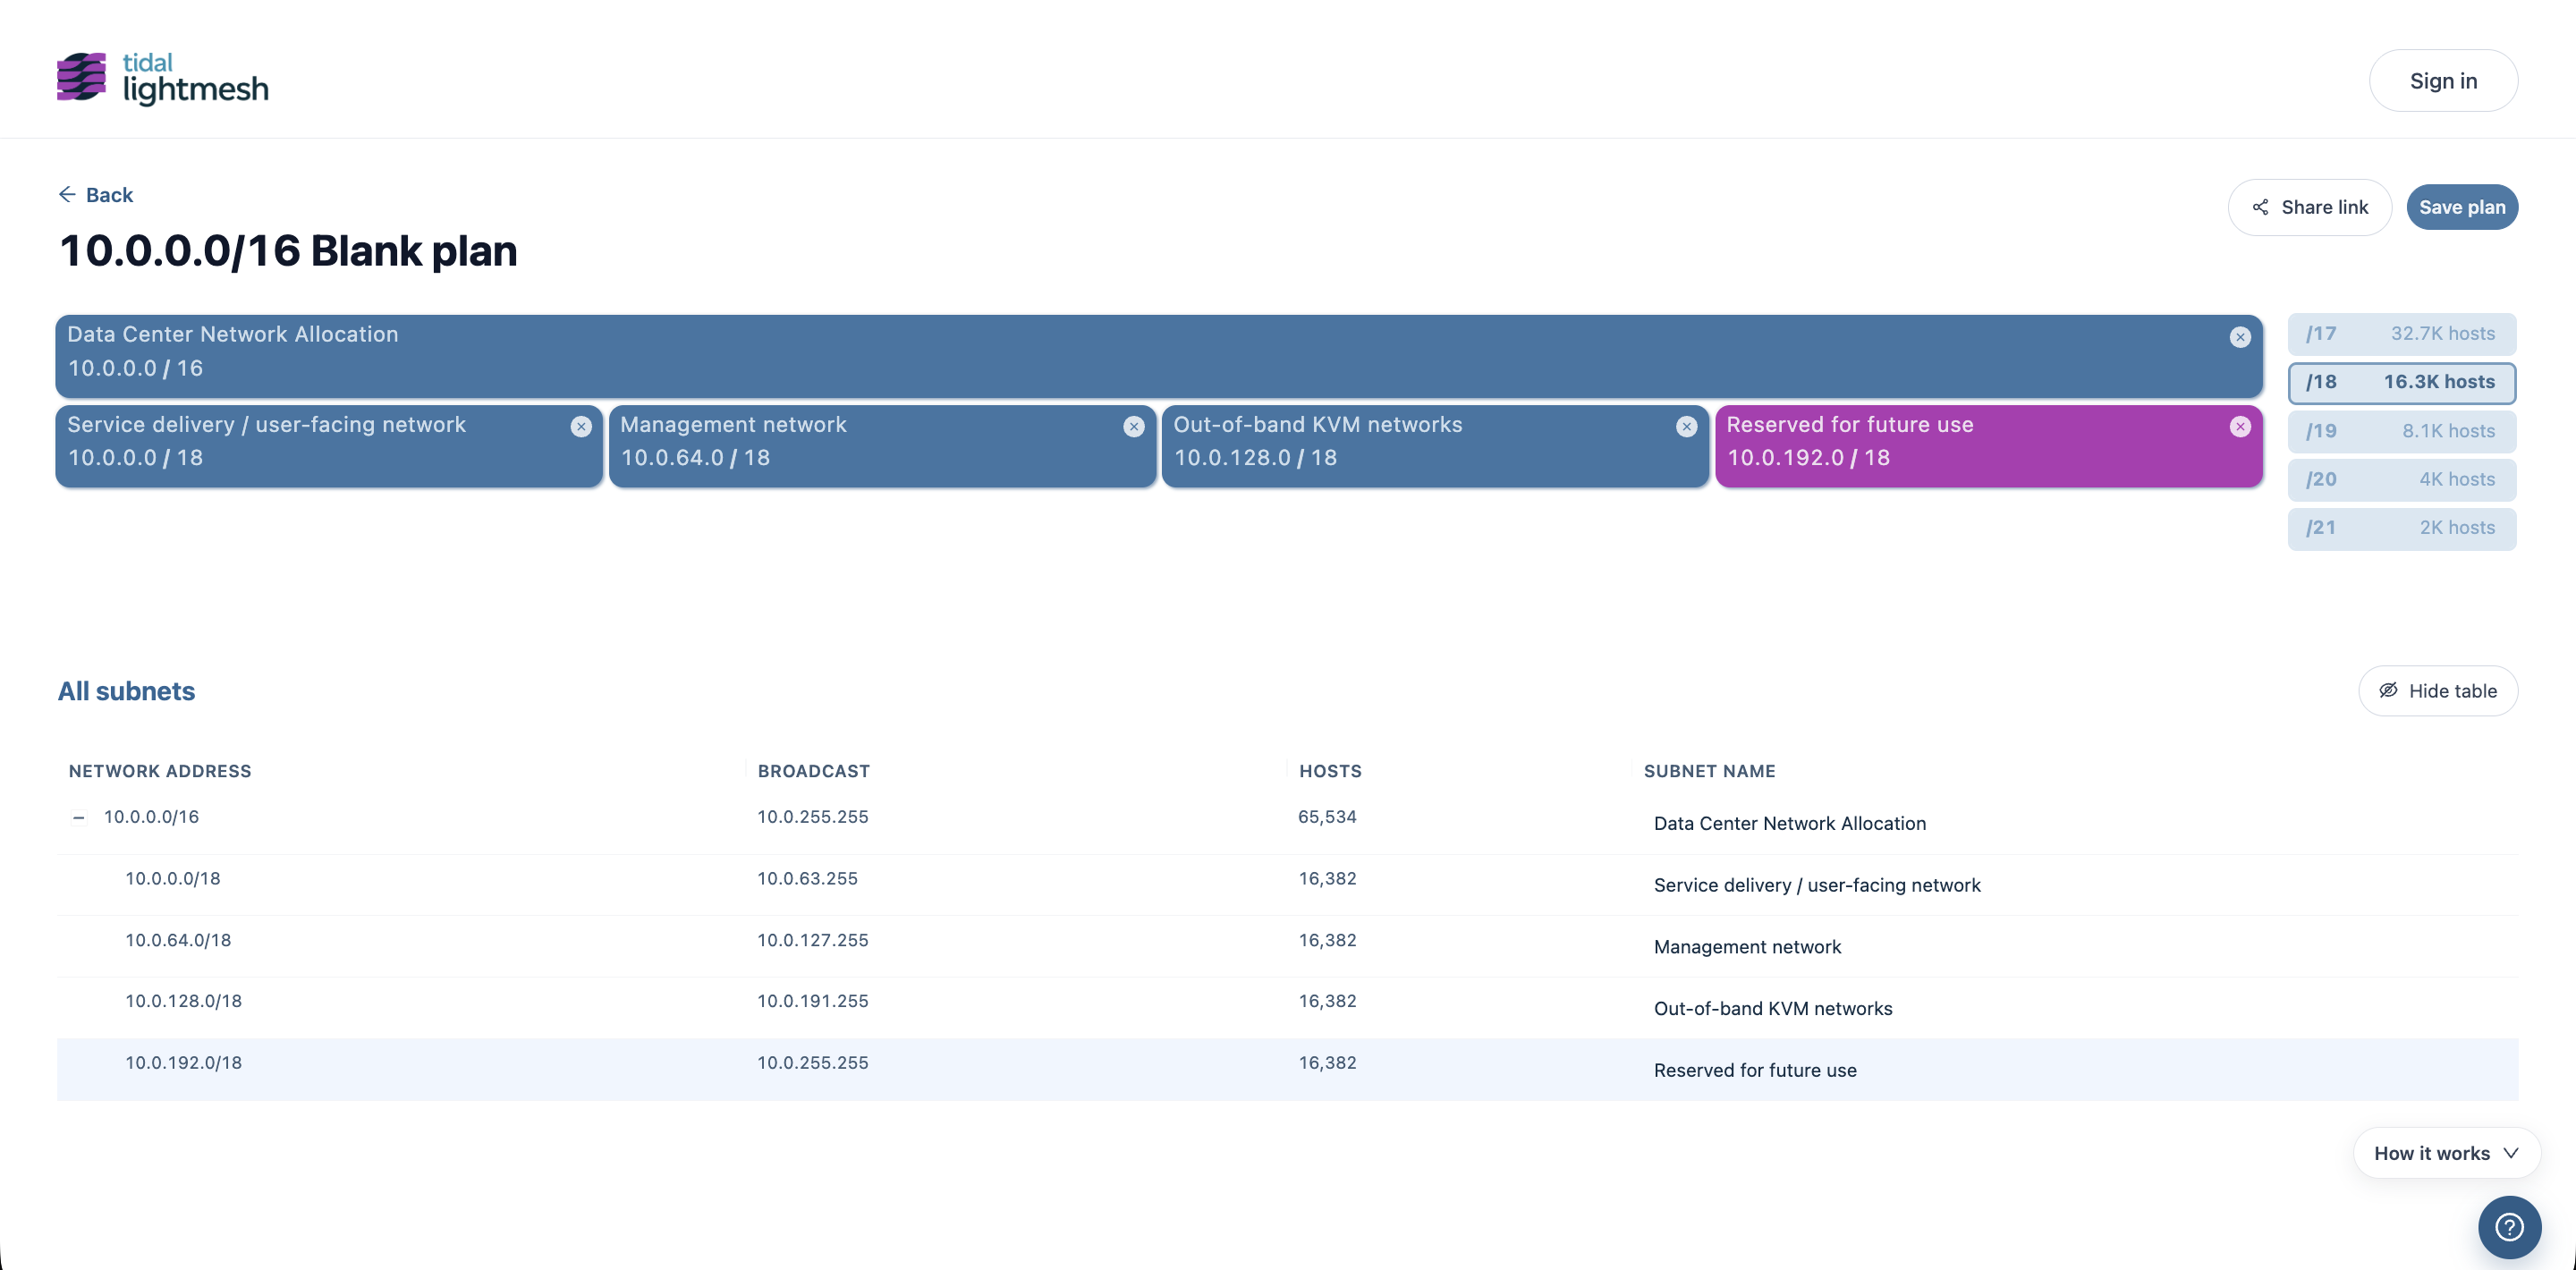
Start by creating a parent CIDR, for example 10.0.0.0/16. This block represents the total address space you want to design. Click or drag inside the parent block to split it into child subnets. LightMesh validates each split so children are contiguous, non-overlapping, and fully contained by the parent.
Name each child block to document its purpose:
10.0.0.0/18— Service delivery / user-facing network10.0.64.0/18— Management network10.0.128.0/18— Out-of-band KVM networks10.0.192.0/18— Reserved for future use
Resize a block by dragging its edges. The planner recalculates neighboring blocks automatically and warns you if a resize would overlap an existing subnet or exceed the parent boundary.
Share and persist a plan
Share a plan. Generate a link to send to colleagues. Anyone with the link can view the plan, and they can persist a copy of it into their own LightMesh account if they want to work with it themselves.
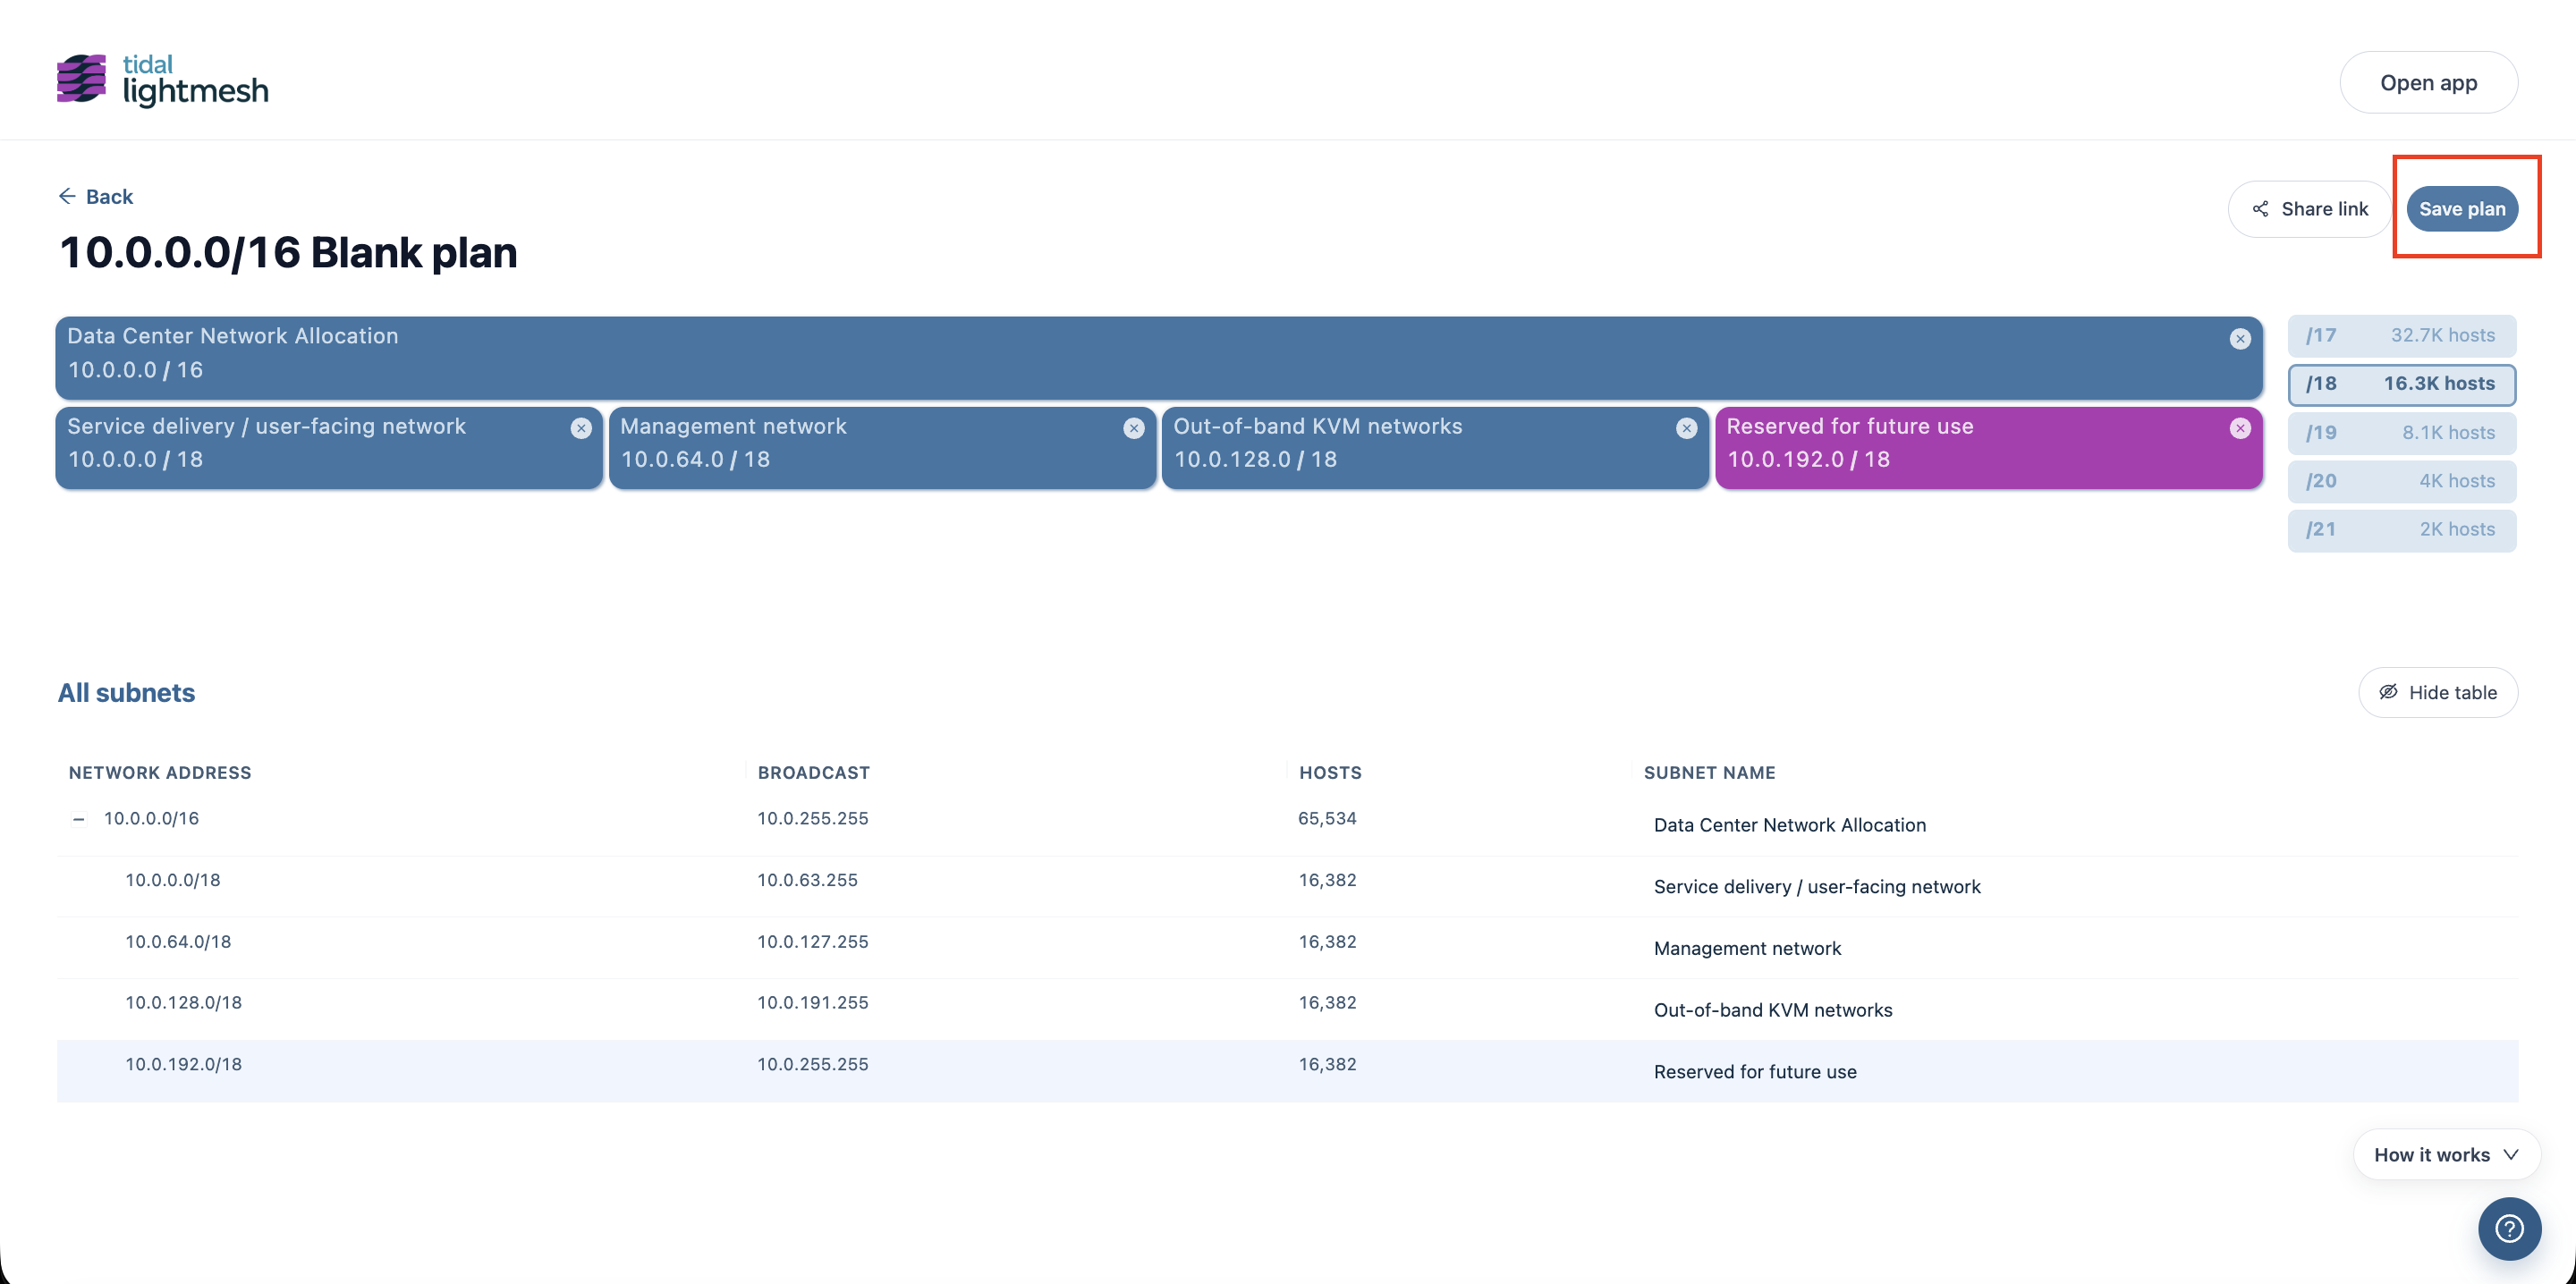
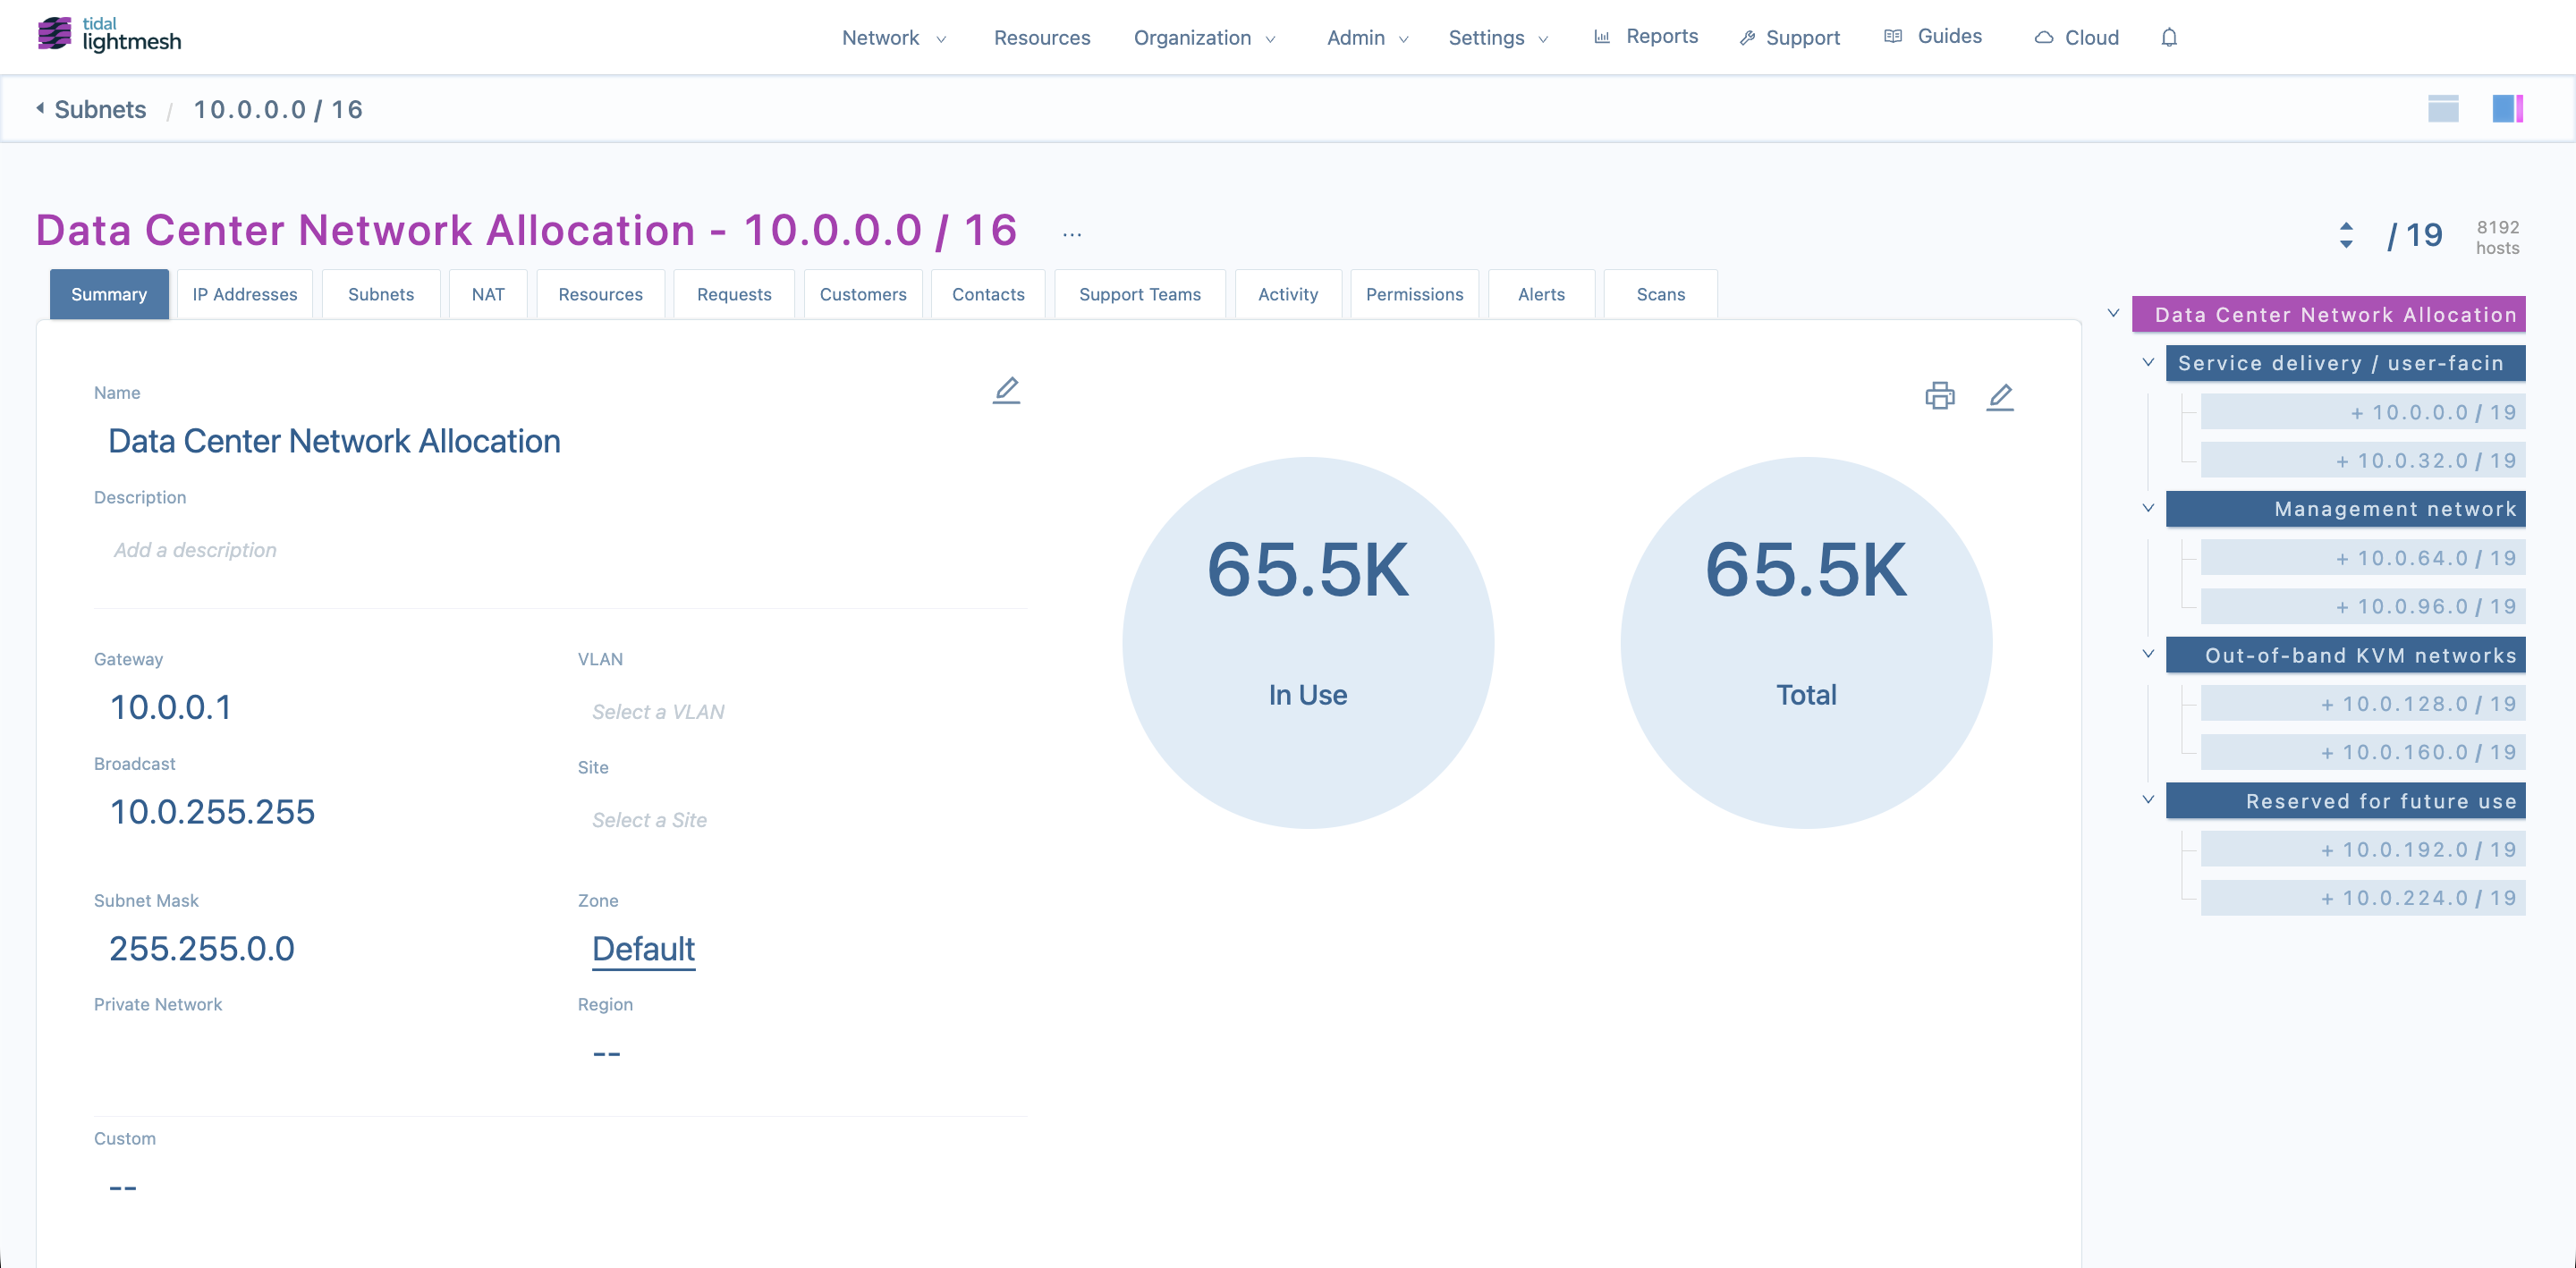
Persist a plan. When the design matches your intent, sign in and click Save Plan. LightMesh creates subnet records from every named block and makes them visible in TreeView and the subnets list. From there the blocks take on the full IPAM life of managed subnets: assigning IPs, handling requests, and synchronizing with discovery sources such as DHCP, ping polls, SNMP, AWS, and Azure — and they are included in cloud import overlap checks.
Planned vs live reconciliation
Saved plans are compared against live state from AWS and Azure imports and from discovery sources such as DHCP, ping polls, and SNMP. If you plan 10.0.1.0/24 in an AWS Production zone and the same range is already allocated in an On-Prem DC zone, LightMesh flags the overlap before you provision any infrastructure.
This reconciliation loop is especially important in hybrid estates where on-prem, AWS, and Azure teams each maintain their own address space. For more on preventing overlap across environments, see Hybrid Networks.
Planner + CLI and API
Saved plans are not trapped in the UI. You can use the lightmesh CLI and the LightMesh GraphQL API to query planned subnets, reserve addresses, and integrate address planning into Infrastructure-as-Code preflight checks.
Install the CLI using the CLI Installation guide and explore the schema in the API Docs. Example:
export LIGHTMESH_API_TOKEN="your-token" && lightmesh subnet list --json | jq '.[].networkAddress'Best practices
- Model zone hierarchy before persisting. Define Sites, cloud accounts, and Zones before you import live subnets or persist a plan into your account. A clear hierarchy makes planned blocks easy to attribute and search.
- Sync cloud accounts early. Connect AWS and Azure so live state is available when you validate a plan.
- Reserve before you provision. Create the planned subnet and reserve required IPs in LightMesh before Terraform or a cloud console creates the resources.
- Keep unused ranges out of the plan. Only save subnets you have actively designed for. Do not create placeholder blocks for address space you may use someday.
Product boundaries
LightMesh is a documentation and planning layer, not a control plane. The Subnet Planner does not push VPC, VNet, route table, or security group changes to your cloud accounts. It also does not execute Terraform or modify network infrastructure. It produces LightMesh subnet records that describe intended address space, which you then reconcile against live state and provision through your normal tooling.
FAQ
Do I need a LightMesh account to use the planner? No. The planner is open to anyone — you can design address space without signing in. You only need an account to share a plan link, persist a plan into LightMesh, or manage the subnet records it creates.
How do I share a plan? Generate a link from the planner and send it to your colleagues. Anyone with the link can view the plan, and they can persist a copy of it into their own LightMesh account.
What happens when I persist a plan? The planned blocks become managed subnet records in LightMesh. They appear in TreeView and the subnets list and take on the full IPAM life: assigning IPs, handling requests, and synchronizing with discovery sources such as DHCP, ping polls, SNMP, AWS, and Azure.
Can I import an existing plan from a spreadsheet? You can import an existing plan into your LightMesh account. The free planner itself is a blank canvas — it does not import spreadsheets. Import existing subnets first via the spreadsheet import, then refine and extend the design visually in the planner.
Does the planner modify my cloud accounts? No. The planner creates LightMesh subnet records only. Cloud sync is read-only and never changes resources in AWS or Azure.
Can multiple people edit a plan? In your LightMesh account, saved state is visible to all collaborators in your tenant. The free planner is a single-user system — to hand off a design, share the plan link so a colleague can pick it up and continue.
Related documentation
- Getting Started — fundamentals of LightMesh IPAM
- Hybrid Networks — planned-vs-live reconciliation across on-prem and cloud
- CLI Installation — installing and using the
lightmeshCLI - API Docs — GraphQL reference for programmatic address management
- Network Containers — group related subnets across environments for visibility