Import Easy IP subnet and IP address exports
Easy IP
Overview
LightMesh recognises Easy IP CSV exports and maps their columns automatically. You upload the files as they come out of Easy IP. You don’t rename headers or join the address and mask columns yourself.
A migration uses two files, imported in this order:
- Subnet export. Each subnet’s address and mask become a LightMesh subnet, and its comment becomes the description.
- IP address export. Each IP address is placed in its subnet, which LightMesh works out from the address and its mask.
Permission required: Imports require an app role of Owner, Administrator, or Contributor. See Roles & RBAC for details.
Prerequisites
- A subnet export and an IP address export from Easy IP, saved as CSV files. Excel files (
.xlsx,.xls) with the same headers also work. - Optional: IP address custom fields named Owner, Email Address, Telephone Number and Location, if you want to keep Easy IP’s owner details. See Keep owner details.
Want to try the import first? Download these example files. They use documentation-only address ranges.
How Easy IP columns import
LightMesh detects the format from the headers. Header case and separators don’t matter, so SHORT_SUBNET and Short Subnet both match.
Subnet export
Detected when the file has SHORT_SUBNET, CIDR_MASK and COMMENT columns.
| Easy IP column | Imports as | Example |
|---|---|---|
SHORT_SUBNET + CIDR_MASK |
Subnet (CIDR) | 192.0.2.0 + 24 → 192.0.2.0/24 |
COMMENT |
Description | Head office LAN |
IPv4 and IPv6 subnets can be mixed in the same file, for example 2001:DB8:0:100:: with mask 56.
IP address export
Detected when the file has SHORT_IP_ADDRESS, CIDR_MASK and HOST_NAME columns.
| Easy IP column | Imports as | Example |
|---|---|---|
SHORT_IP_ADDRESS |
IP Address | 192.0.2.10 |
SHORT_IP_ADDRESS + CIDR_MASK |
Subnet (CIDR), worked out per row | 192.0.2.10 + 24 → 192.0.2.0/24 |
HOST_NAME |
Host Name | fs-hq-01 |
MAC_ADDRESS |
Mac Address | 00:1A:2B:3C:4D:10 |
DEVICE_TYPE |
Resource Type | Server |
NOTES |
Notes | File server |
OWNER, EMAIL_ADDRESS, TELEPHONE_NUMBER, LOCATION |
Custom fields with those names, if they exist | Rack A1 |
ADDRESS_TYPE |
Not imported |
The IP address export has no zone or subnet column. Rows without a zone go into the Default zone, which is also where the subnet import puts zone-less subnets, so each IP address attaches to the subnet you imported first.
Step 1: Create an import
- Navigate to Configuration → Imports.
- Click New Import.
- Enter a description, for example
Easy IP migration, and click Submit.
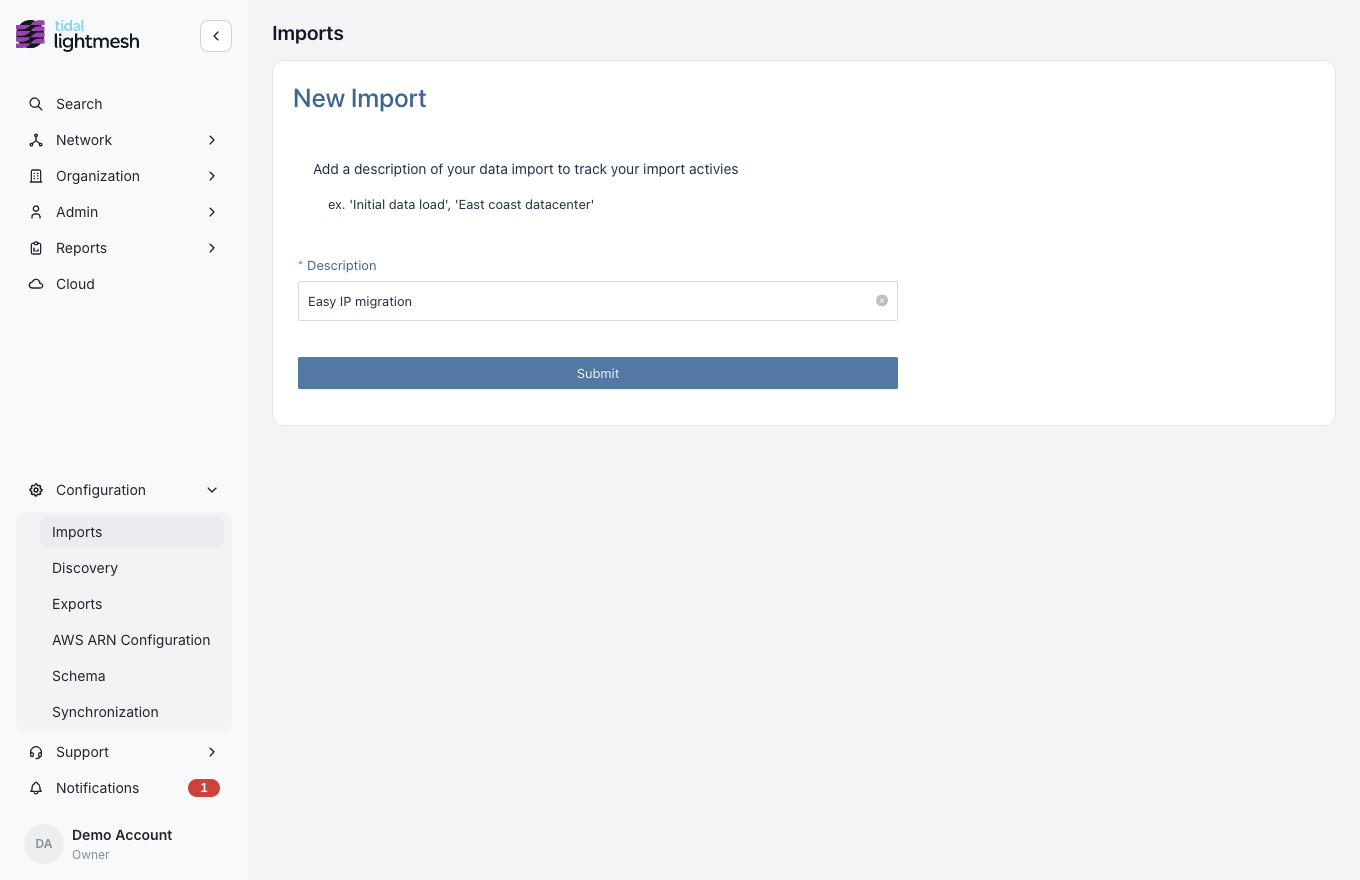
LightMesh opens the import with a tab for each record type. Both Easy IP files go into this one import.
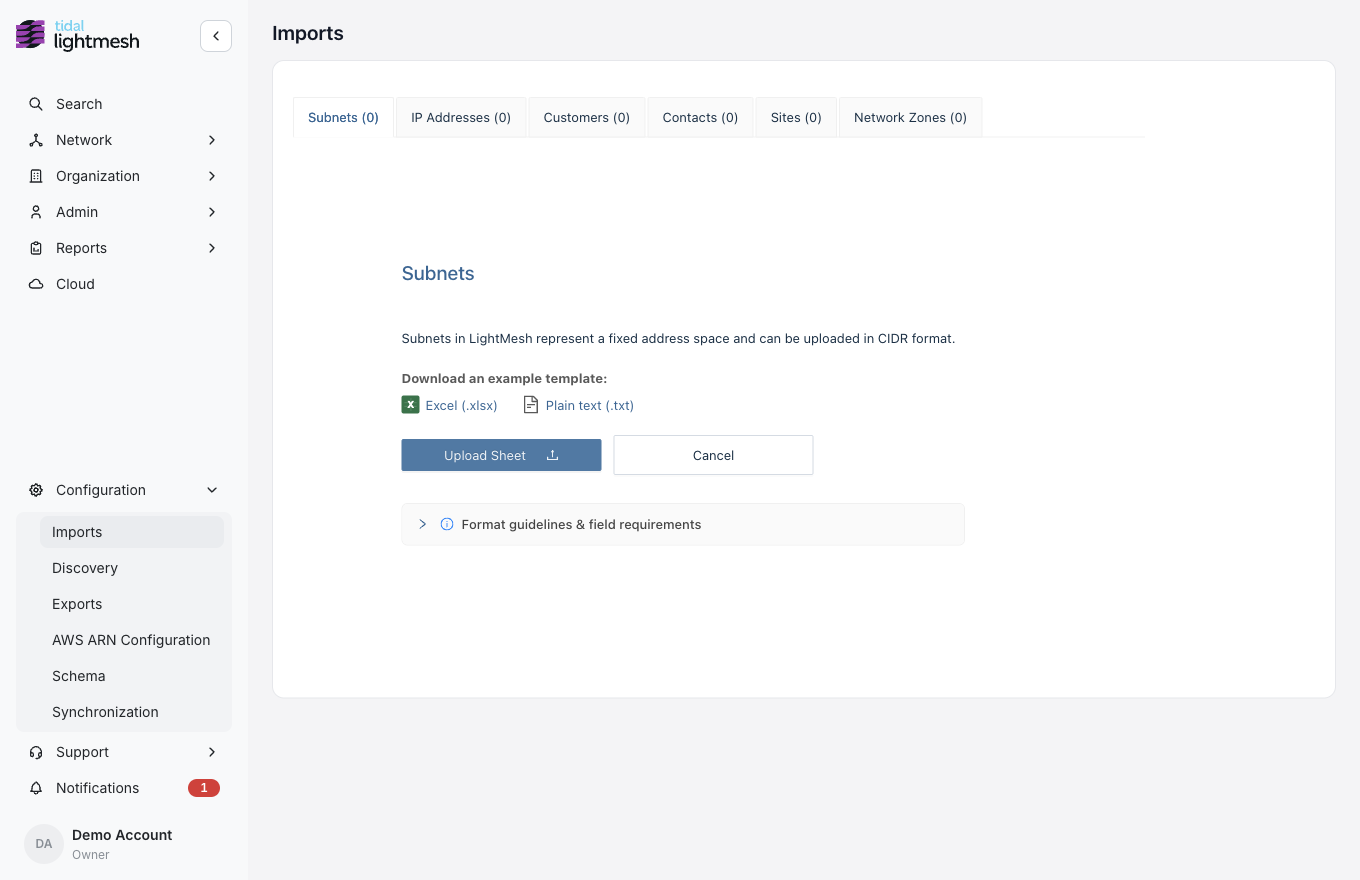
Step 2: Import the subnet export
- Open the Subnets tab.
- Click Upload Sheet and choose the Easy IP subnet export.
- Check the Easy IP subnet export detected notice. It lists how the columns are imported, and the column headers above the preview table show the fields they mapped to.
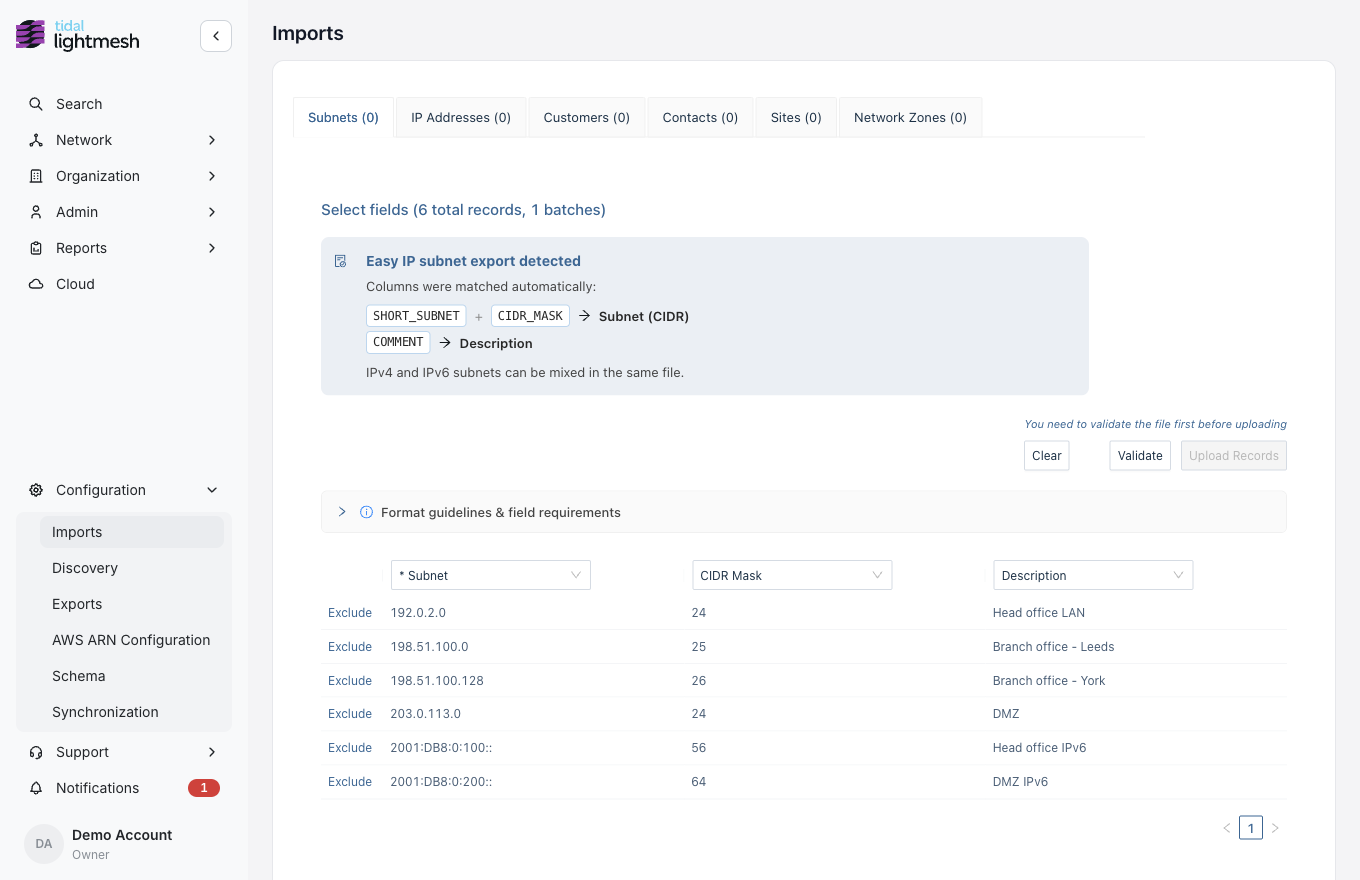
- Click Validate. LightMesh checks every row before anything is saved.
- When you see Validation successful, click Upload Records.
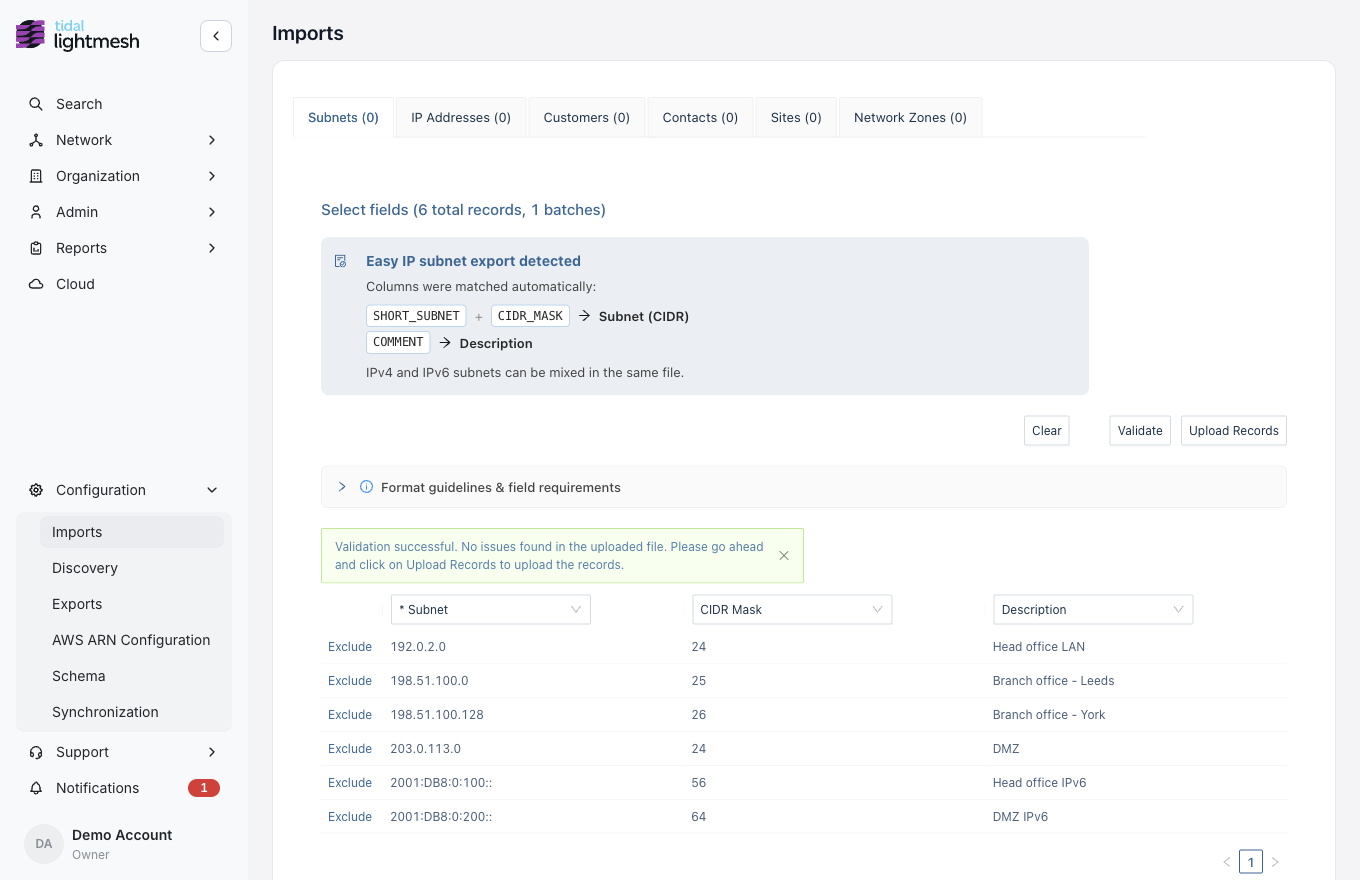
The imported subnets appear on the Subnets tab in CIDR notation, in the Default zone. IPv6 subnets are stored in compressed lowercase form, for example 2001:db8:0:100::/56.
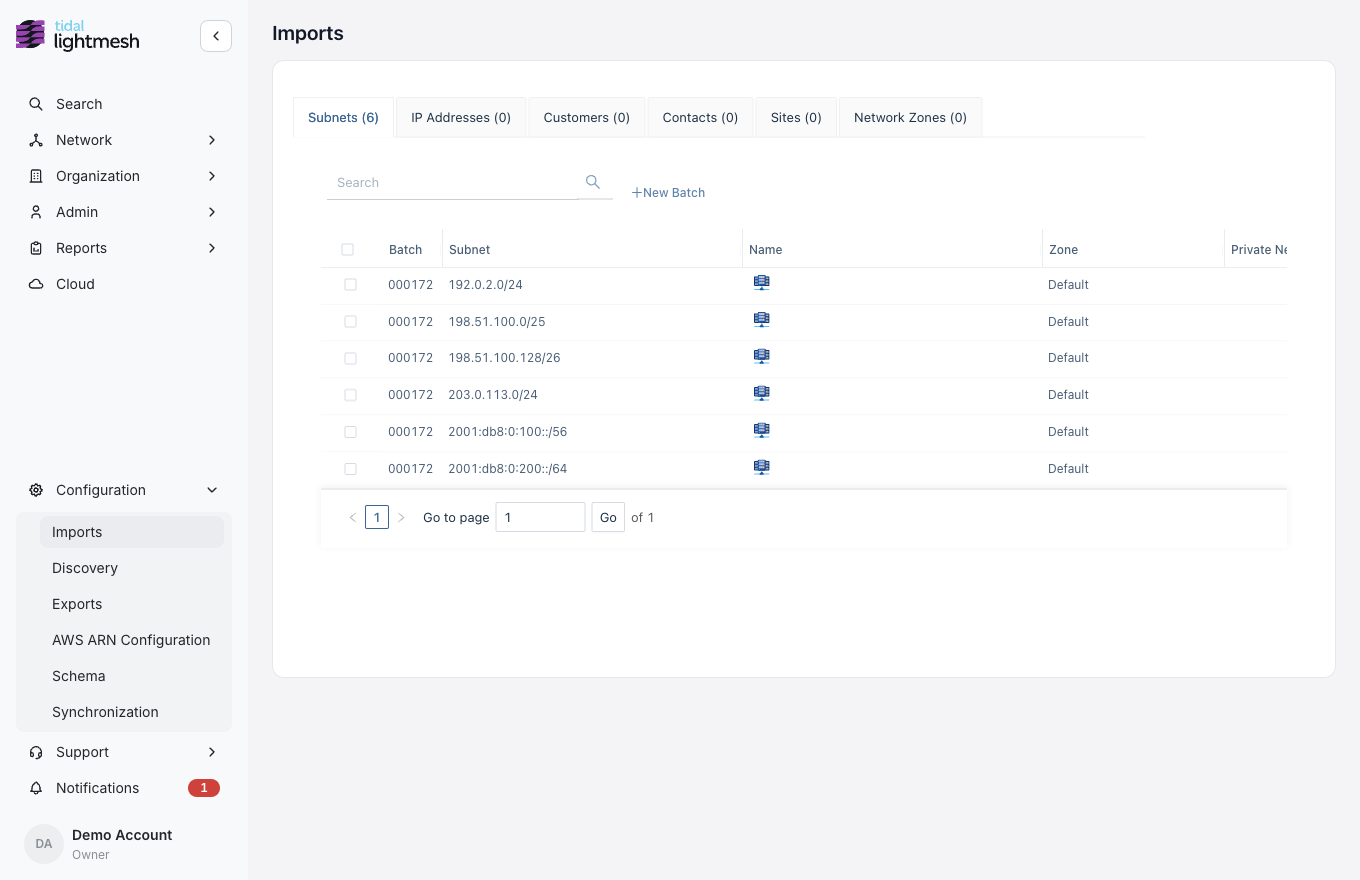
Subnet names: Easy IP subnet exports don’t include a name. To name subnets during import, add a Name column to the CSV before uploading. You can also name them later in LightMesh.
Step 3: Import the IP address export
- Open the IP Addresses tab of the same import.
- Click Upload Sheet and choose the Easy IP IP address export.
- Check the Easy IP IP address export detected notice. Columns that don’t import, such as
ADDRESS_TYPEor owner columns with no matching custom field, show Select a field.
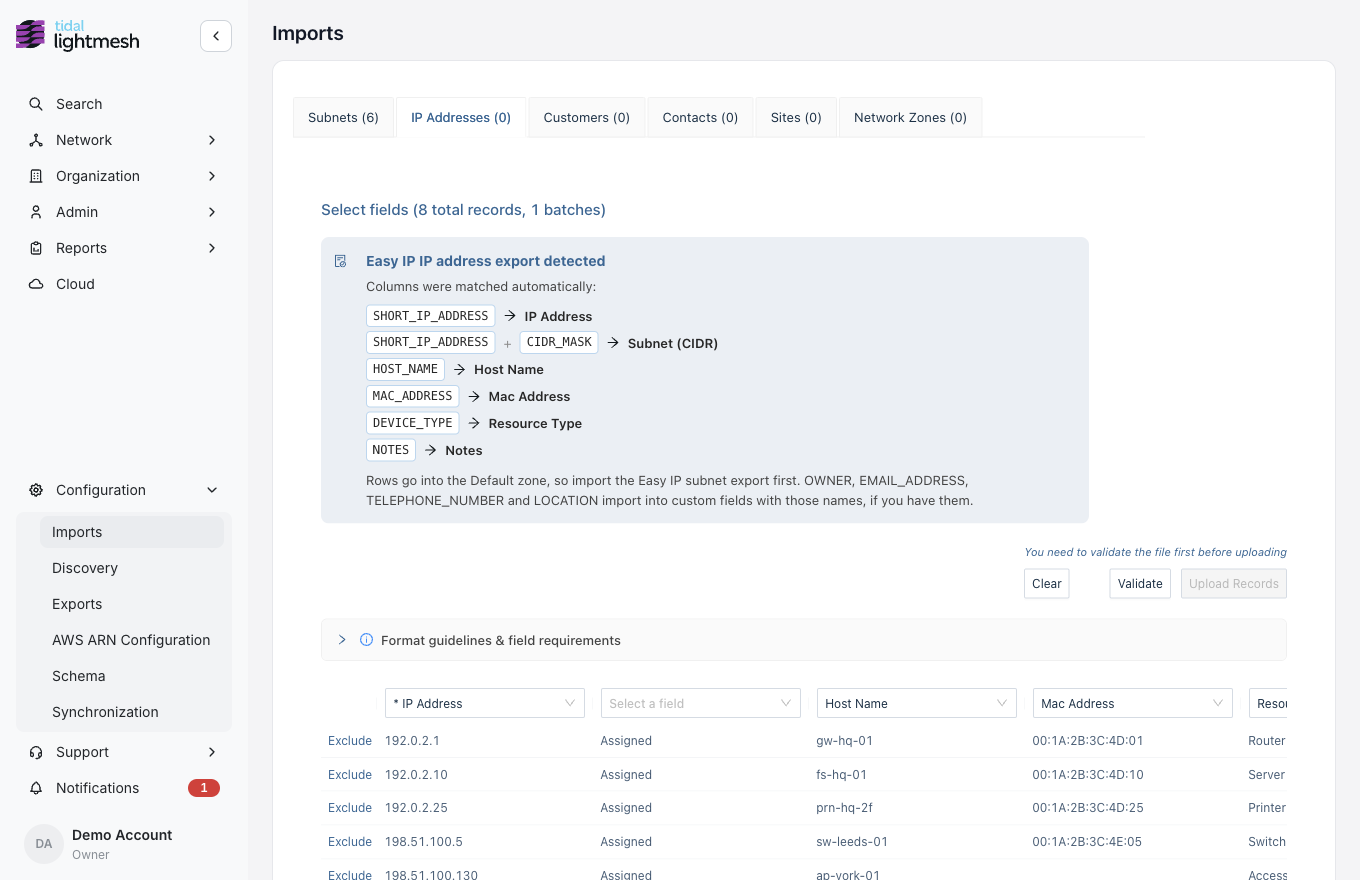
- Click Validate, then Upload Records once validation succeeds.
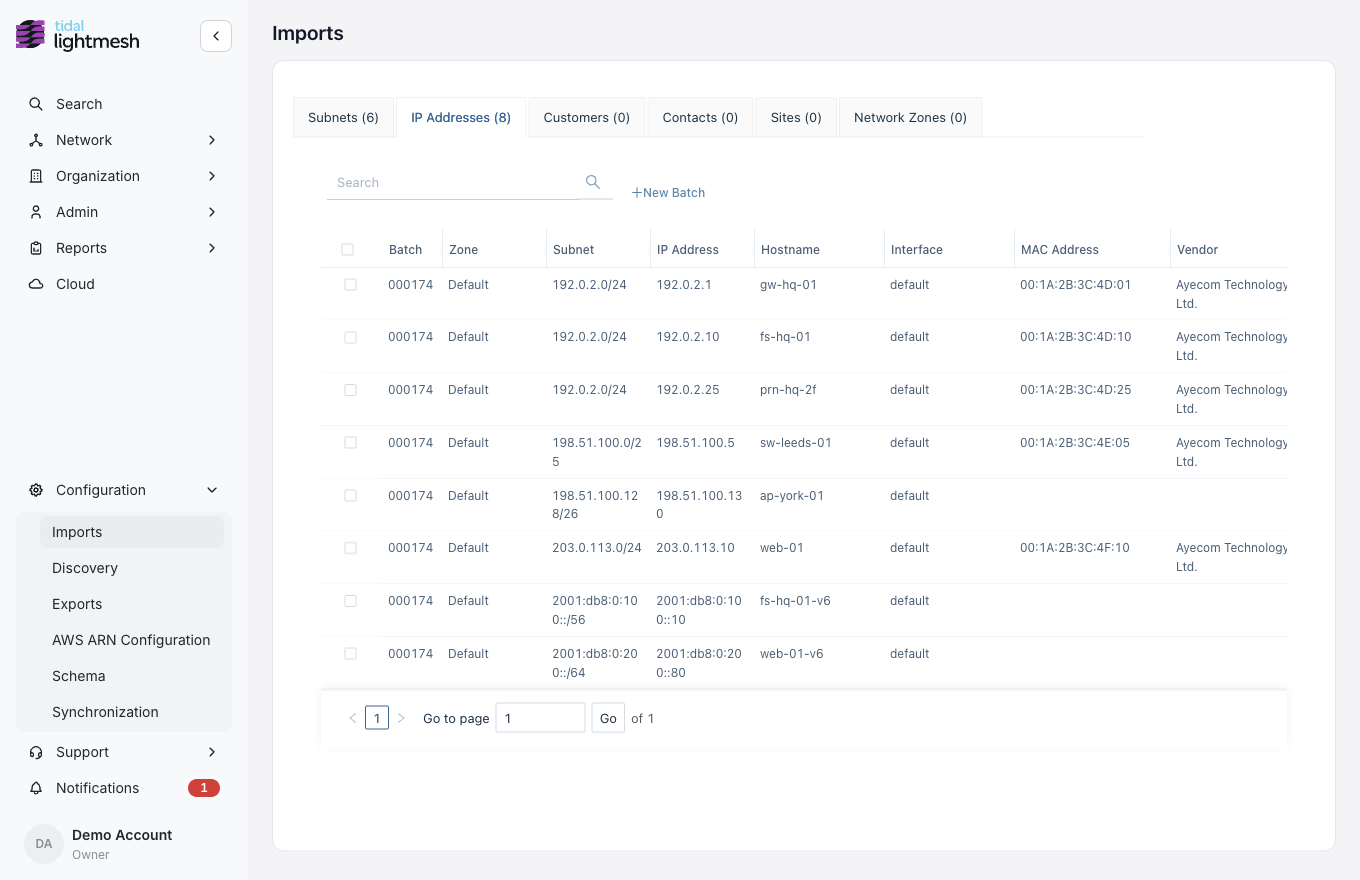
Each IP address is saved in the subnet worked out from its address and mask. For example, 198.51.100.130 with mask 26 goes into 198.51.100.128/26.
Keep owner details
Easy IP’s OWNER, EMAIL_ADDRESS, TELEPHONE_NUMBER and LOCATION columns import into IP address custom fields with matching names:
| Easy IP column | Custom field name |
|---|---|
OWNER |
Owner |
EMAIL_ADDRESS |
Email Address |
TELEPHONE_NUMBER |
Telephone Number |
LOCATION |
Location |
Create the fields under Configuration → Schema before you upload the IP address file. See Custom Field for the steps. Columns without a matching field are left unmapped, and you can pick a field for them by hand from the column header.
Values are read as text, so phone numbers keep their leading zeros (01134960000).
Use a zone other than Default
Both Easy IP files import into the Default zone. To use a different zone, add a Zone column with the same zone name to both files before uploading. LightMesh creates the zone if it doesn’t exist, and matches each IP address to a subnet in that zone.
If your workspace has no Default zone, zone-less rows import without a zone.
Mask formats
The CIDR_MASK column accepts:
- A prefix length:
24or/24 - An IPv4 netmask:
255.255.255.0
IPv6 masks must be a prefix length from 0 to 128.
This works for any subnet or IP address sheet, not just Easy IP. A column named CIDR Mask, Netmask or Prefix Length maps to the CIDR Mask field automatically.
Troubleshooting
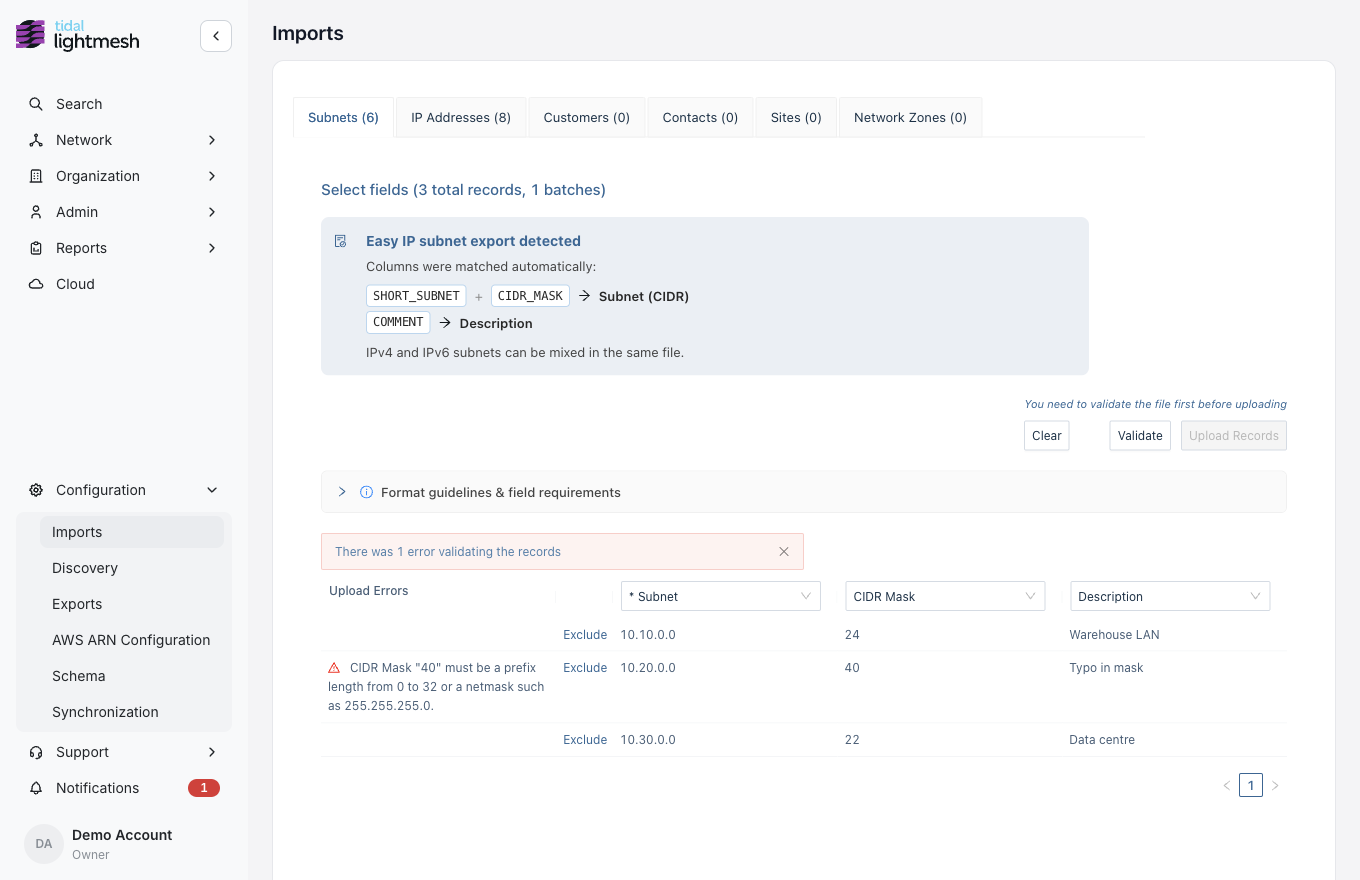
When Validate finds a problem, LightMesh shows how many rows failed, and each error appears in the Upload Errors column next to its row. Upload Records stays disabled until the file validates. Fix the row in the CSV, click Clear, and upload the file again.
| Message | What to do |
|---|---|
CIDR Mask "40" must be a prefix length from 0 to 32 or a netmask such as 255.255.255.0. |
The mask is out of range for the address type. Correct the mask in that row. |
… already has a /24 prefix, which doesn't match CIDR Mask 23. |
The address already includes a prefix that disagrees with CIDR_MASK. Remove one of them or make them match. |
IP Address "…" isn't a valid IP address, so its subnet can't be worked out from the CIDR Mask. |
Fix the IP address in that row. |
| No Easy IP … export detected notice | One of the detection headers is missing or renamed. Check the headers listed in How Easy IP columns import, or map the columns by hand from each column header. |
| IP addresses don’t land in the imported subnets | Import the subnet file first, and use the same zone for both files. See Use a zone other than Default. |
| Owner columns aren’t imported | Create IP address custom fields with the matching names, then upload the file again. See Keep owner details. |
LightMesh validates rows in batches of 100. If one row in a batch has a mask or address error, the rest of that batch isn’t checked until you fix it, so run Validate again after each fix.