Getting Started with LightMesh IPAM
Learn the basics of LightMesh IPAM to start managing IP Addresses and subnets comfortably at scale. Import subnet lists, discover IP addresses in use, and visually subnet your environment.
Overview
In this guide we will perform the following 6 steps:
- Signup for an account
- Create a subnet tree visually
- Reserve an IP Address manually
- Import a list of subnets via spreadsheet
- Scan a subnet with nmap and LightMesh CLI
- Integrate LightMesh IPAM with your Azure environment
1. Signup for an account
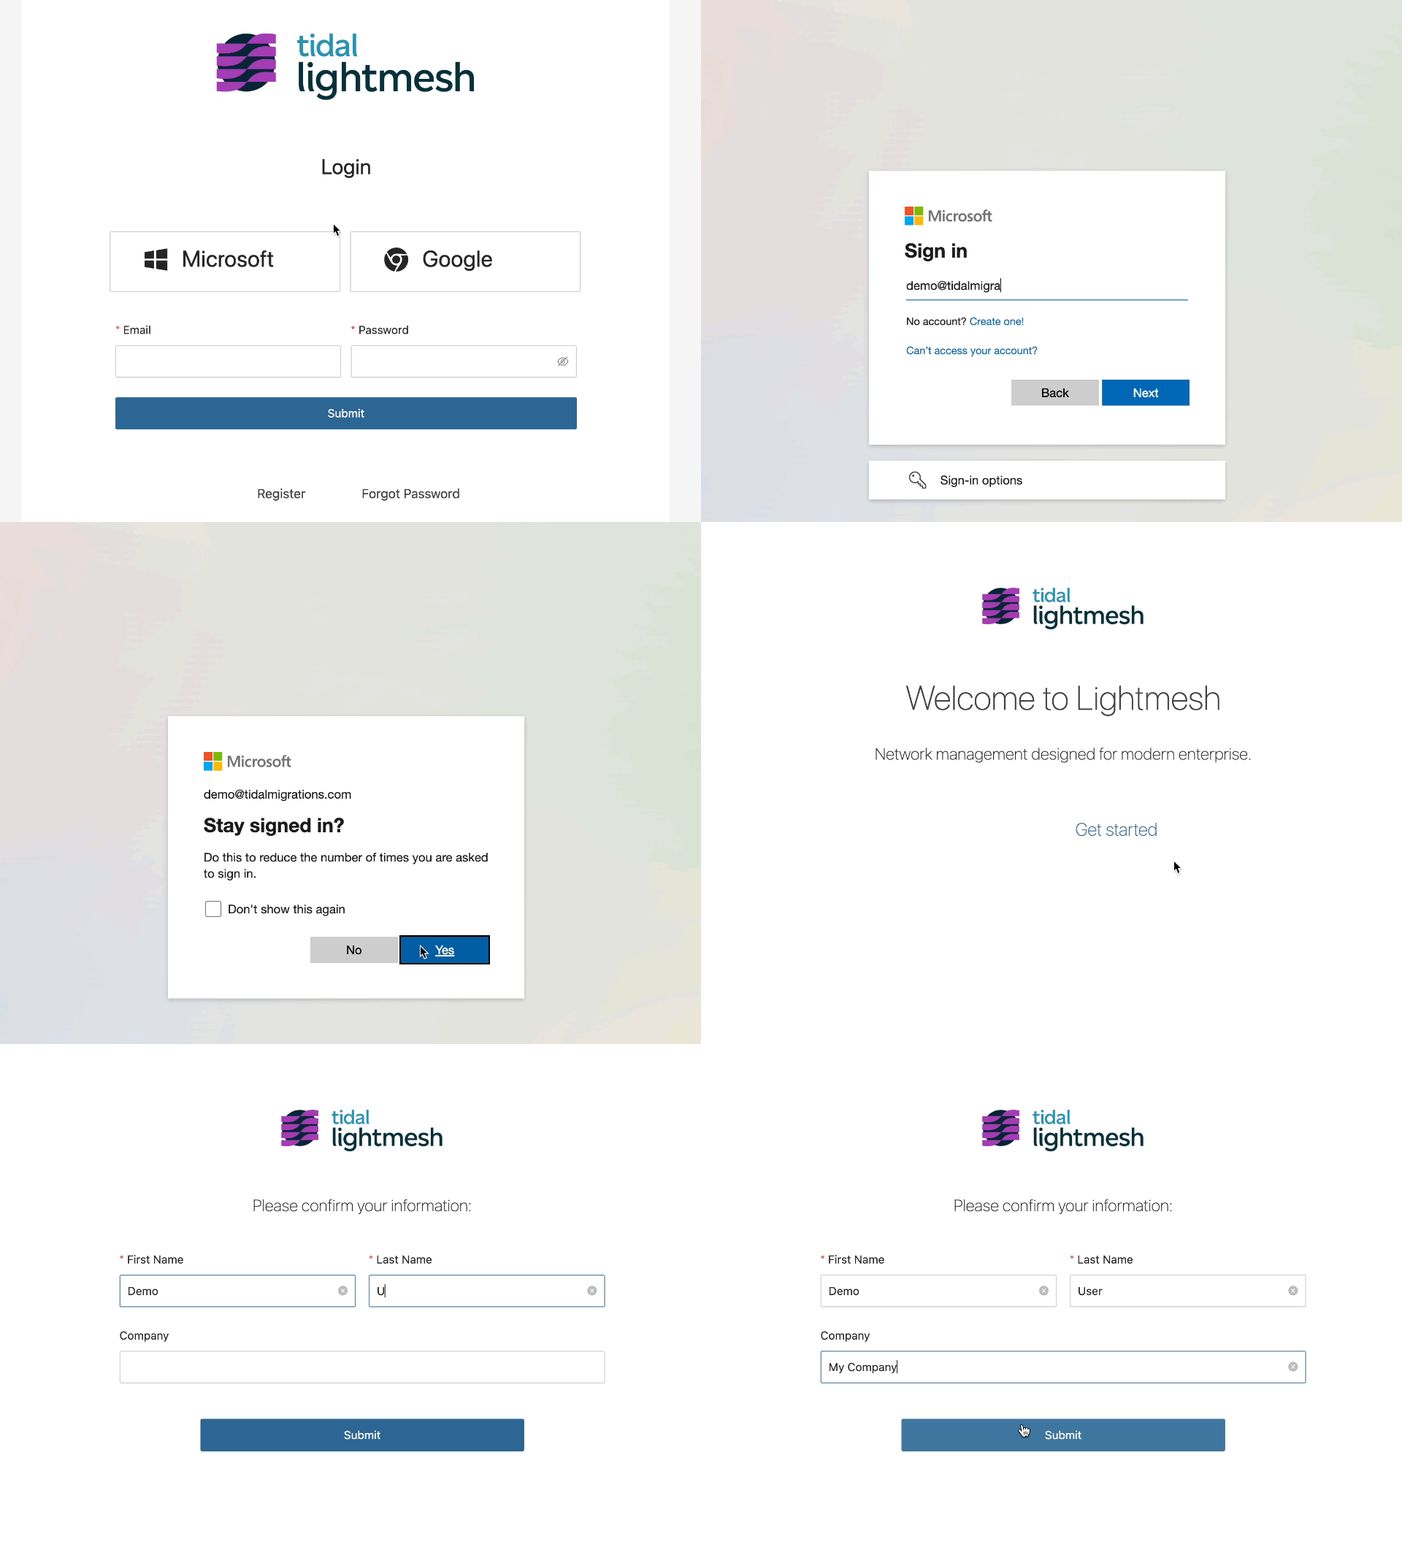
LightMesh IPAM supports Single Sign On (SSO) with Microsoft personal and work (AzureAD) identities, Google personal and Workspaces identities, as well as email and password.
Here I will demonstrate signing up with my Microsoft identity in one click:
2. Create a subnet tree visually
Upon initial login, you are presented with a walkthrough demonstration on how to create subnets. These will be saved, but you can delete them if you make a mistake.
I’ll follow the defaults, and create a 10.0.0.0/16 subnet here, and I’ll break it down into 4 smaller networks. These smaller networks are to aggregate my various server and network device address spaces in my datacenter.
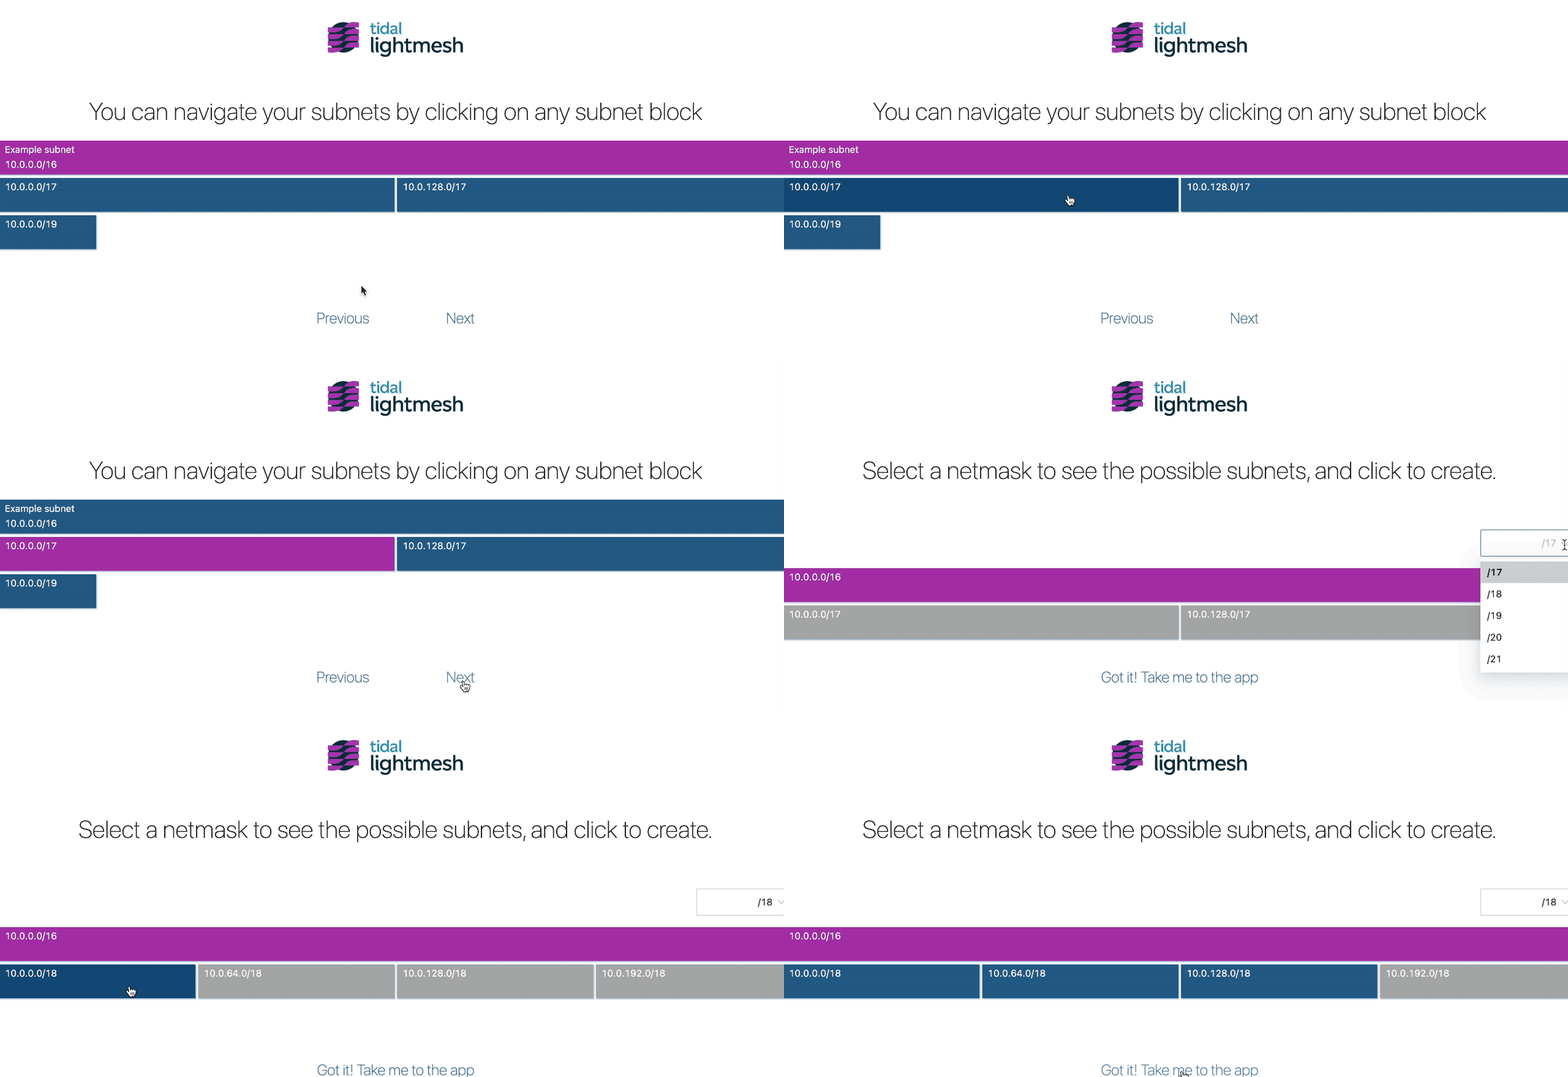
Clicking “Got it! Take me to the app”, I will now go ahead and name these networks to document them:
- 10.0.0.0/18 - Service delivery / User-facing network (data plane)
- 10.0.64.0/18 - Management network (control plane)
- 10.0.128.0/18 - Out of Band KVM networks throughout my datacenter
- 10.0.192.0/18 - Reserved for future use
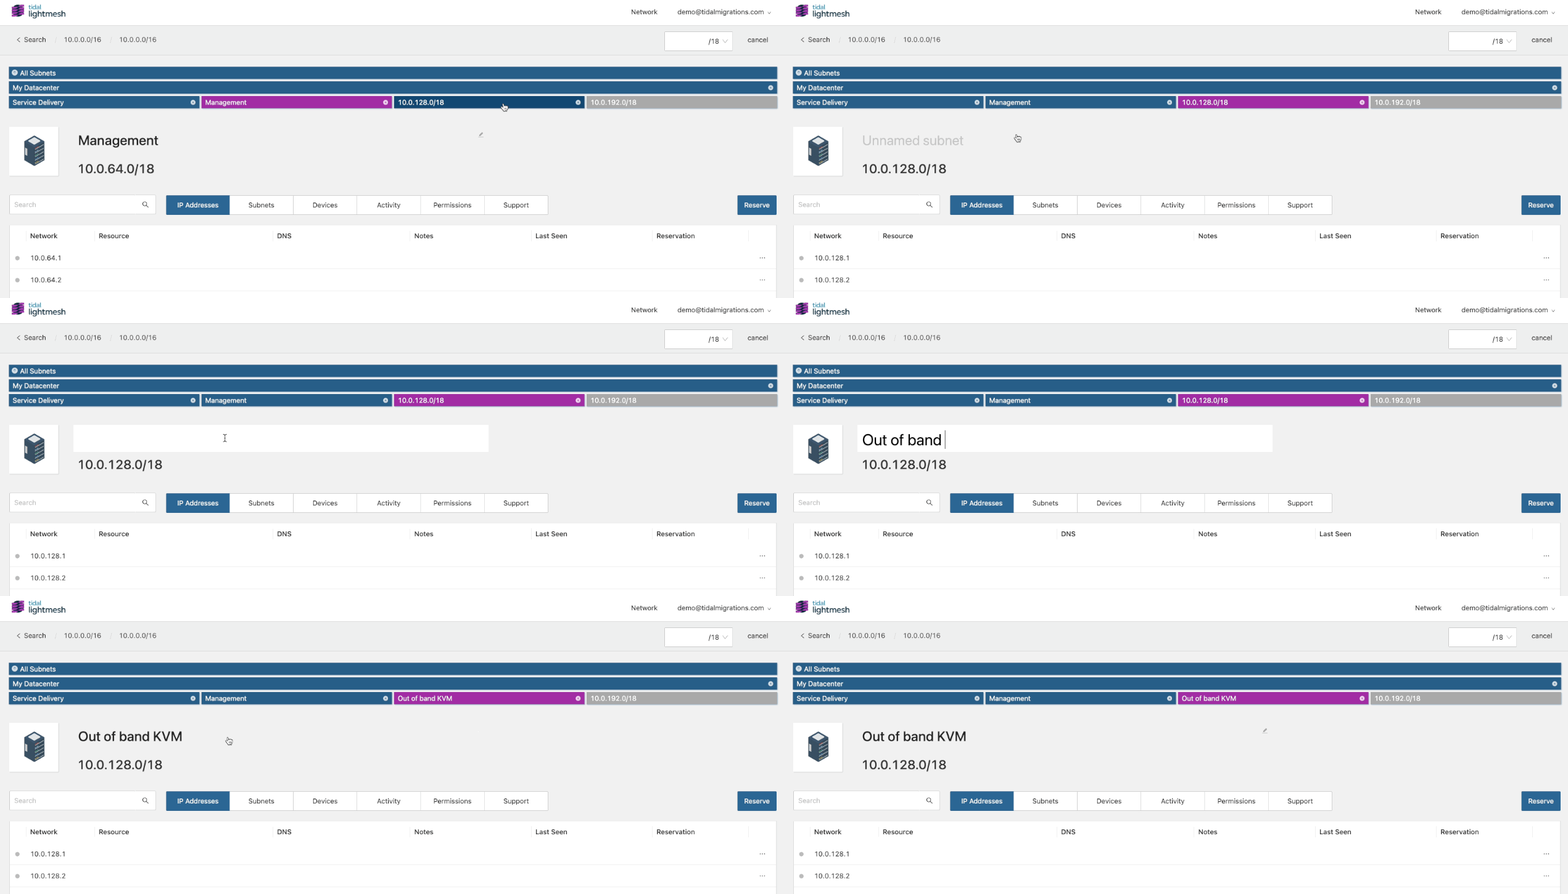
As I don’t have any smaller reservations, or IPs in use in that last range, I’m not going to create it here in the visualization. I like to keep my IPAM to just the networks that I’ve actively designed for. Networks that are not in use, and not planned to be used need not be created here.
3. Reserve an IP Address manually
I have a few network devices coming, so I’m going to go ahead and reserve a few IP addresses for those. This way, my team mates know which IP is meant to be used by what devices as they write code or configure them manually.
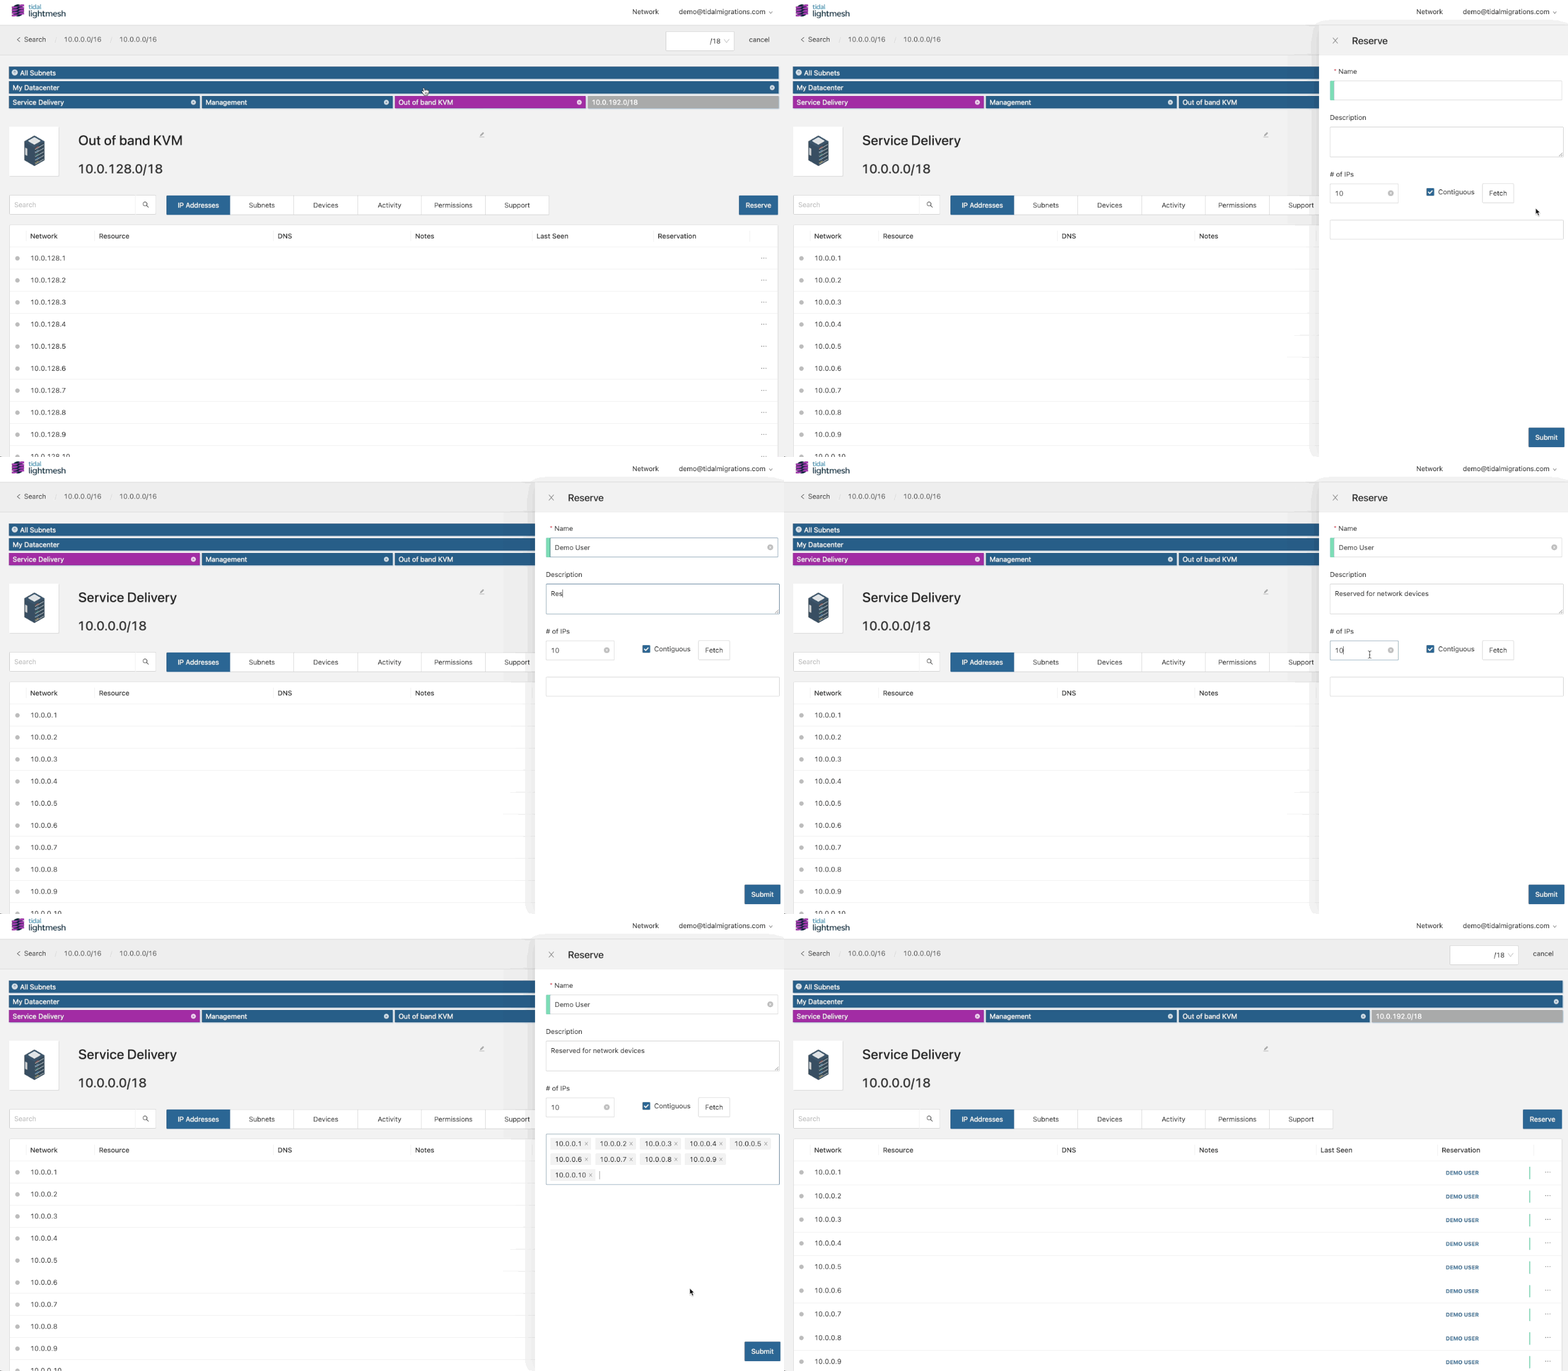
First, I click on the subnet I want to reserve an IP address in.
Second, I click Reserve to pop up a form, and add a note about my reservation.
For the name field, I put the name of the person or project that is making the reservation and a brief description for why these IP addresses are being held back from the allocation pool.
I don’t know much yet, so I’m just going to add a note: “Reserved for network device”. I’ll come back and add hostnames as these are known.
Lastly, I click save:
4. Import a list of subnets from excel
This isn’t my first rodeo, and like any good network engineer I have my trusty excel spreadsheet of subnets in my environment.
Here is a sample spreadsheet to get you started if you haven’t got one handy.
Note: This is networks, not lists of IP reservations. We’ll cover that in the future.
To import Excel, I click on my username, then Settings.
Once in Settings, I select Import and then I can select my spreadsheet.
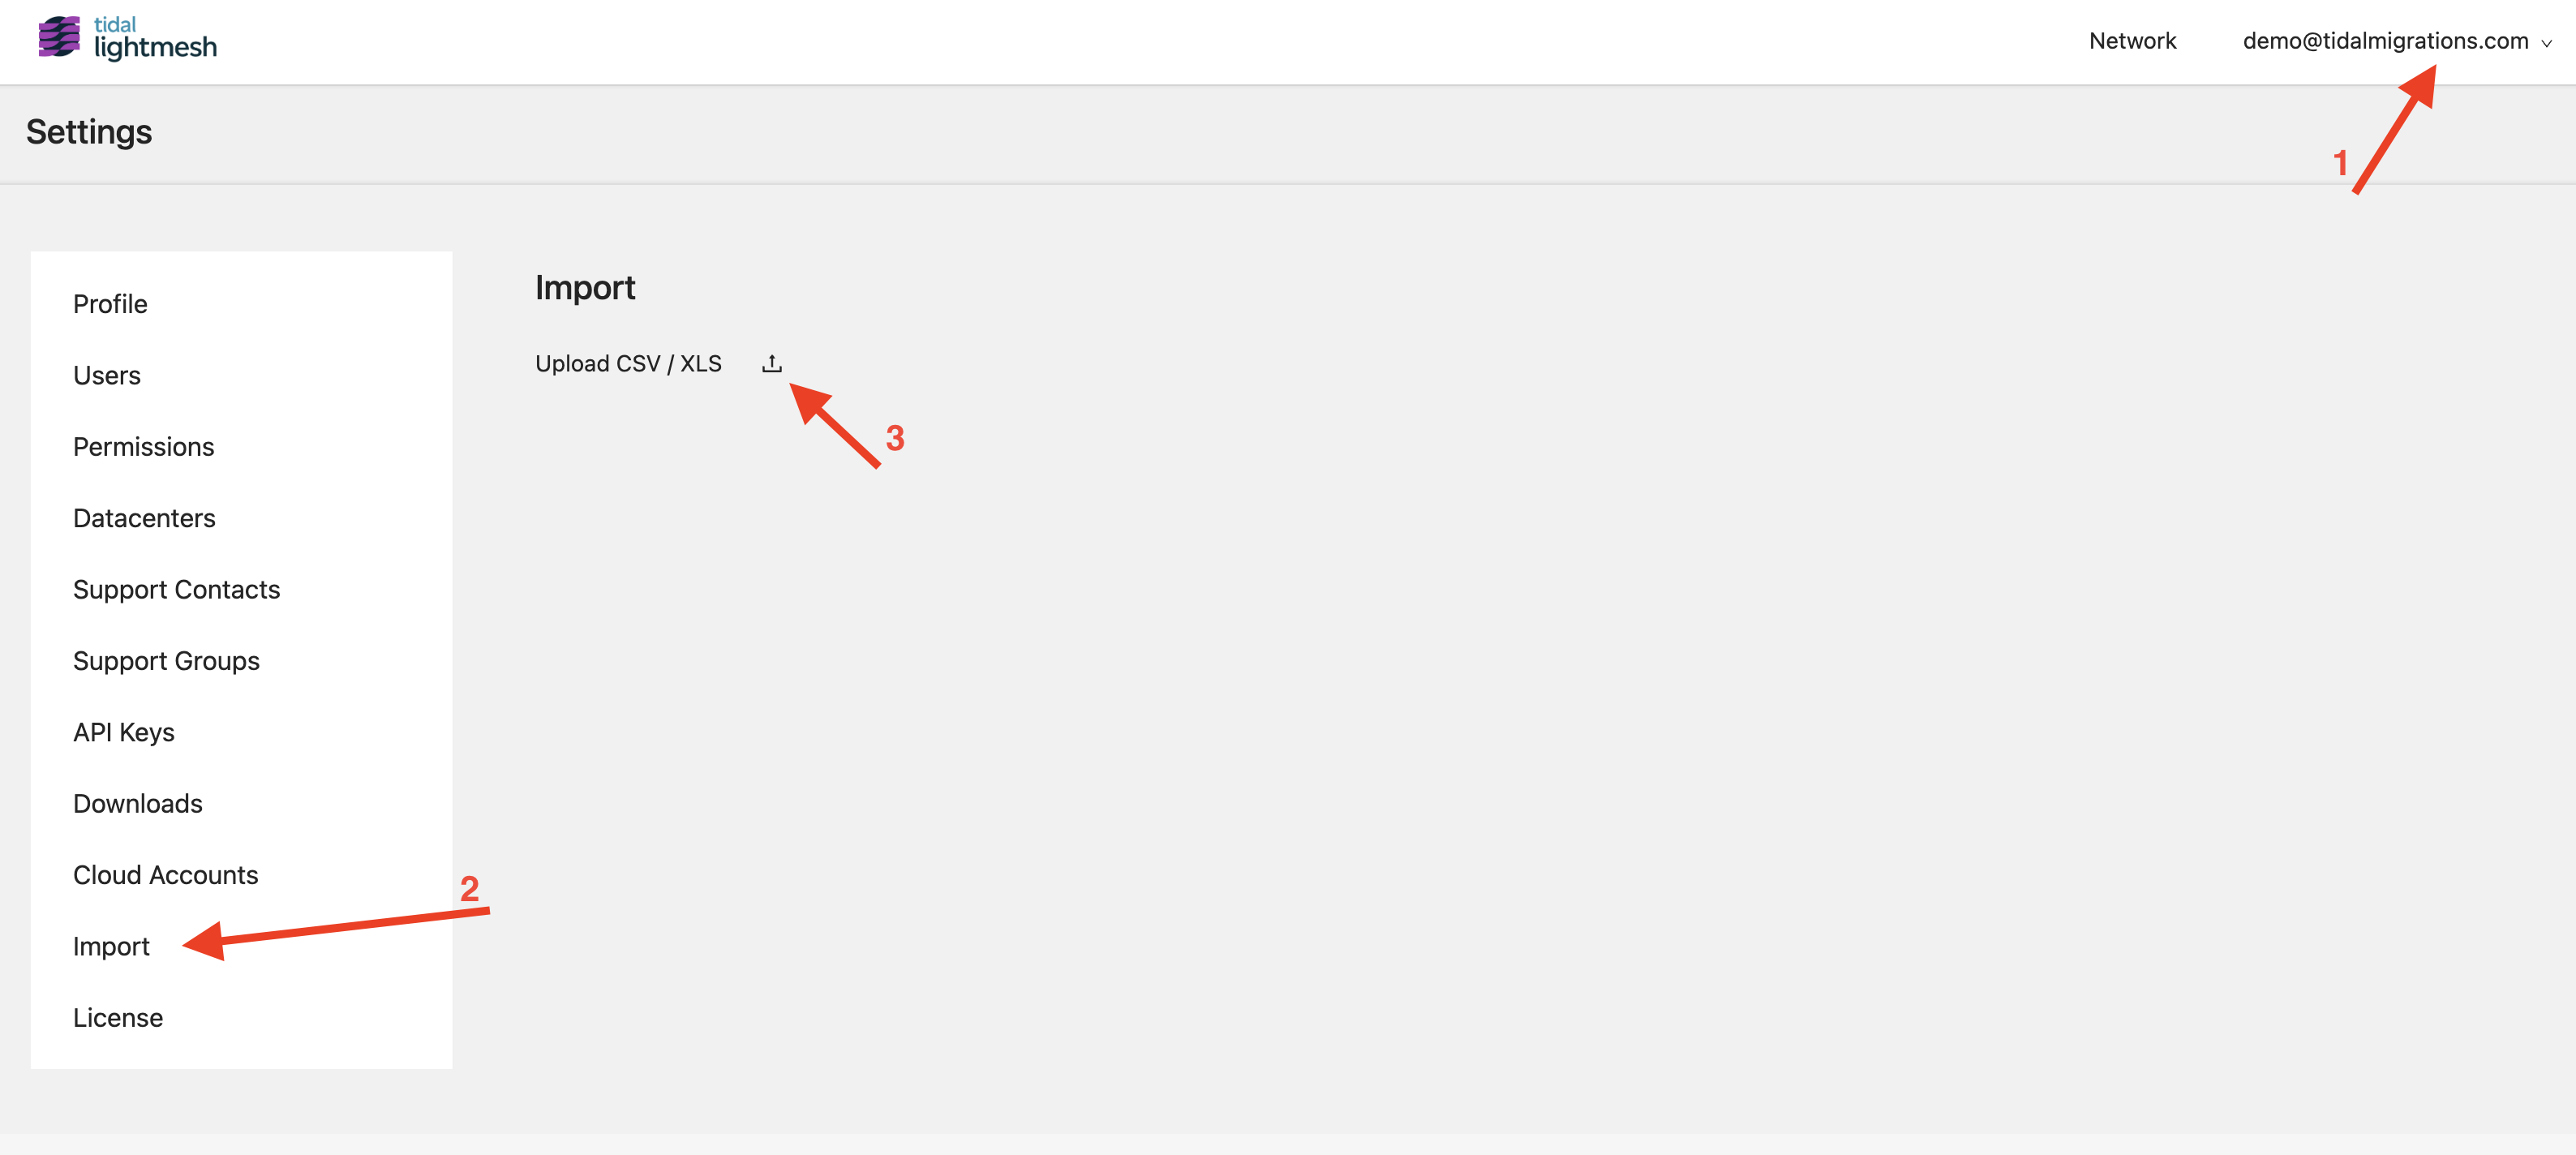
With the spreadsheet selected, I now select the model Subnets from the dropdown, check “Header Row” and map my column names with the corresponding field names.
In the sample spreadsheet, the mapping order is:
networkAddress
netmask
name
description
status
direction
5. Scan a subnet with nmap and LightMesh CLI
With my list of subnets imported, I can now scan those networks for hosts and have the detected devices captured in LightMesh as used IPs. This is a fast way to build an IP address management data set up if you have nothing.
Take note of your subnet ID from the URL bar, as we will need this later. In my case here, the ID is 48.
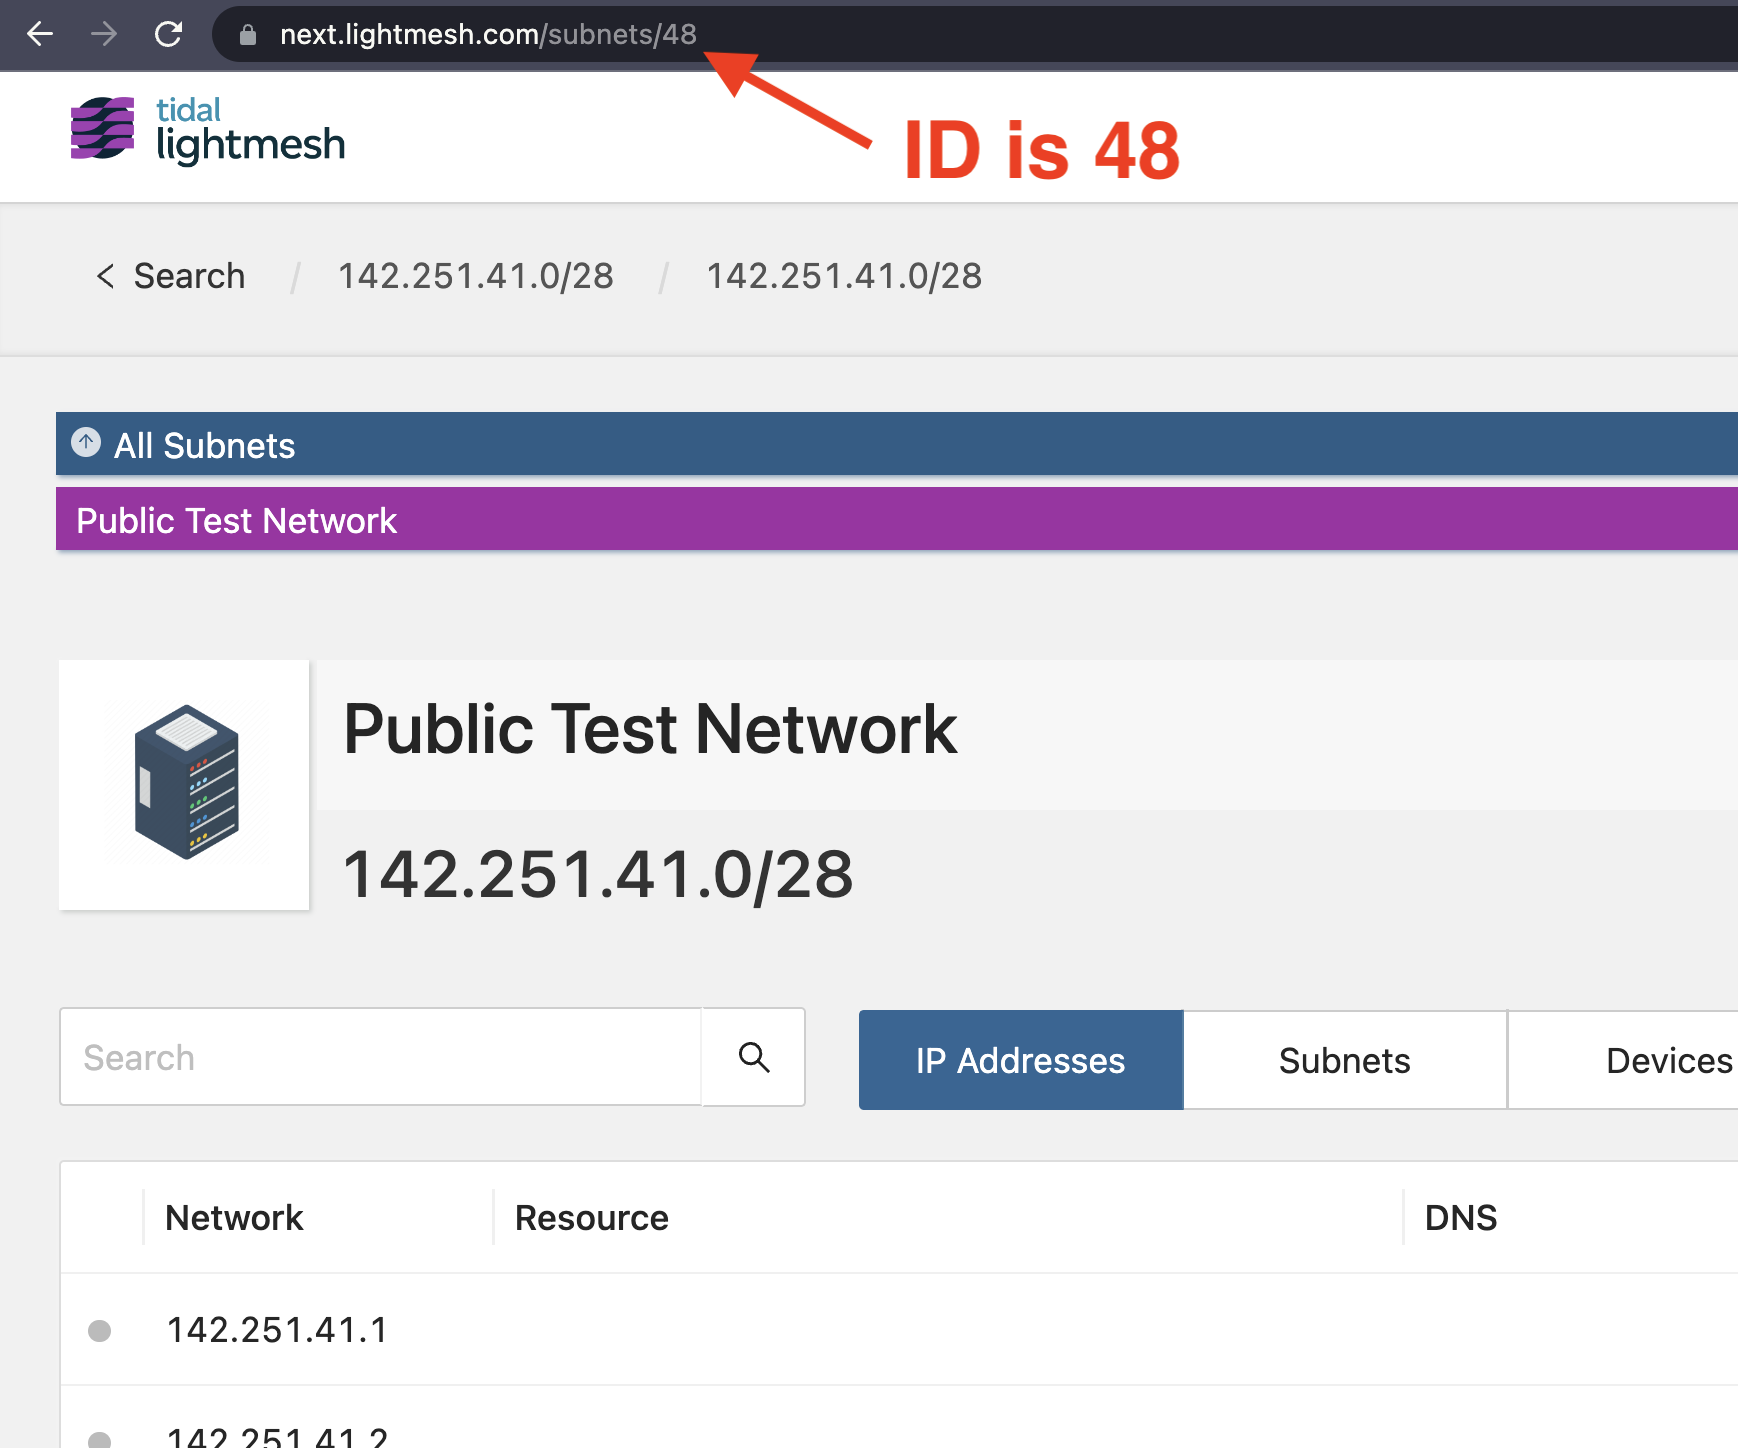
We use the popular and open source nmap utility for this. It’s a powerful tool, so use it carefully and if in doubt, ask your security team if they’re ok with you running it. They may want to run it for you.
We’ll start with a simple “ping sweep”, using ICMP echo to ping subnets and capturing replies.
If ICMP echo (ping) is blocked by your firewalls, or your servers are hardened to not respond, we may scan a few known TCP ports to test if those IPs are in use. Common ports like applications HTTP (tcp_80), HTTPS (tcp/443), OracleDB (tcp/1521) etc. are a good start, as are the remote administration ports of SSH (tcp/22) and RDP (tcp/3389). Scanning networks for a handful of ports is very fast, but can trigger IDS_IPS (Intrusion Detection, Intrusion Prevention) devices, so seek permission first.
# sudo is optional here, and provides different discovery options.
sudo nmap -sn 142.251.41.0/28 -oX nmap-scan.xml

# for more on nmap discovery options:
man nmap
With our scan file available, now we can use the lightmesh command to push the results to our tenant.
Don’t have the
lightmeshcommand? See our installation guide.
export LIGHTMESH_API_TOKEN="xxx-xxx-xxx-xxx"
lightmesh scan sync --file nmap-scan.xml --id 48
and now if we refresh our subnet page, we will see the results:
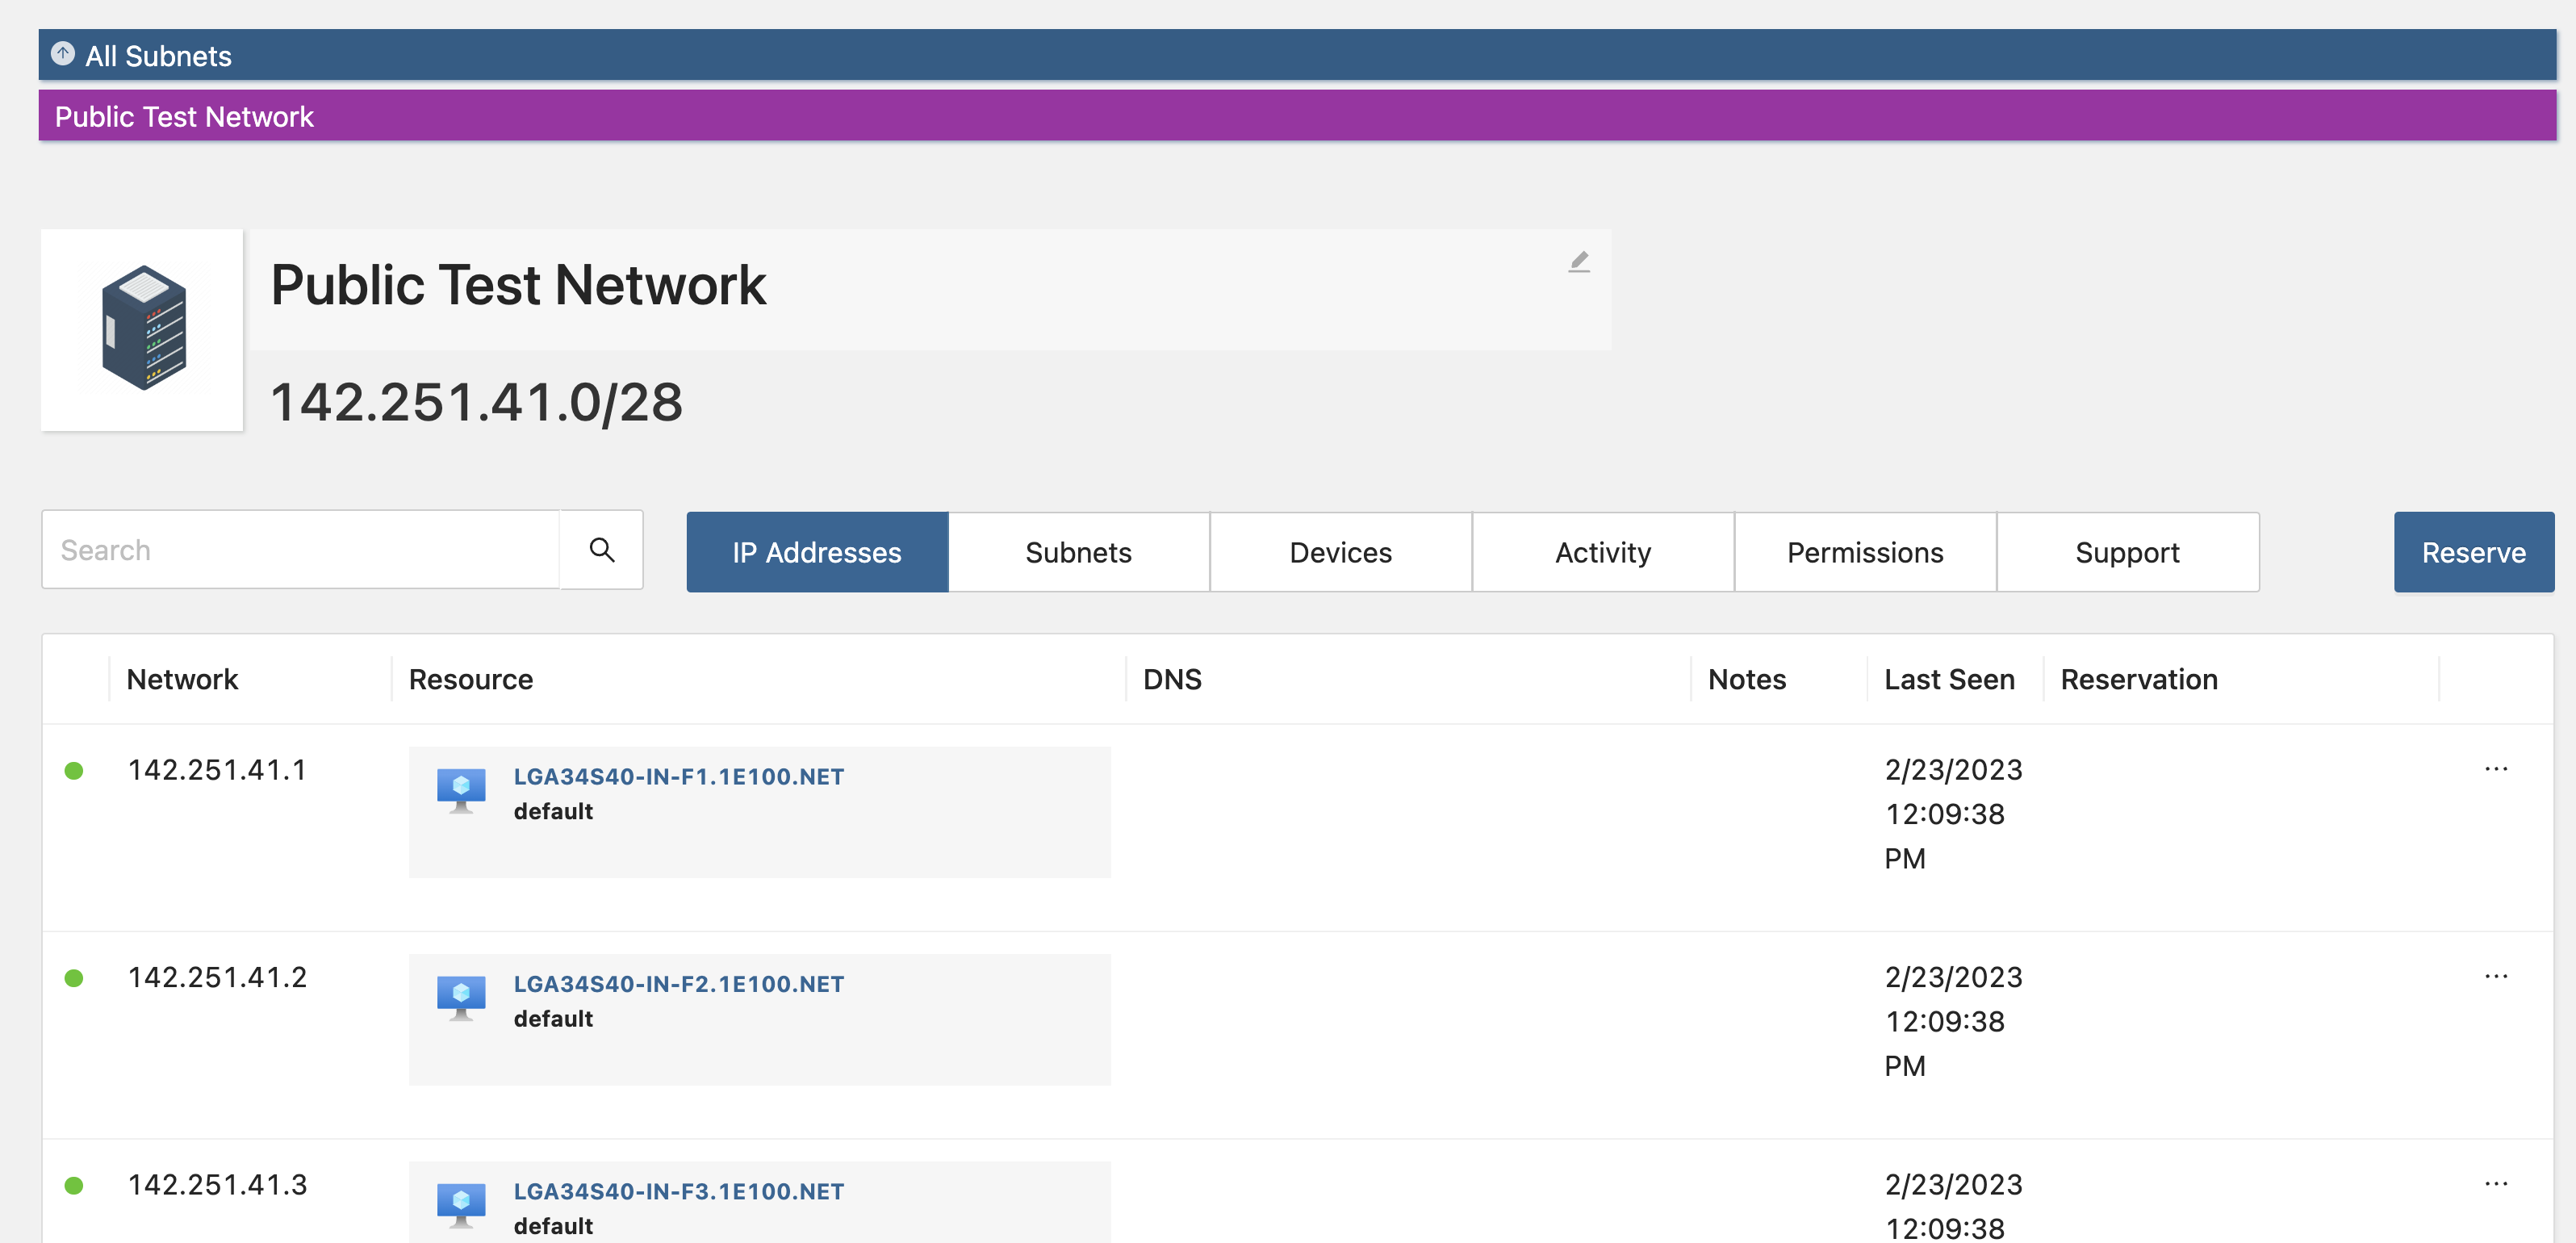
6. Integrate with cloud (AWS / Azure)
Cloud computing has empowered teams of engineers to create their own resources, and while this is incredibly valuable it does lead to “lots of networks” to manage.
No problem, Tidal LightMesh plugs in to your Azure and AWS environments with read only access and will poll for subnets and IP assignments. This provides you and your security response team with a unified solution for hunting down which IP addresses are allocated to what. It also allows you to ensure you don’t overlap IP ranges if you intend to peer them later on.
See more here: Cloud Integration Guide