Discover live hosts on your subnets with ICMP ping sweeps from the Windows Discovery Agent
Ping Sweep Discovery via Desktop (GUI)
Ping Sweep is a discovery feature of the LightMesh Windows Discovery Agent. The agent sends ICMP Echo (ping) requests to the hosts in the subnets you select, then reports which addresses responded. Reachable hosts have their Last Seen timestamp refreshed in LightMesh and each cycle is recorded as a PING_SWEEP scan, so you can track live IP usage across your network.
The setup runs in this order:
- In LightMesh — when ping sweep is enabled on your deployment, go to Settings > Discovery and configure which subnets to sweep, how often, and turn Enabled on. Save changes. Then generate an API key at Admin > API Keys and download the Windows installer from Settings > Downloads > Ping Sweep.
- On Windows — run the installer and paste the API key when prompted. If you skipped the installer prompt, open the agent to set Base URL and API Token on the Configuration tab, then register the service from the Ping Sweep panel. Once the agent registers, LightMesh automatically applies the settings from step 1.
Prerequisites
On the Windows machine where the agent runs:
- Operating system: 64-bit Windows. Windows Server 2016 or later is recommended for production.
- Permissions: Local administrator rights to install and control the Windows service. Sending ICMP Echo typically requires the elevated service account the agent runs under.
- Network: The agent must reach the target subnets over ICMP. Firewalls, ACLs, or host-based firewalls that drop ICMP Echo will make otherwise-live hosts appear down. Outbound HTTPS from the agent host to your LightMesh URL is also required so results can upload.
Who can configure ping sweep
Sign in to LightMesh as a user with the Owner or Administrator application role. Only those roles can change ping sweep settings (enable/disable, interval, and subnet selection). Other roles can view status but cannot make changes.
1. Configure ping sweep in LightMesh
When ping sweep is enabled on your deployment, go to Settings > Discovery. The Ping Sweep tab opens with the configuration for a new agent that has not registered yet.
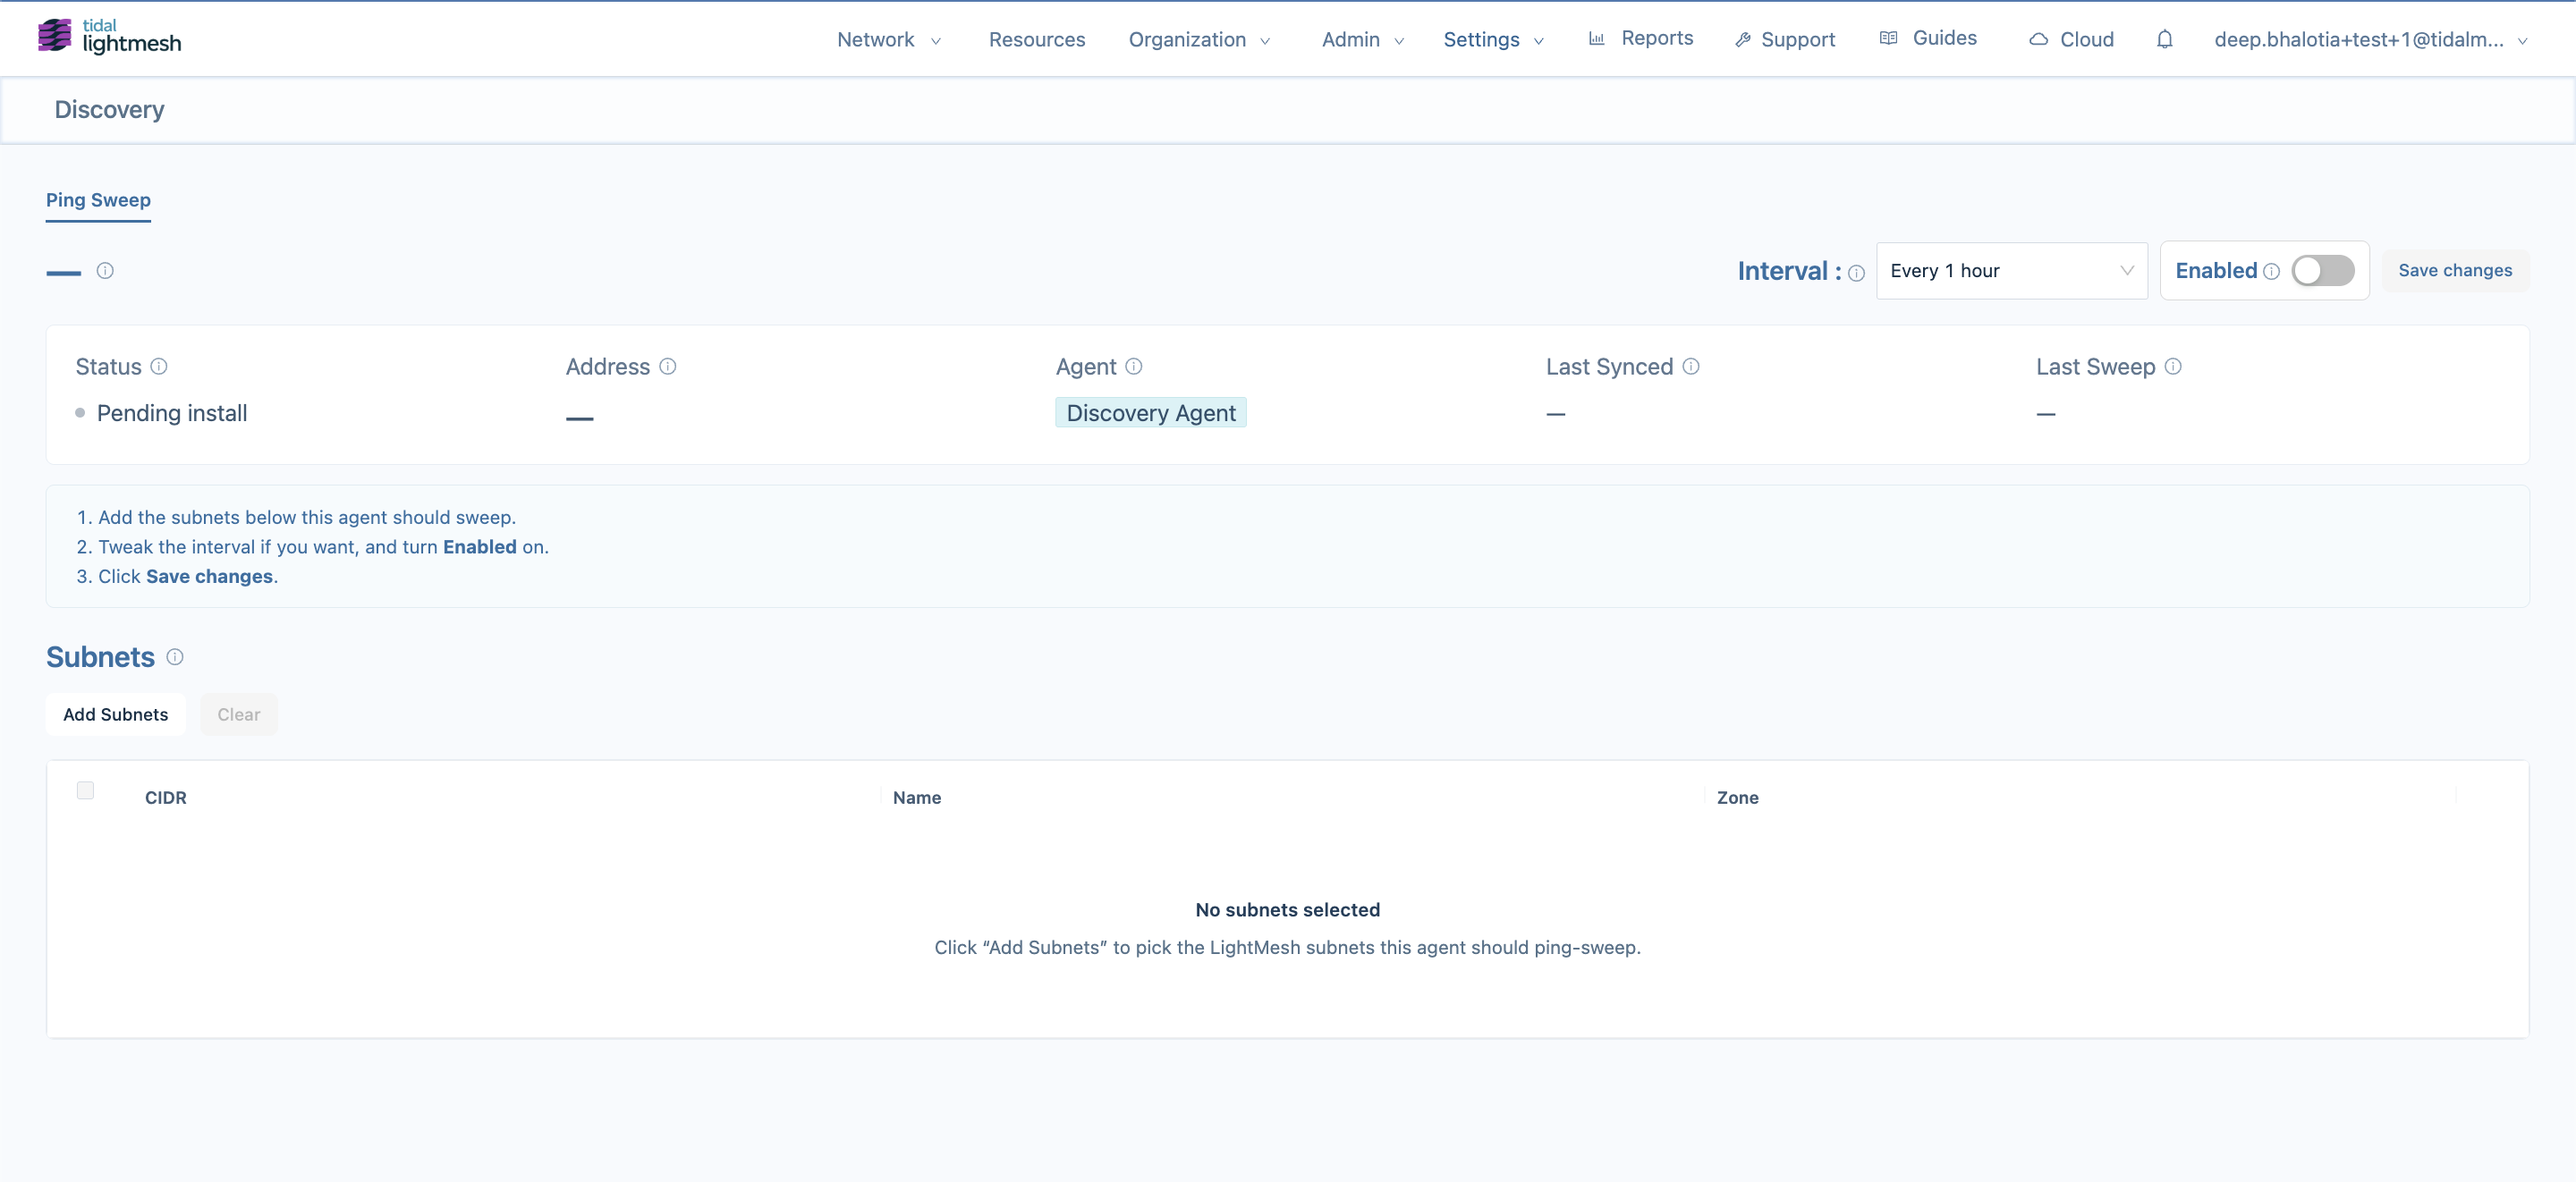
Follow the three steps in the info box:
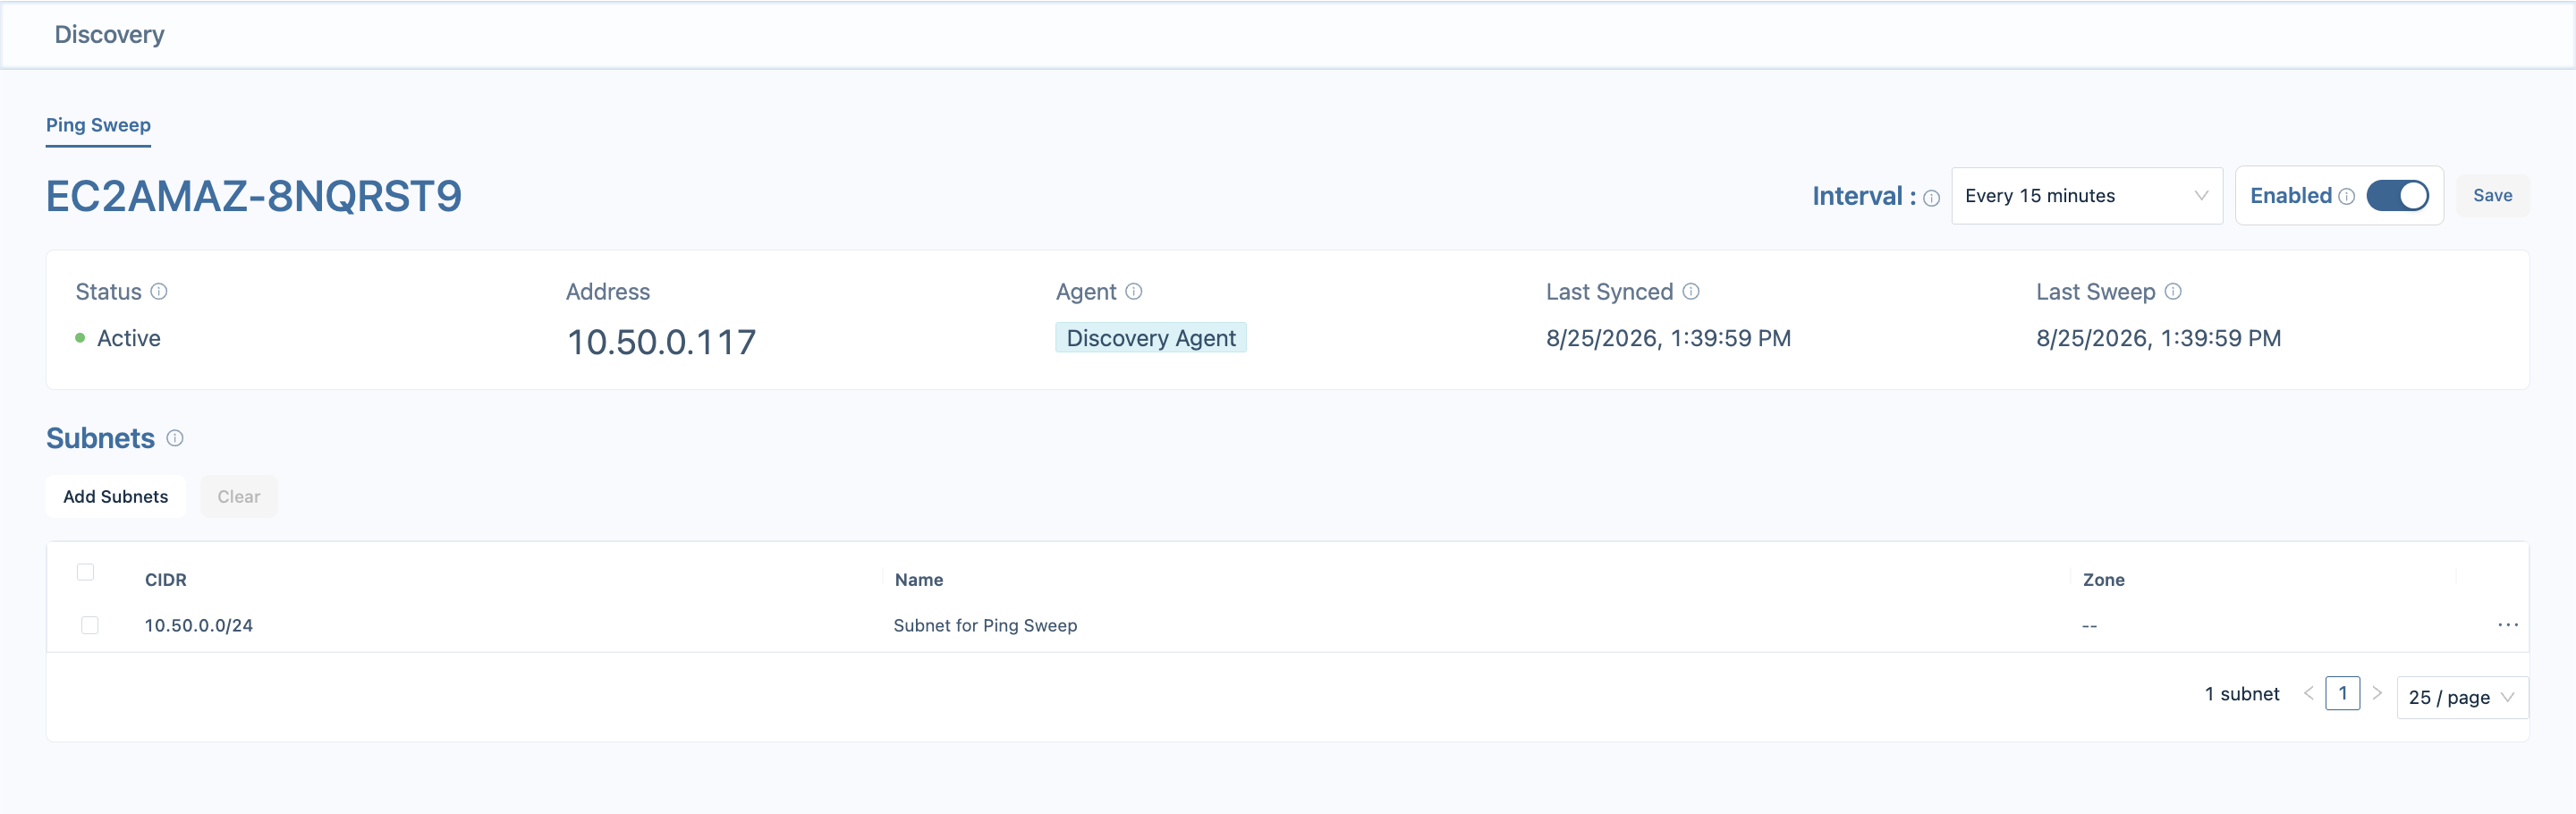
- Add the subnets below that this agent should sweep. Click Add Subnets, search and filter the same way you do on the Subnets screen, check the subnets you want, and add them.
- Tweak the interval if you want, and turn Enabled on. Available intervals are Every 15 minutes, 30 minutes, 1 hour, 2 hours, 6 hours, or 24 hours.
- Click Save changes.
After you save, the page confirms the settings are stored and swaps the info box for the four install steps you will run next. Status changes to Waiting for install.
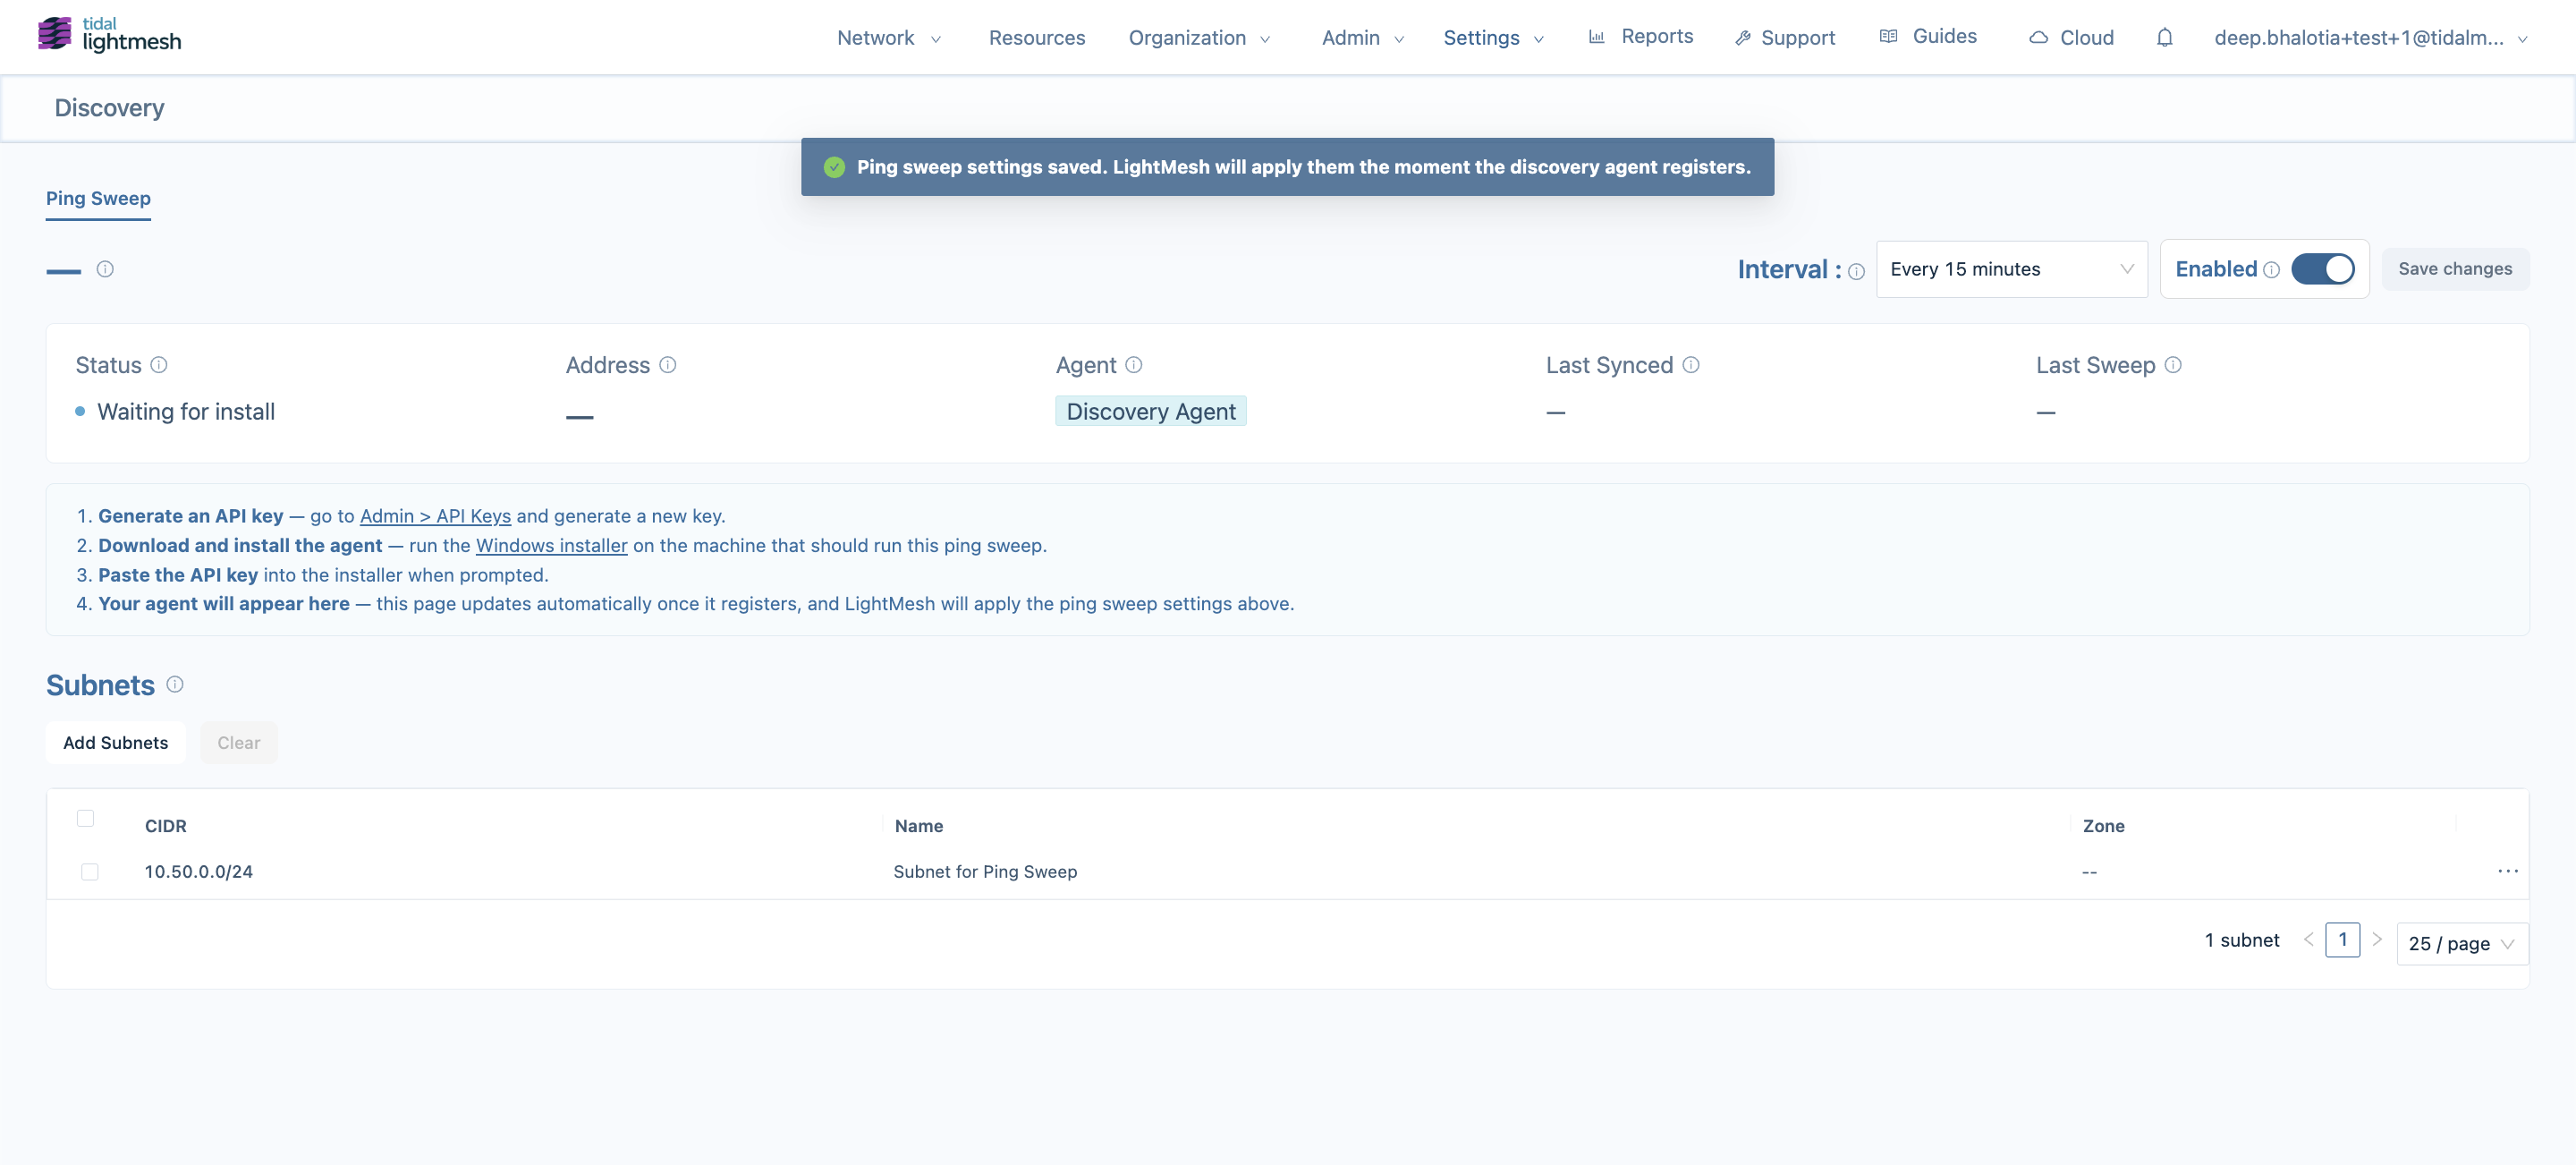
LightMesh applies the settings from this screen automatically the moment the agent registers, so it is safe to configure ping sweep before the Windows machine is ready.
2. Install the Windows Discovery Agent
Complete the four steps shown in the install info box:
- In LightMesh, go to Admin > API Keys and generate a new API key. Set Role to DHCP Server so the key can register the discovery agent and upload ping sweep results without full tenant API access.
- Go to Settings > Downloads. On the Windows Discovery Agent card, select the Ping Sweep tab. Under Windows installer (.msi), click Download MSI. (This tab serves the MSI only today.)
- Run the installer on the Windows host. When prompted, paste the API key from step 1. If you skipped the installer prompt, open the agent, go to Configuration, set Base URL to your LightMesh URL, paste the key into API Token, and click Save & Apply.
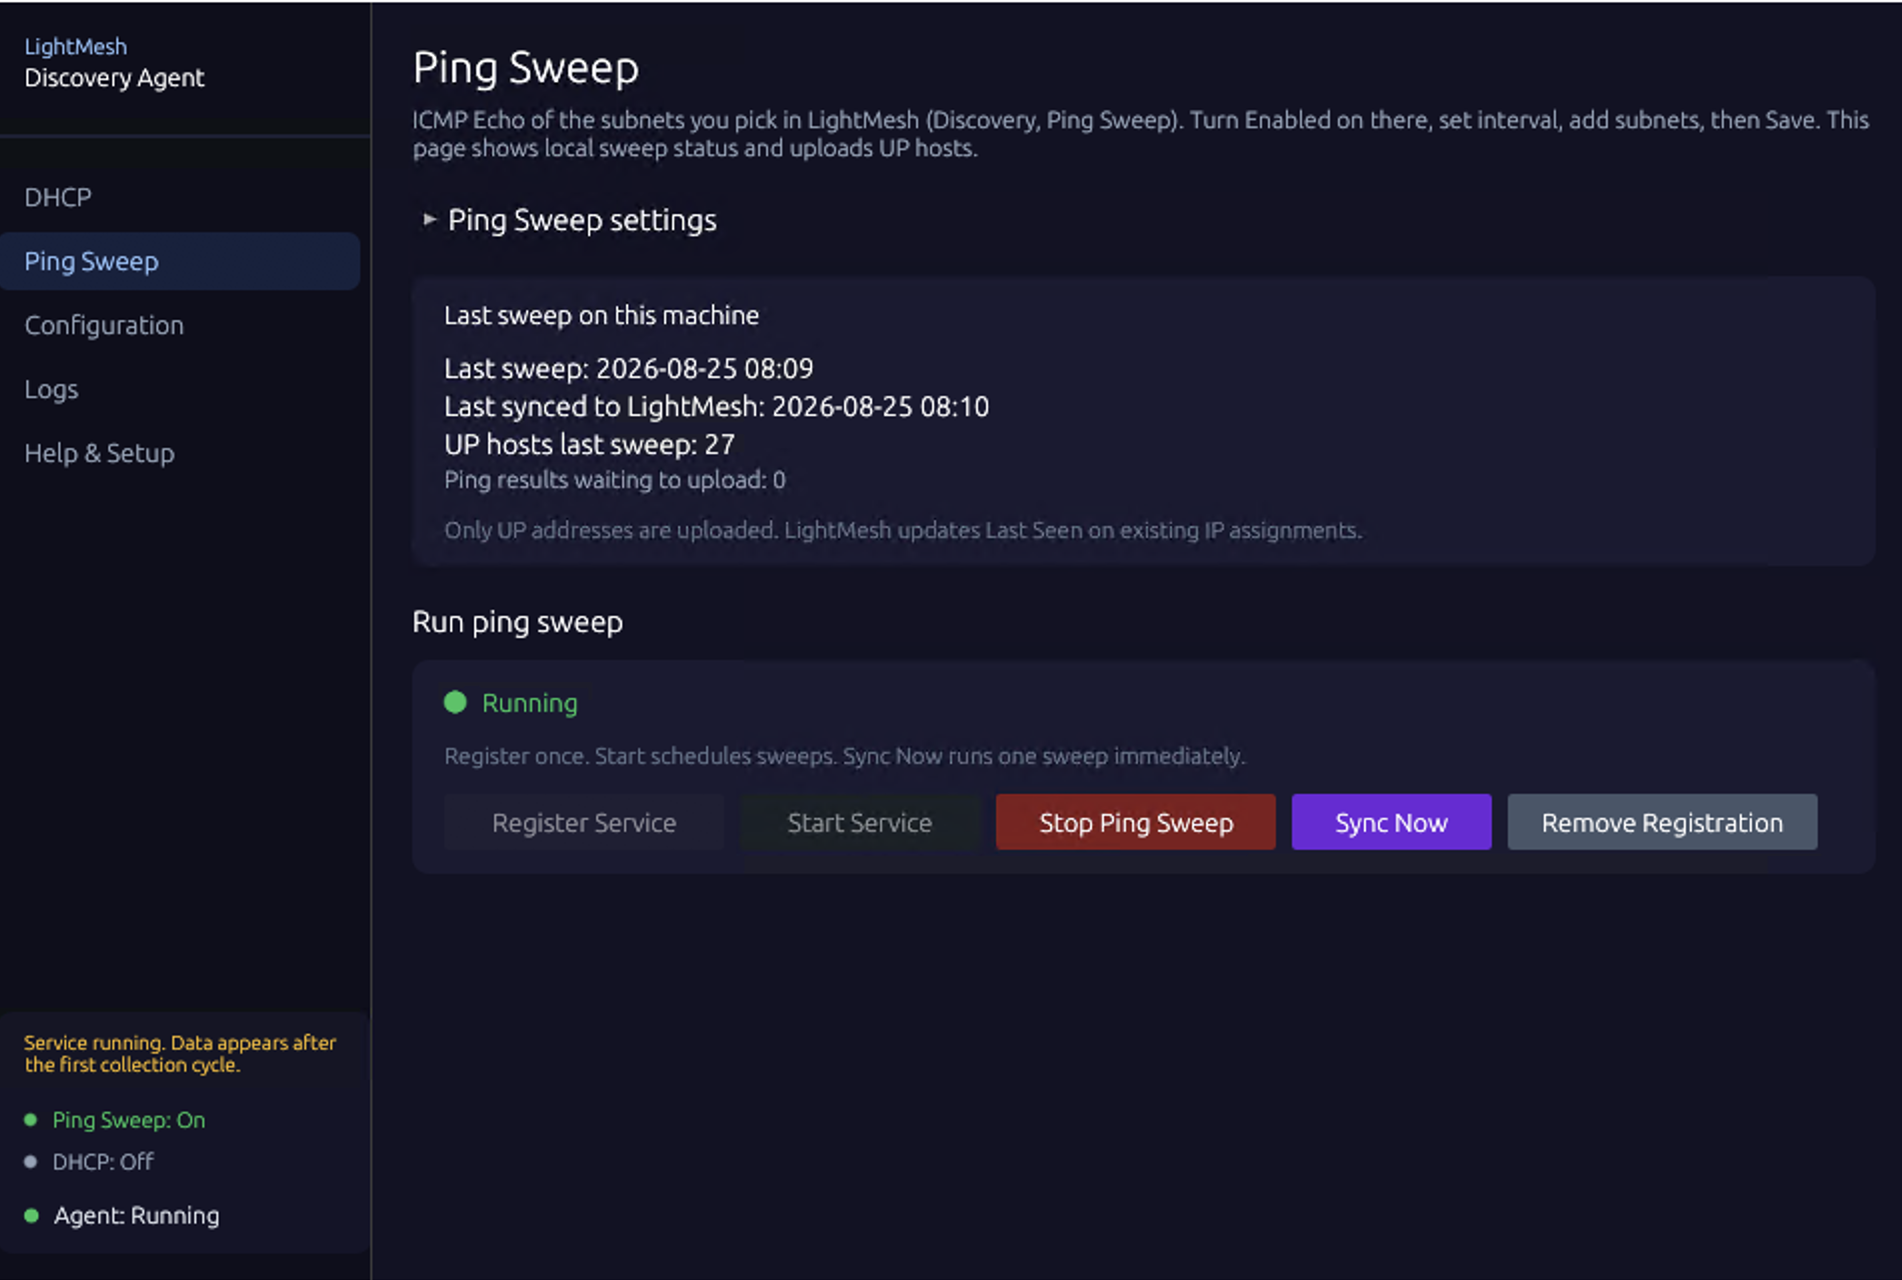
- Open the agent’s Ping Sweep panel. Click Register Service to install the Windows service, then click Start Ping Sweep to begin sweeping.
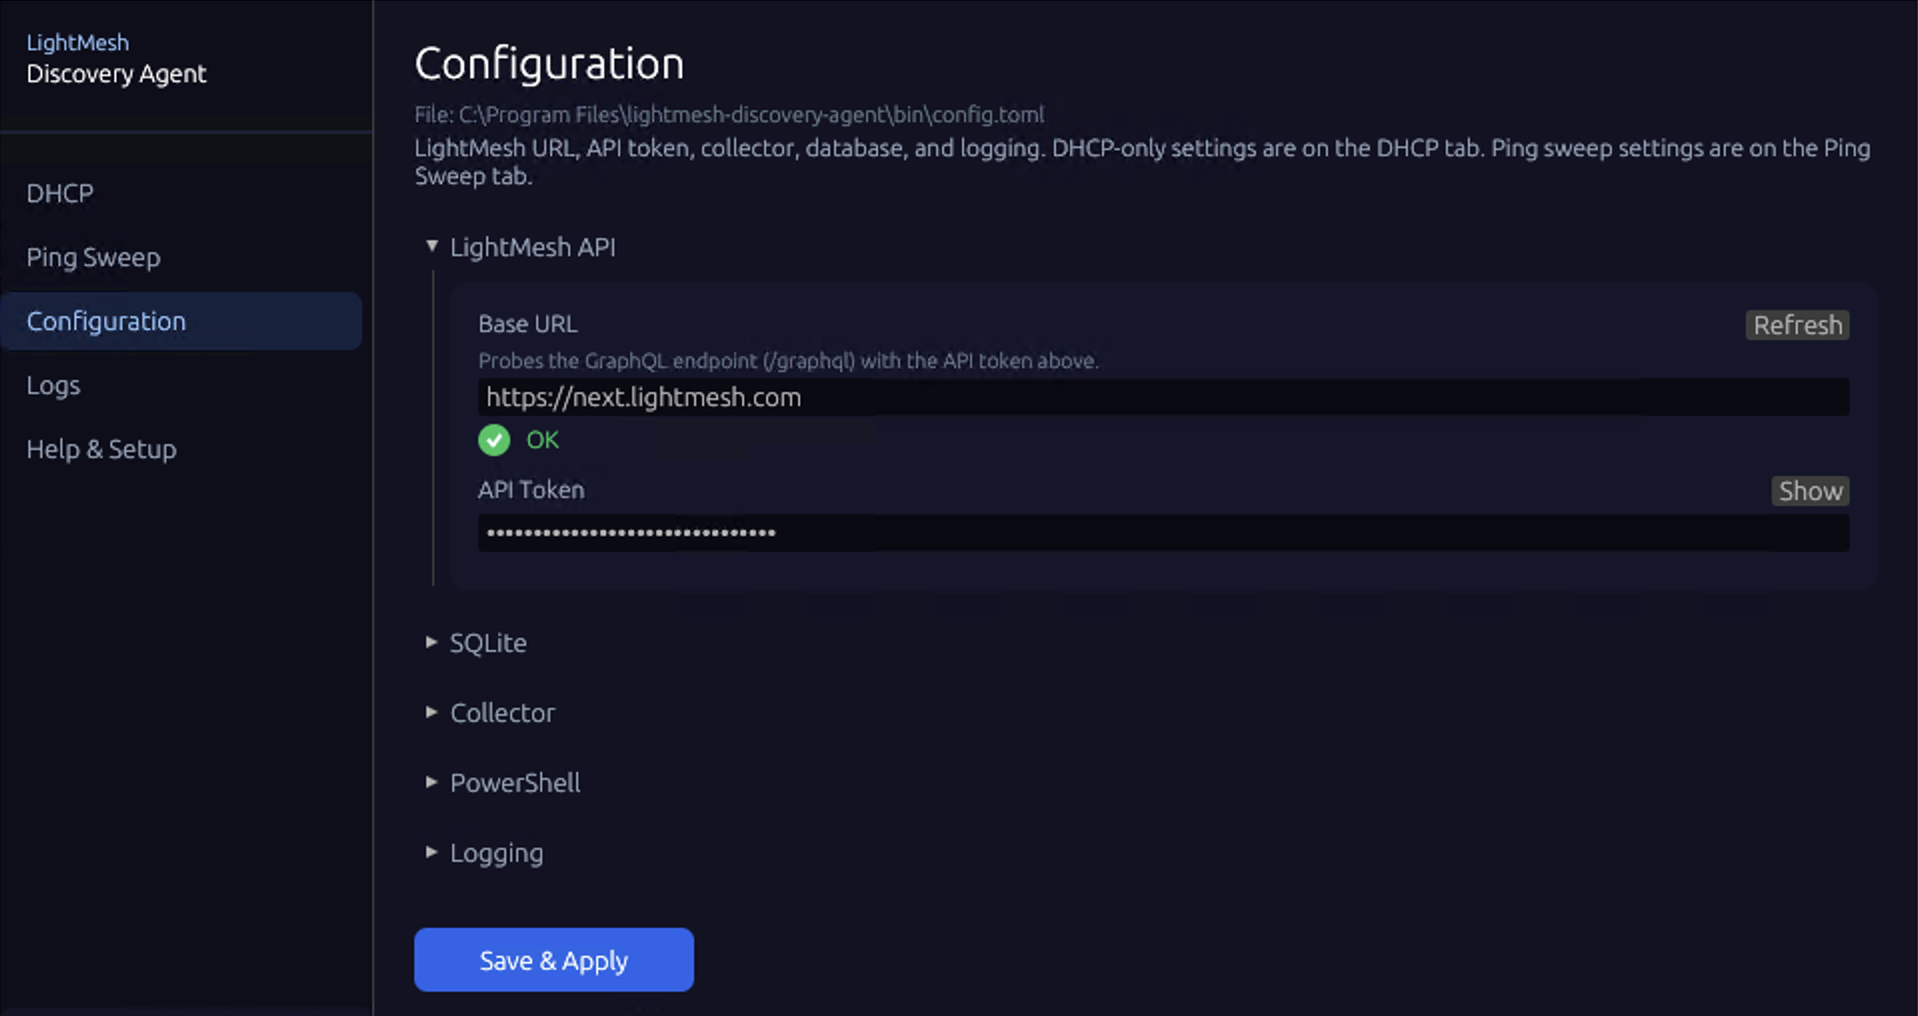
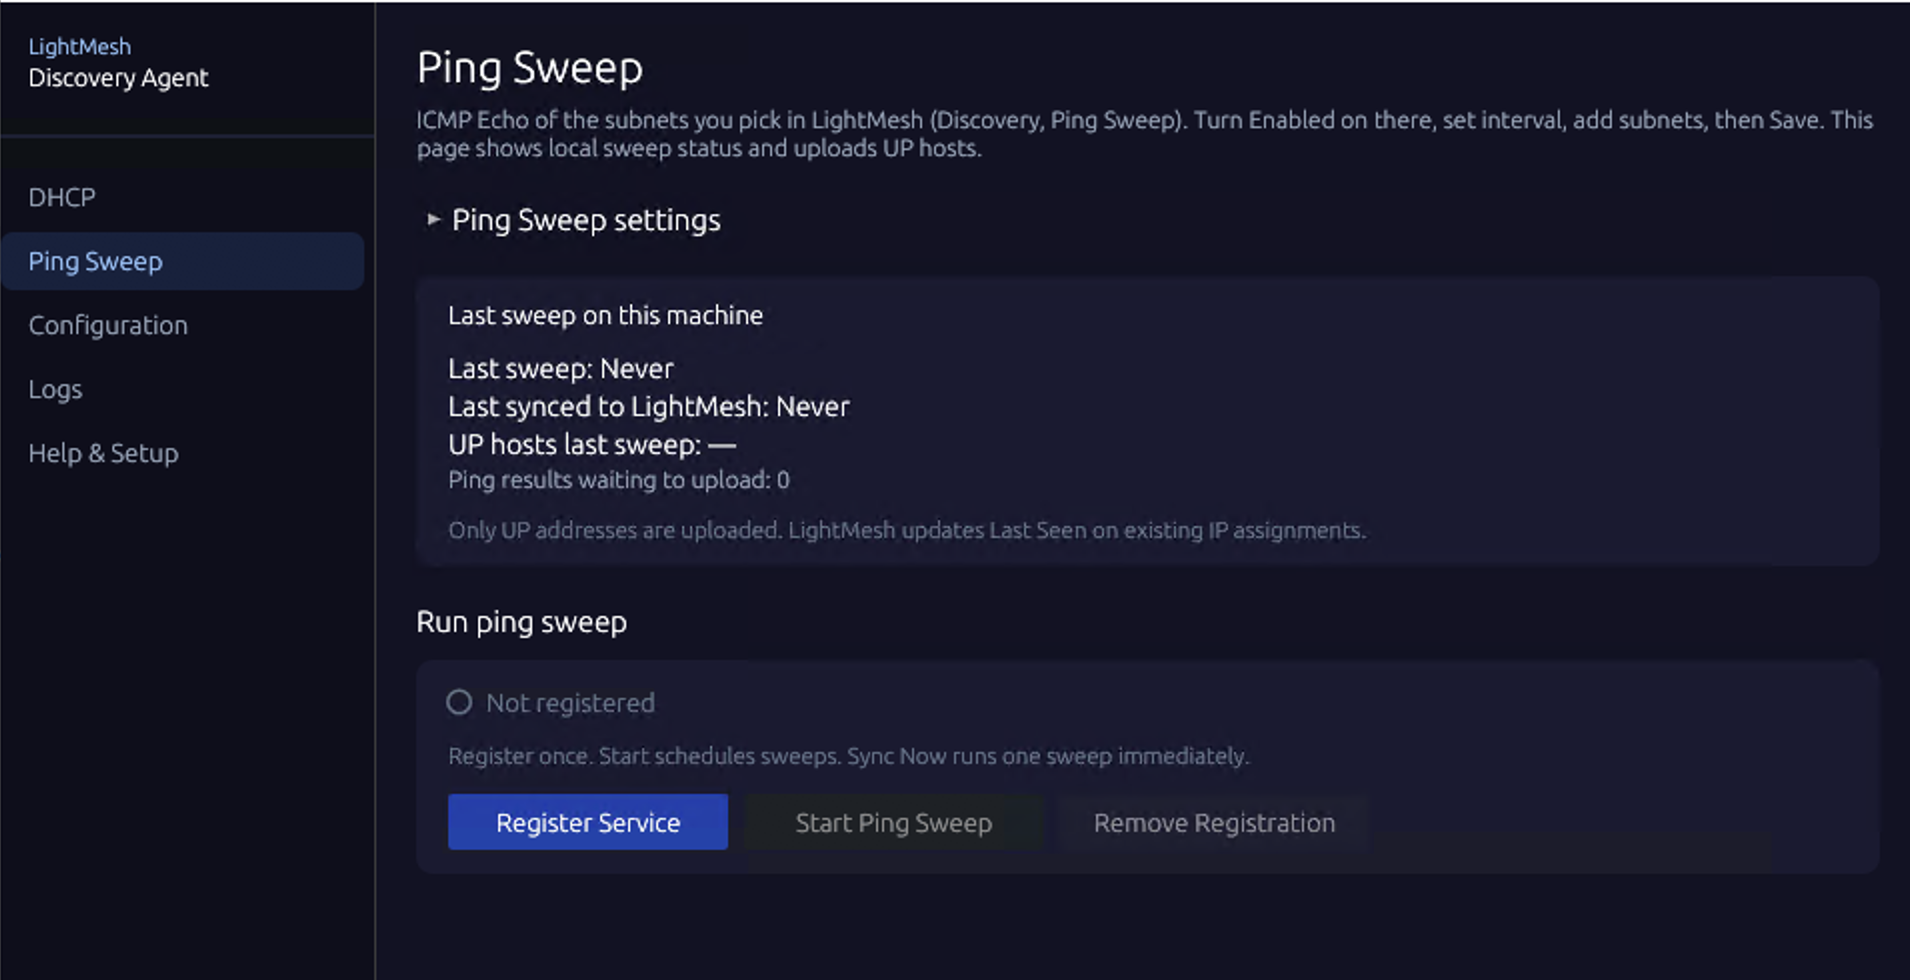
Once the agent registers, the Settings > Discovery page in LightMesh updates automatically. The agent appears with its name and address, Status moves to Awaiting sweep and then to Active after the first successful upload, and the ping sweep settings you saved in step 1 begin to apply on the next cycle.
3. Enable or disable ping sweep per subnet
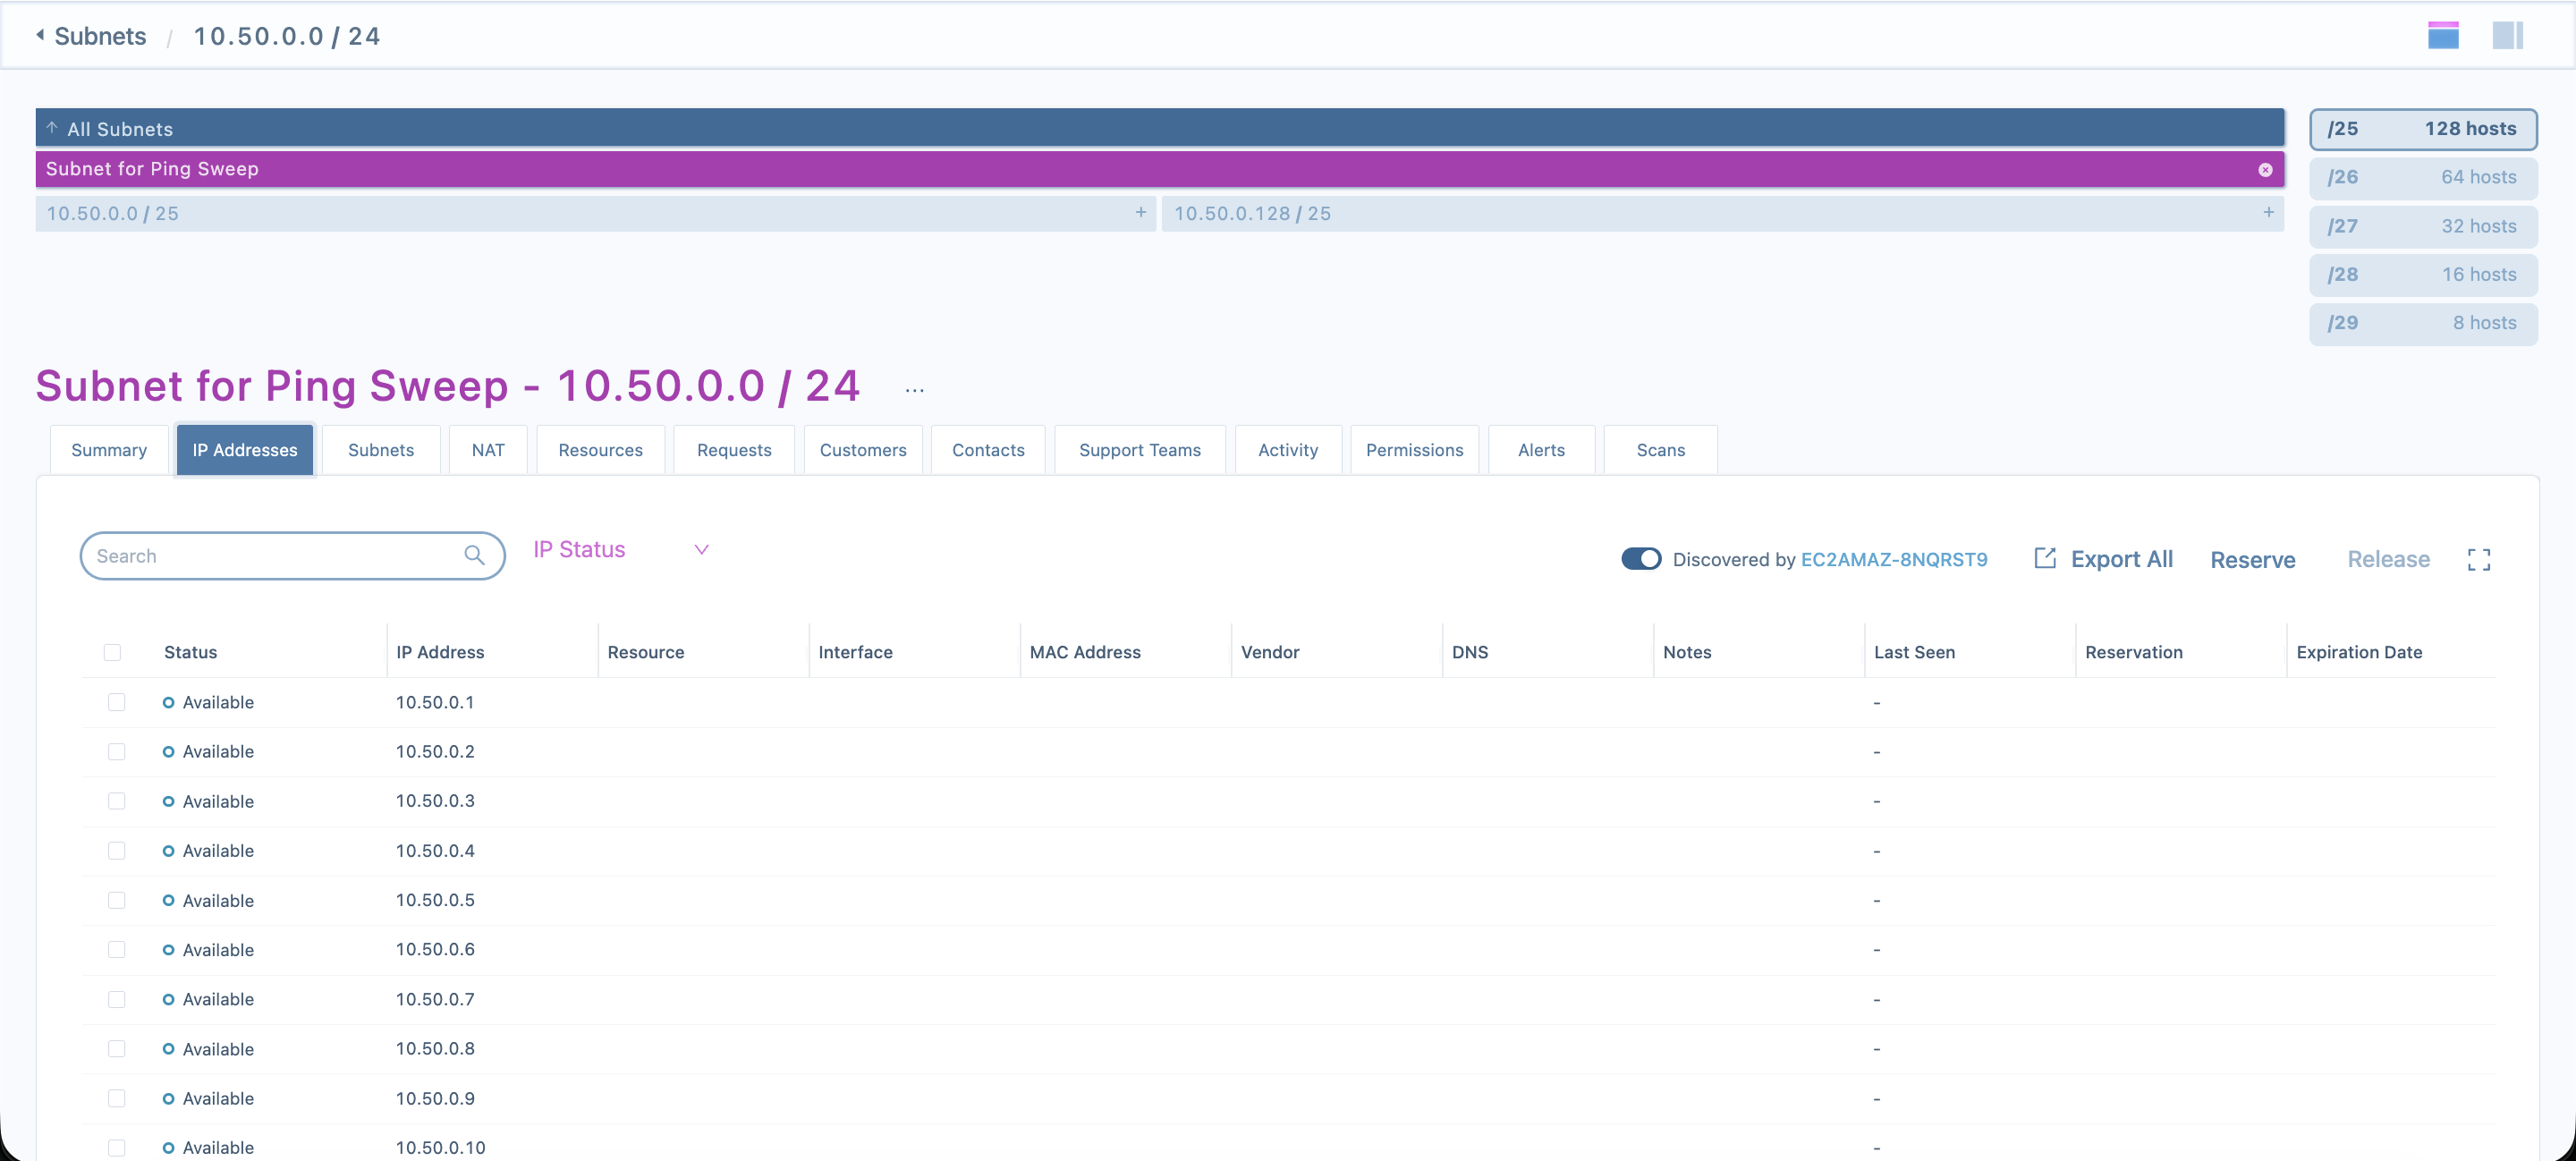
You can also control ping sweep from an individual subnet. Open a subnet in Subnets, select the IP Addresses tab, and use the ping sweep toolbar:
- Toggle ping sweep on or off for that specific subnet.
- Follow the agent link to jump to the Settings > Discovery > Ping Sweep screen for the agent responsible for that subnet.
If no discovery agent is installed yet, LightMesh prompts you to configure ping sweep under Settings > Discovery first. Only Owners and Administrators can change this toggle.
4. Review ping sweep results in LightMesh
After a sweep cycle completes and uploads:
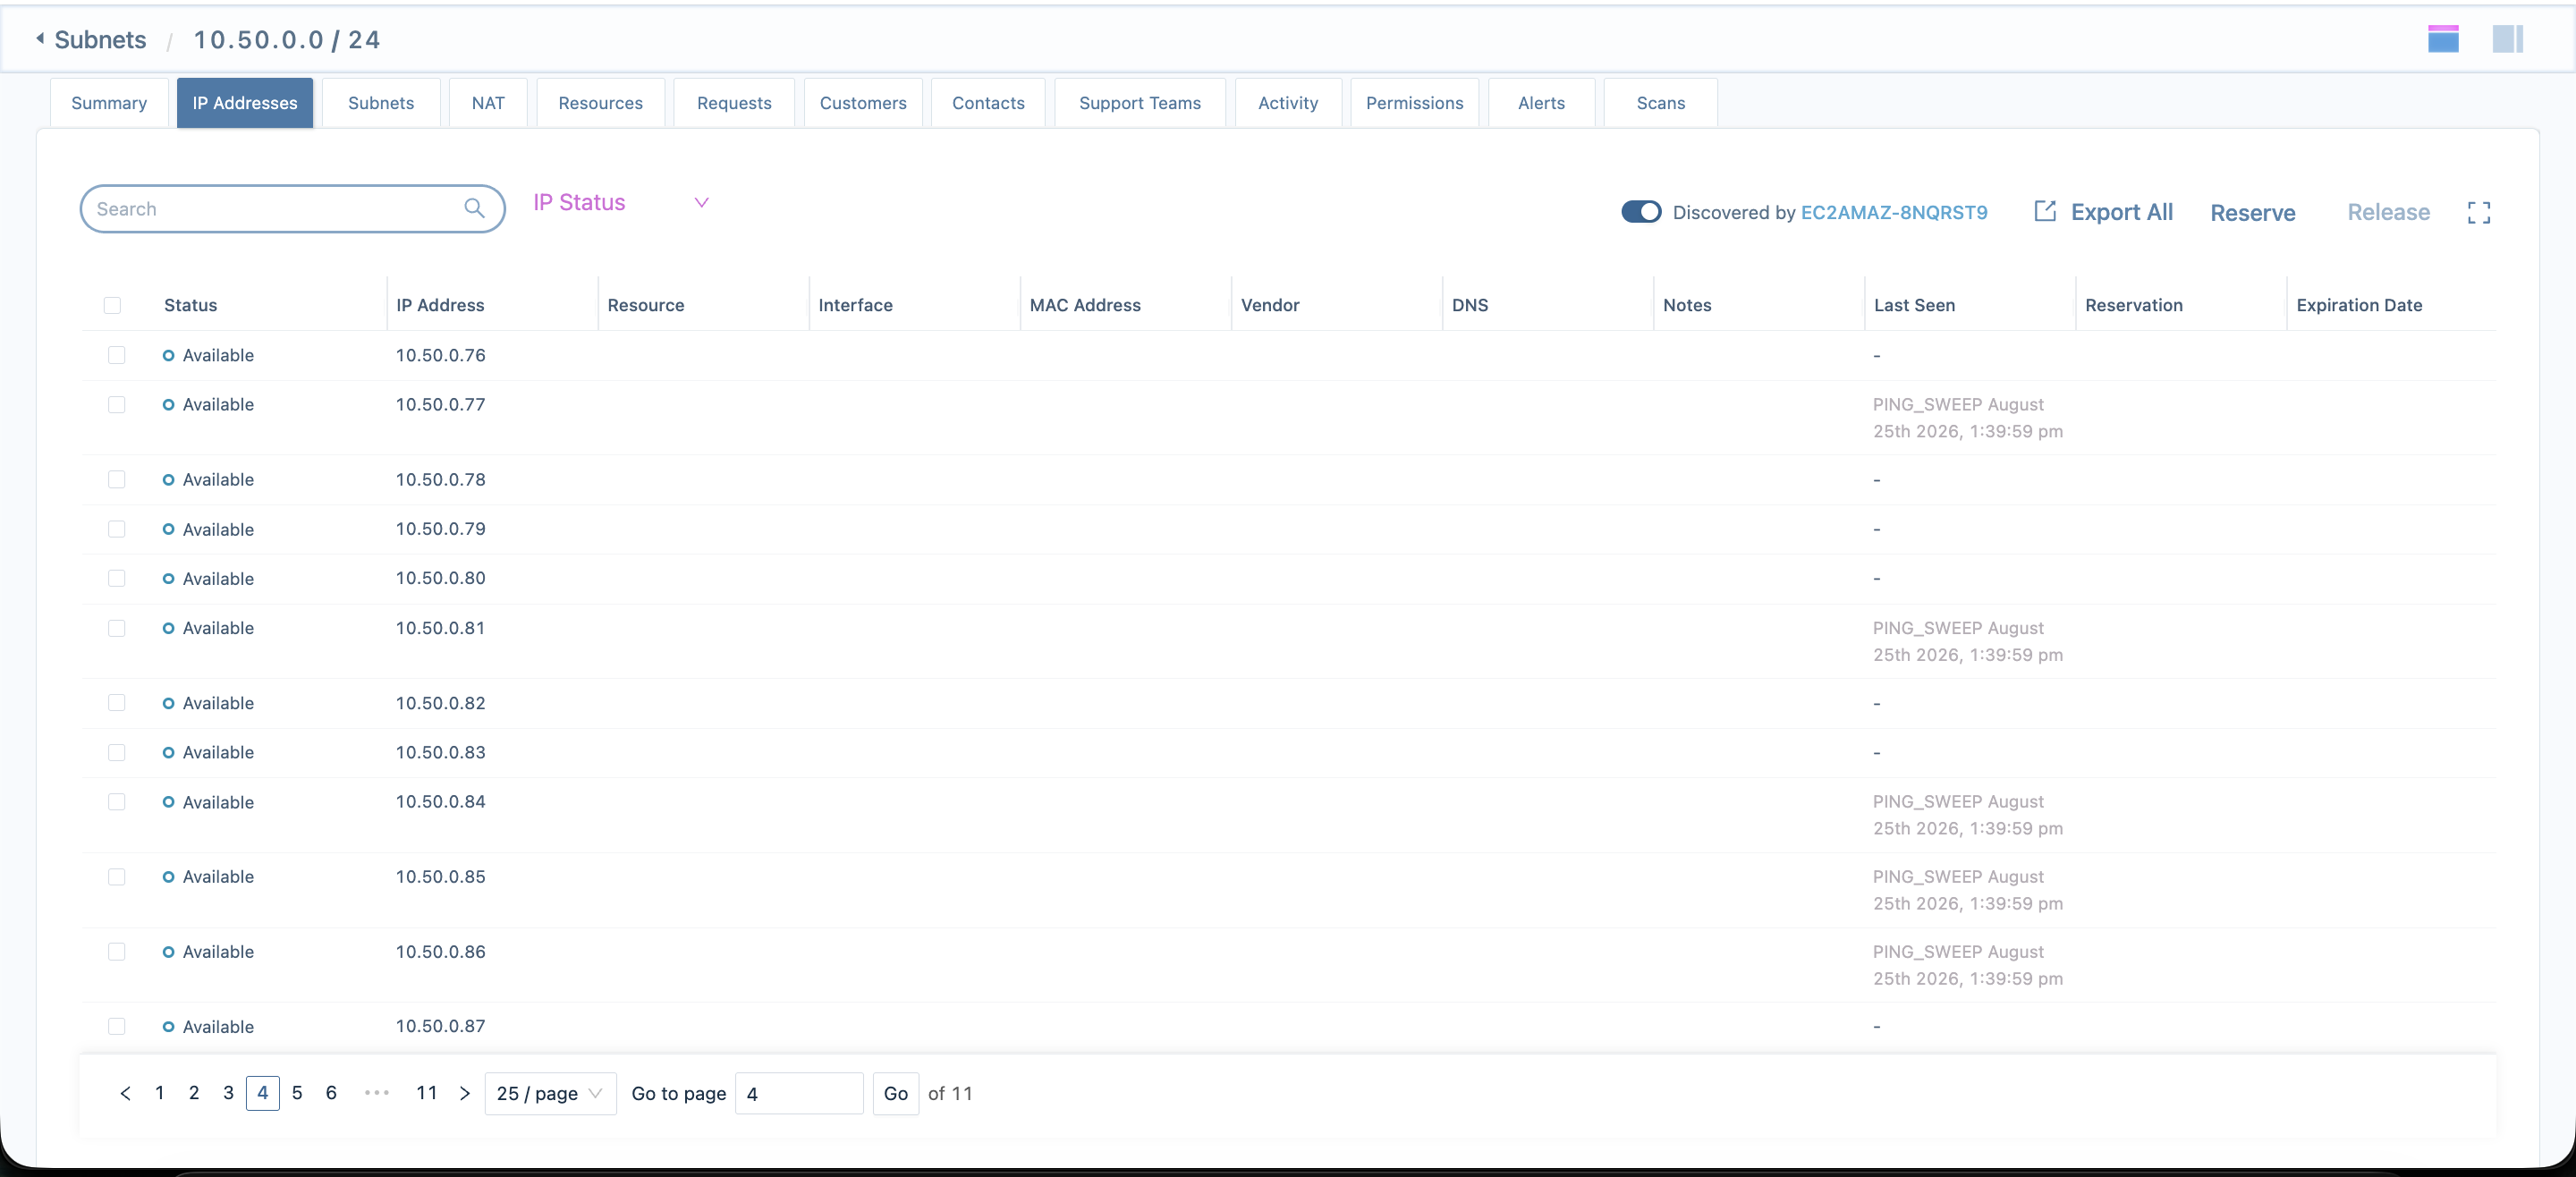
- Hosts that responded to ICMP Echo are marked reachable, and their Last Seen timestamp is refreshed on the subnet’s IP Addresses view.
- Each cycle is recorded as a
PING_SWEEPscan, so ping-sourced activity is distinguishable from NMAP or manual entries. - On the Settings > Discovery page, Last Synced shows the most recent upload and Last Sweep shows the most recent completed sweep for the selected agent.
Operational notes
- Enable, interval, and subnets are controlled from LightMesh, not the agent. The agent applies what LightMesh sends it on the next cycle.
- Wide subnets are skipped. By default subnets wider than
/16are not swept, to avoid expanding into millions of hosts. Split large ranges if you truly need to sweep them. - Ping sweep updates Last Seen and scan history; it does not create or delete IP assignments by itself.
Troubleshooting
If ping sweep results do not appear in LightMesh:
- Confirm the agent shows on Settings > Discovery with Status of Awaiting sweep or Active. If it stays on Pending install or Waiting for install, the agent has not registered yet — verify Base URL, API Token, and the Register Service step on the Windows host.
- Confirm Enabled is on and at least one subnet is added under Settings > Discovery, and that you clicked Save changes.
- In the agent’s Ping Sweep panel, check the last sweep time and hosts-up count. If the sweep runs but zero hosts come back up, ICMP is likely blocked by a firewall between the agent and the targets.
- Verify the target subnets are IPv4 and narrower than
/16; wider subnets are skipped. - Check the agent Logs for ping sweep planning messages, skipped-subnet reasons, and upload results. Failed uploads log an actionable summary (DNS, TCP, TLS, proxy, or HTTP 401/403).
- Confirm the API key is valid (DHCP Server role) and the Base URL connectivity probe on the agent’s Configuration tab shows OK.
Once sweeping and upload succeed, each interval refreshes reachable-host state and Last Seen on the IP Addresses views for your selected subnets.