Sync Azure Tags to LightMesh
Overview
This guide explains how to sync Azure Virtual Network (VNet) tags into LightMesh and use them for subnet filtering.
After you connect an Azure account, LightMesh discovers tags on your cloud networking resources during sync. You choose which tag keys to map onto LightMesh subnets. Once mapped and synced, those tags appear on subnet records and can be used as Cloud Tag filters on the Subnets page.
Prerequisite: You need an Azure cloud account connected in LightMesh. If you do not have one yet, follow Azure Integration (service principal setup), or use Add Azure Integration below.
Permission required: Managing cloud accounts requires an app role of Owner, Administrator, or Contributor. See Roles & RBAC for details.
Sync tags from an existing Azure integration
Use these steps when your Azure account is already connected and showing a Synchronized status.
Step 1: Open Cloud Integration
- Navigate to Cloud → Cloud Accounts.
- Click your Azure account in the table.

Step 2: Trigger tag sync
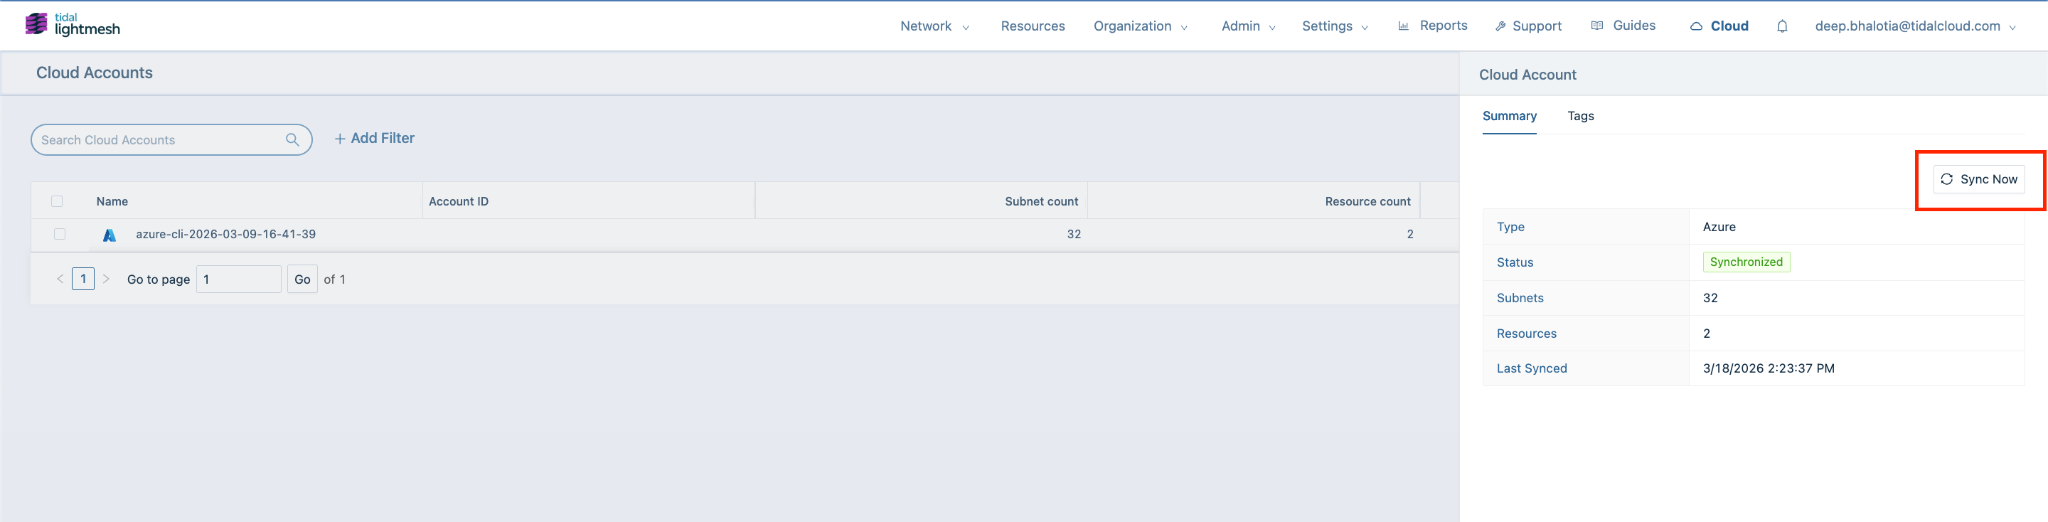
- Open the account drawer (Summary tab).
- Click Sync Now.
Step 3: Wait for sync
Sync runs in the background. You can continue using the app while status shows Synchronizing.
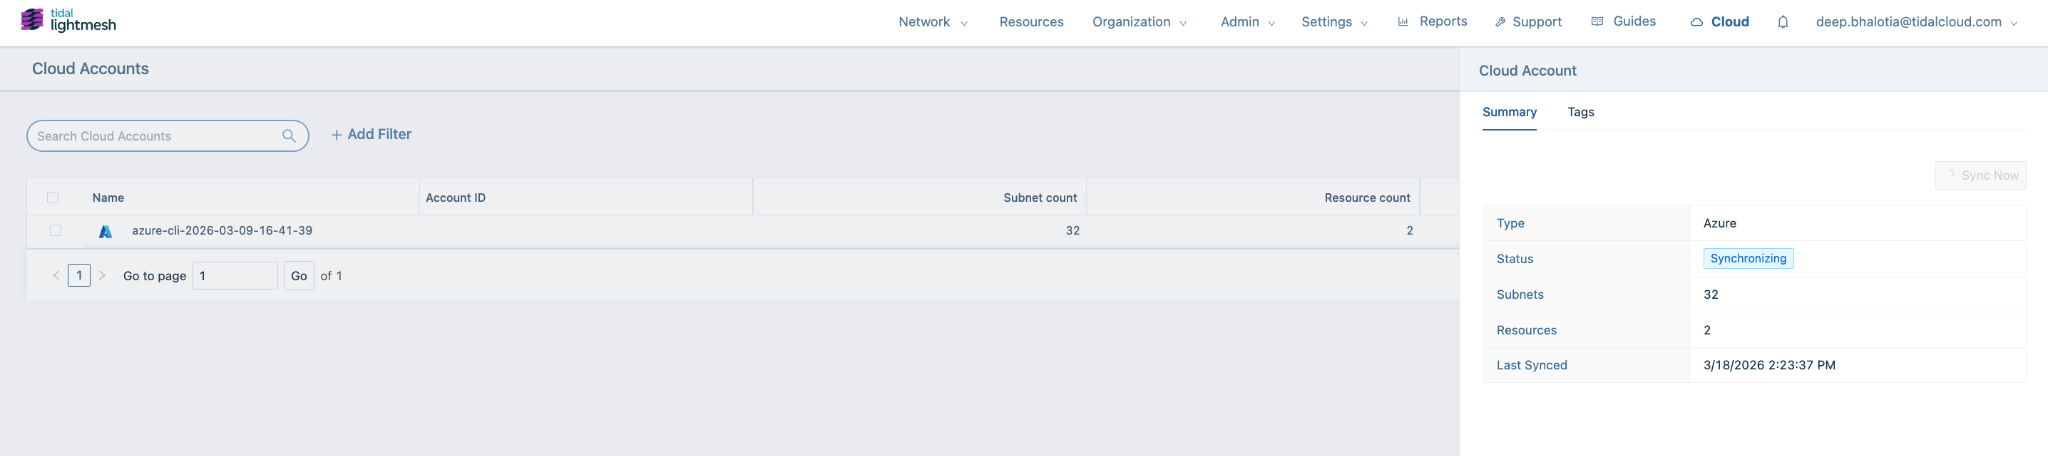
Initial sync duration depends on the size of your Azure environment and may take a few minutes.
Step 4: View tags
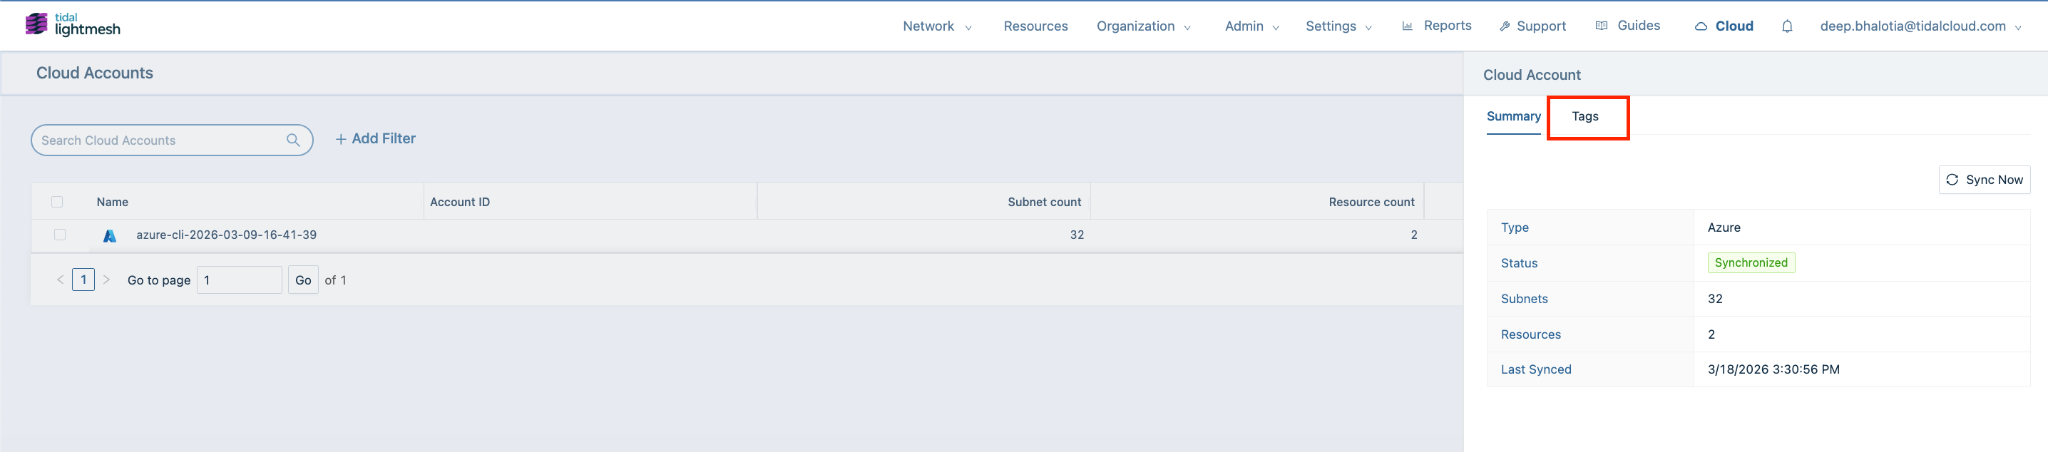
- Re-open the Azure account record.
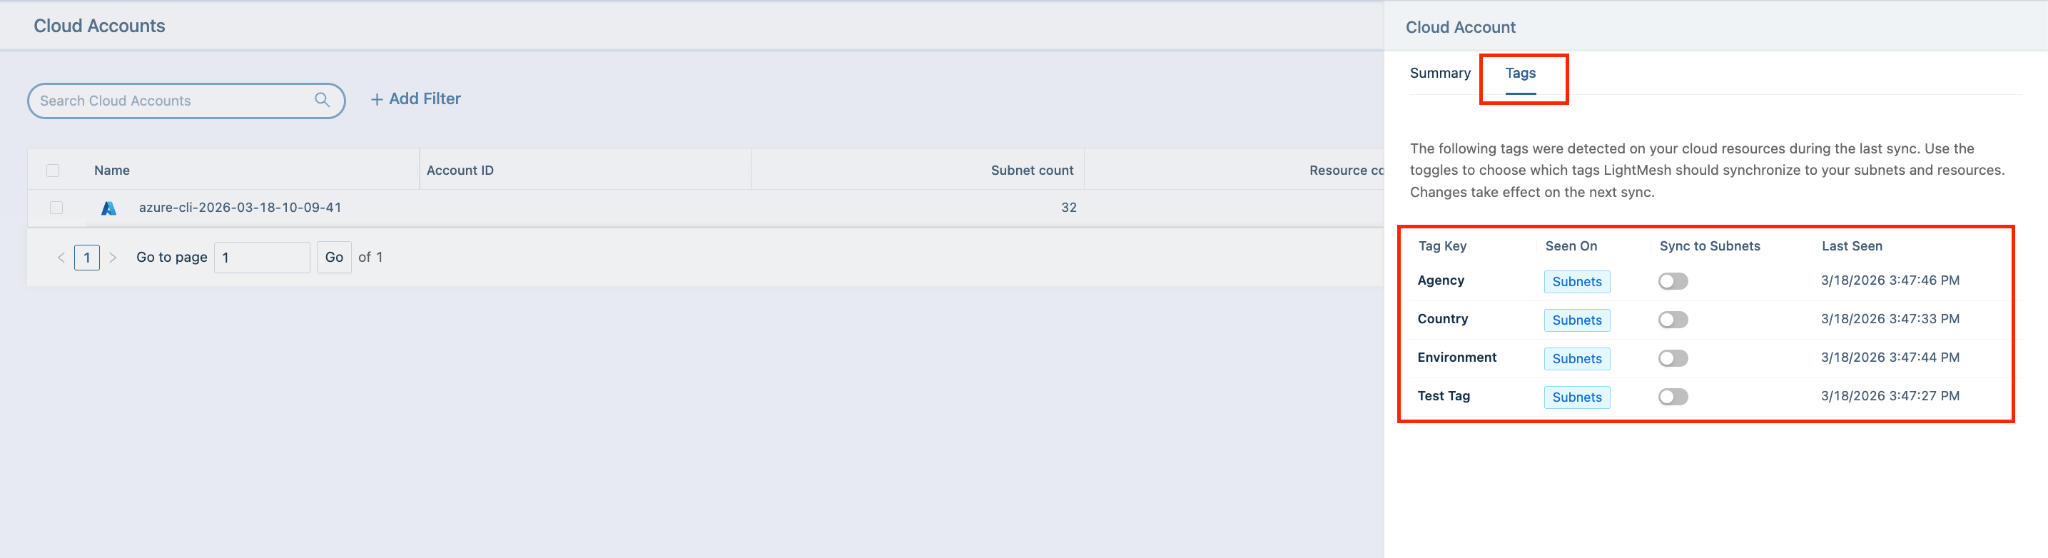
- Open the Tags tab.
Step 5: Map tags
LightMesh lists tag keys detected on your cloud resources during the last sync.
- Review each Tag Key (for example,
Agency,Country,Environment). - Use the Sync to Subnets toggle to choose which keys LightMesh should apply to subnets.
- Changes take effect on the next sync — run Sync Now again after enabling toggles if you want them applied immediately.
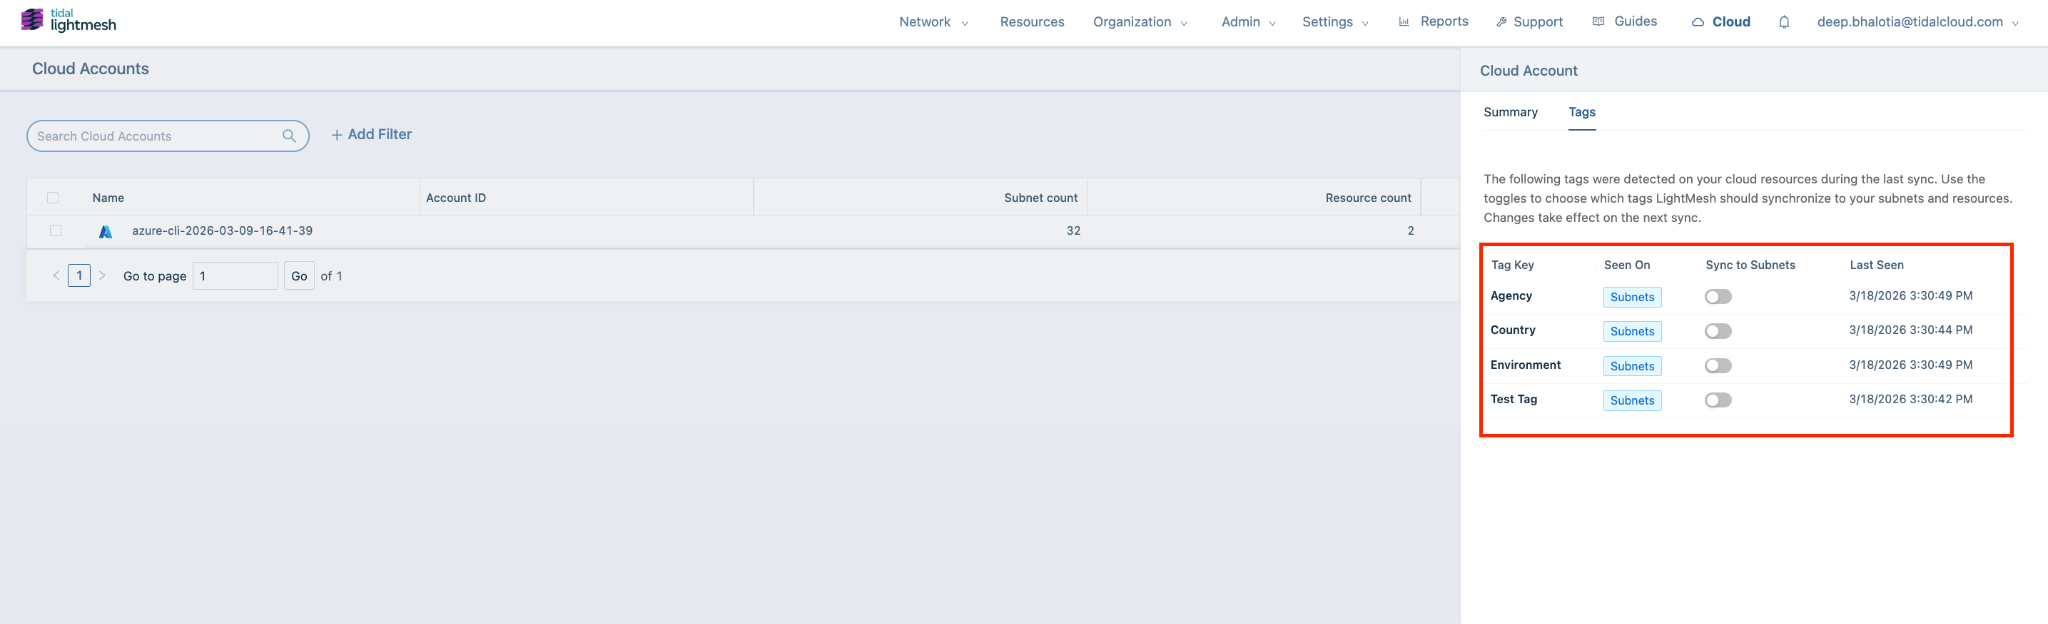
Important: Tag mapping is user-controlled. Nothing is auto-applied to subnets until you enable the toggle for that tag key.
Add Azure integration (if not configured)
If you do not yet have an Azure account in LightMesh, add one first, then map tags.
Step 1: Add a cloud account
- Go to Cloud.
- Click Connect an Azure Account (or + Add Cloud Account → Azure).
Step 2: Enter credentials
- Create a read-only service principal in Azure (see Azure Integration for the CLI command and scope options).
- In LightMesh, fill in:
- Azure Cloud Environment (for example, Azure Commercial Cloud)
- Name
- App ID
- Password
- Tenant ID
- Click Finish Adding Account.
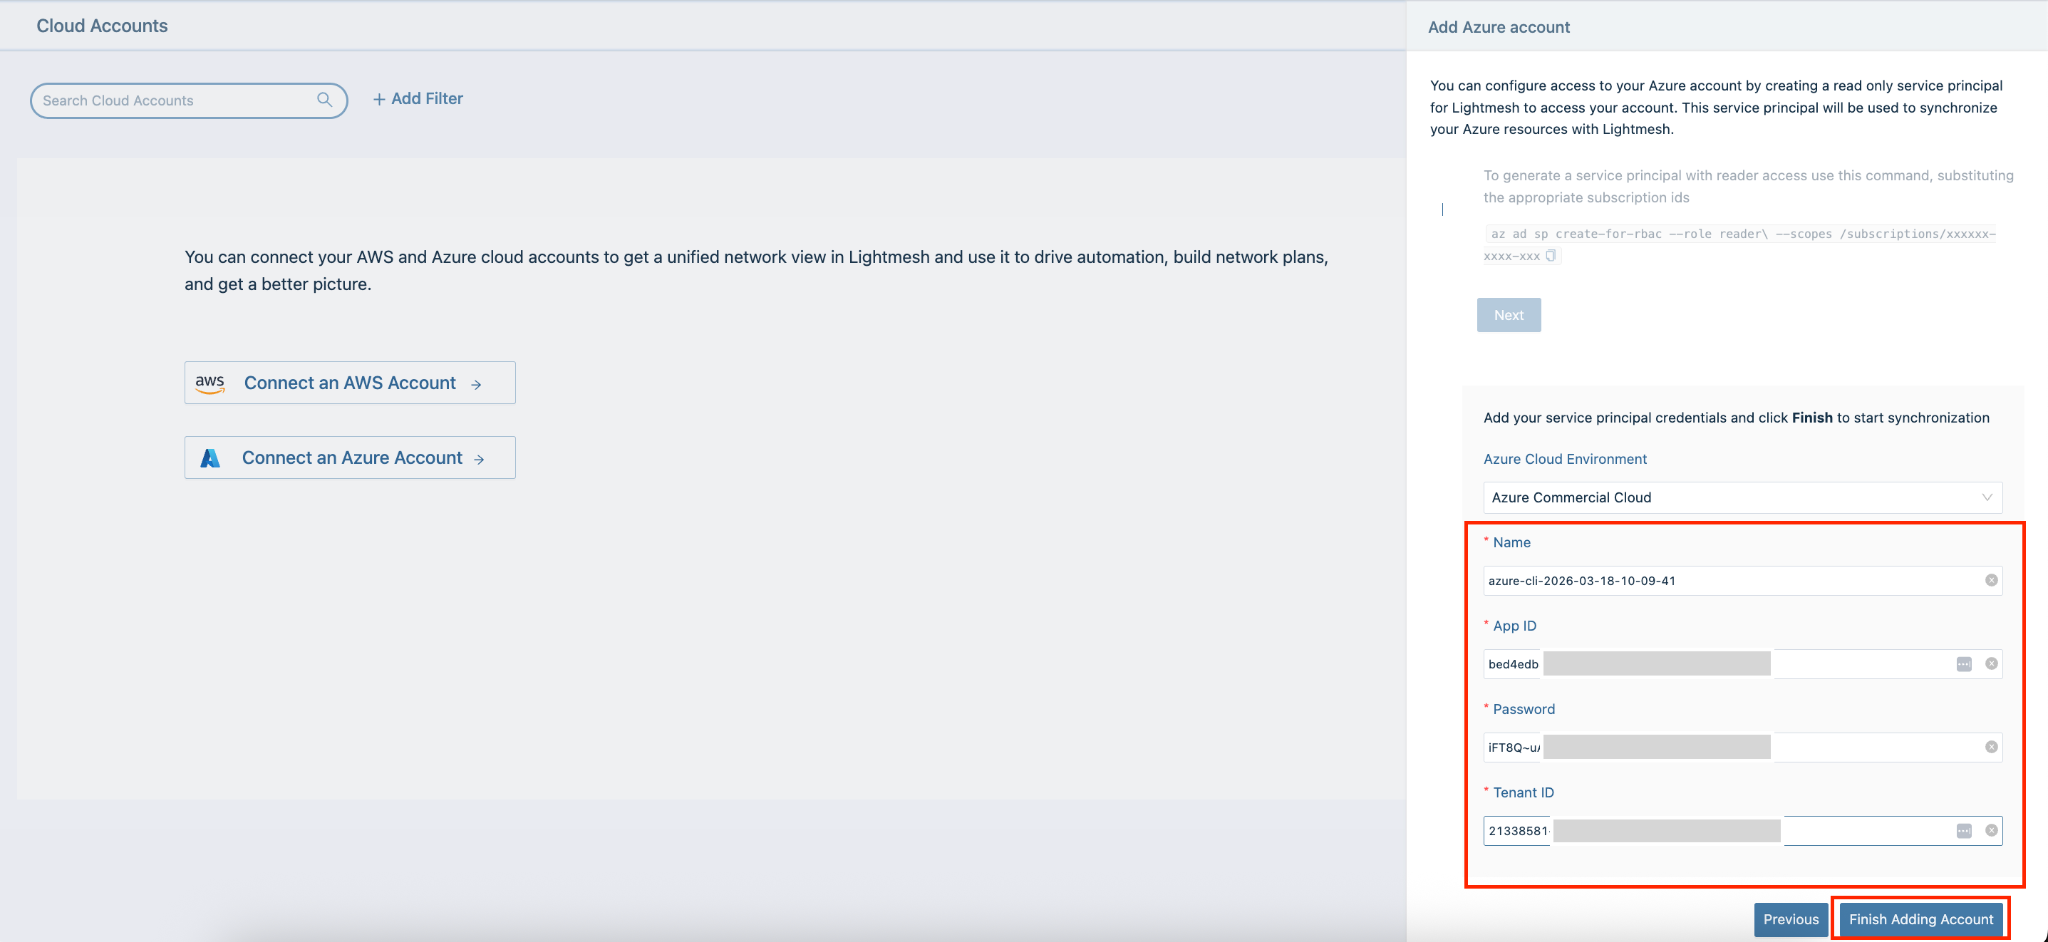
Note: Some credential values are redacted in screenshots for security.
Step 3: Sync starts
After you finish, status becomes Synchronizing while LightMesh discovers networks, subnets, and tags.
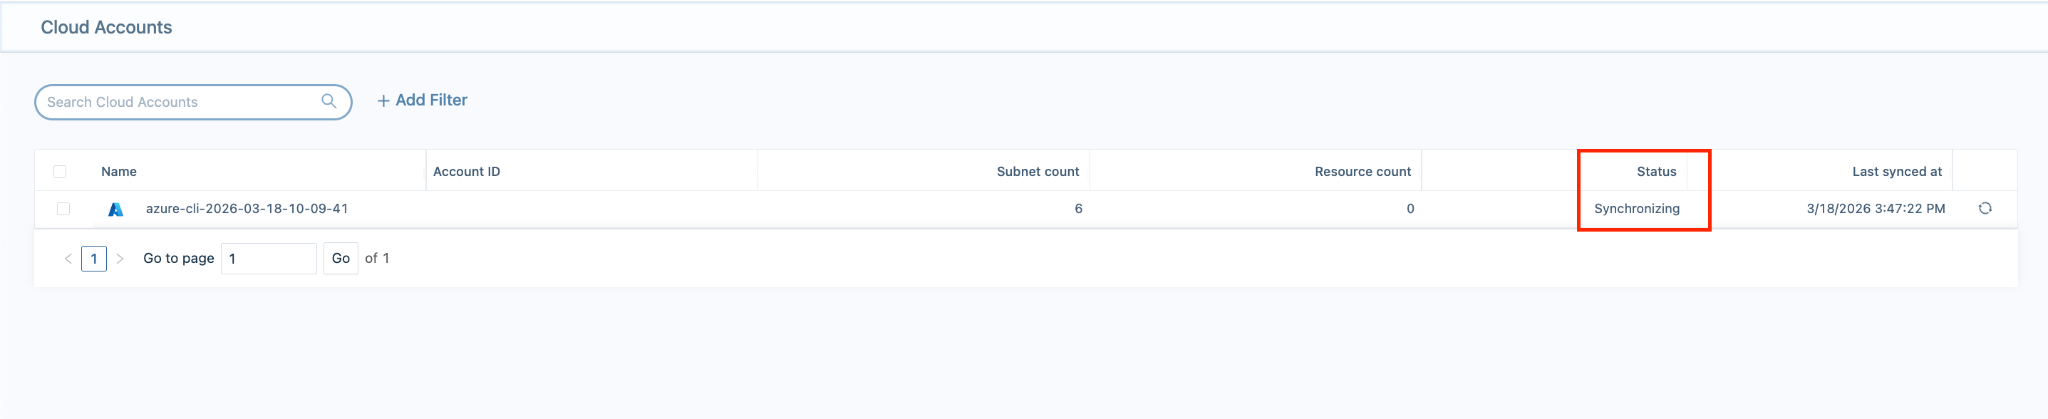
Step 4: Configure tags
- Open the new Azure account record.
- Go to the Tags tab.
- Repeat the tag mapping steps above, then sync again so mapped tags apply to subnets.
Filter subnets using tags
After tags are mapped and synced, use them on the Subnets page.
Step 1: Open Subnets and Filters
- Open the Subnets page.
- Click + Add Filter.
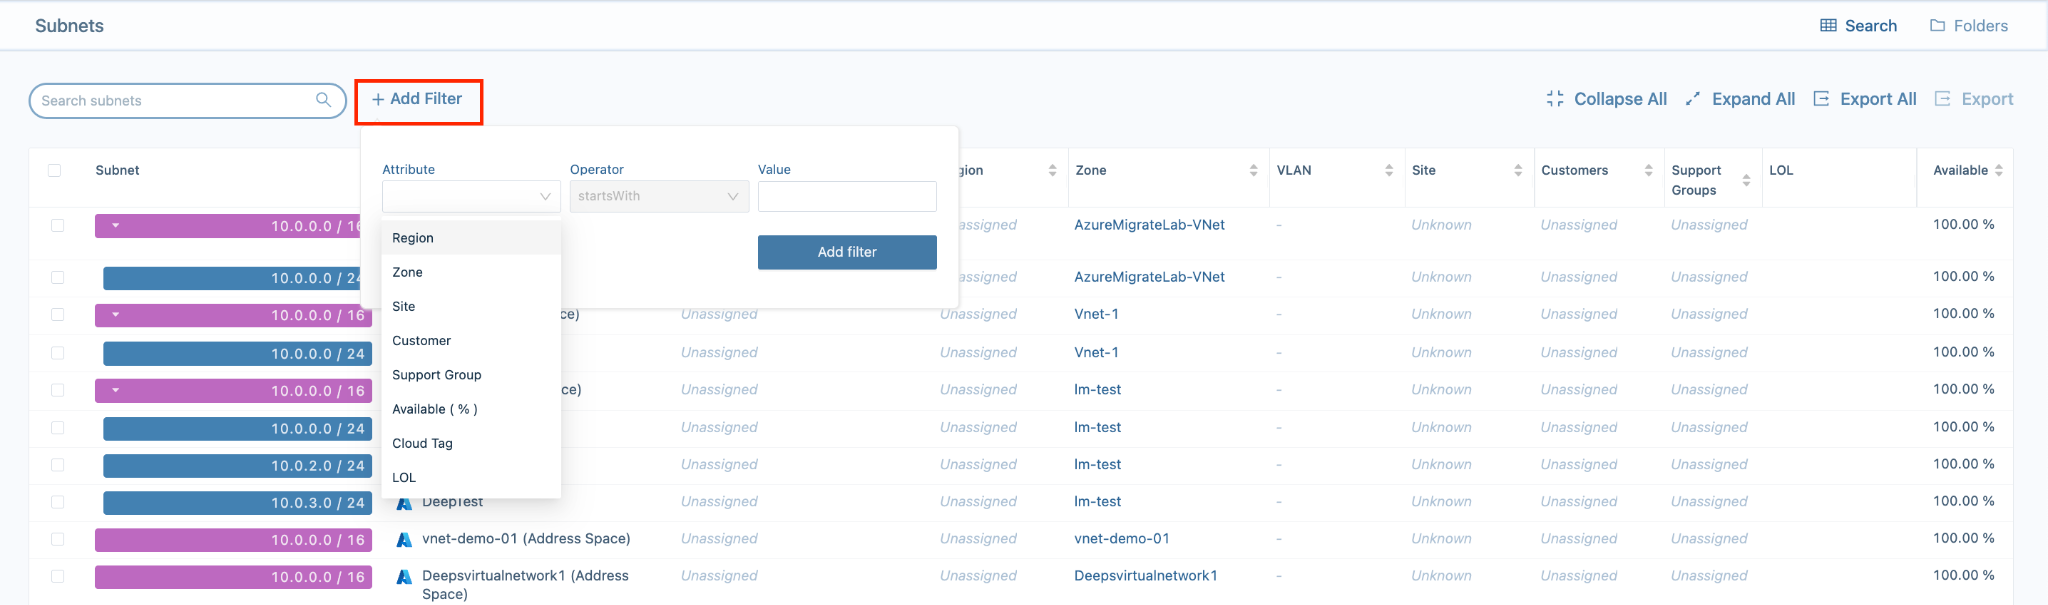
Step 2: Apply a Cloud Tag filter
- Set Attribute to Cloud Tag.
- Choose a Tag Key (for example,
Agency). - Enter a Tag Value (for example,
MPI). - Click Add filter.
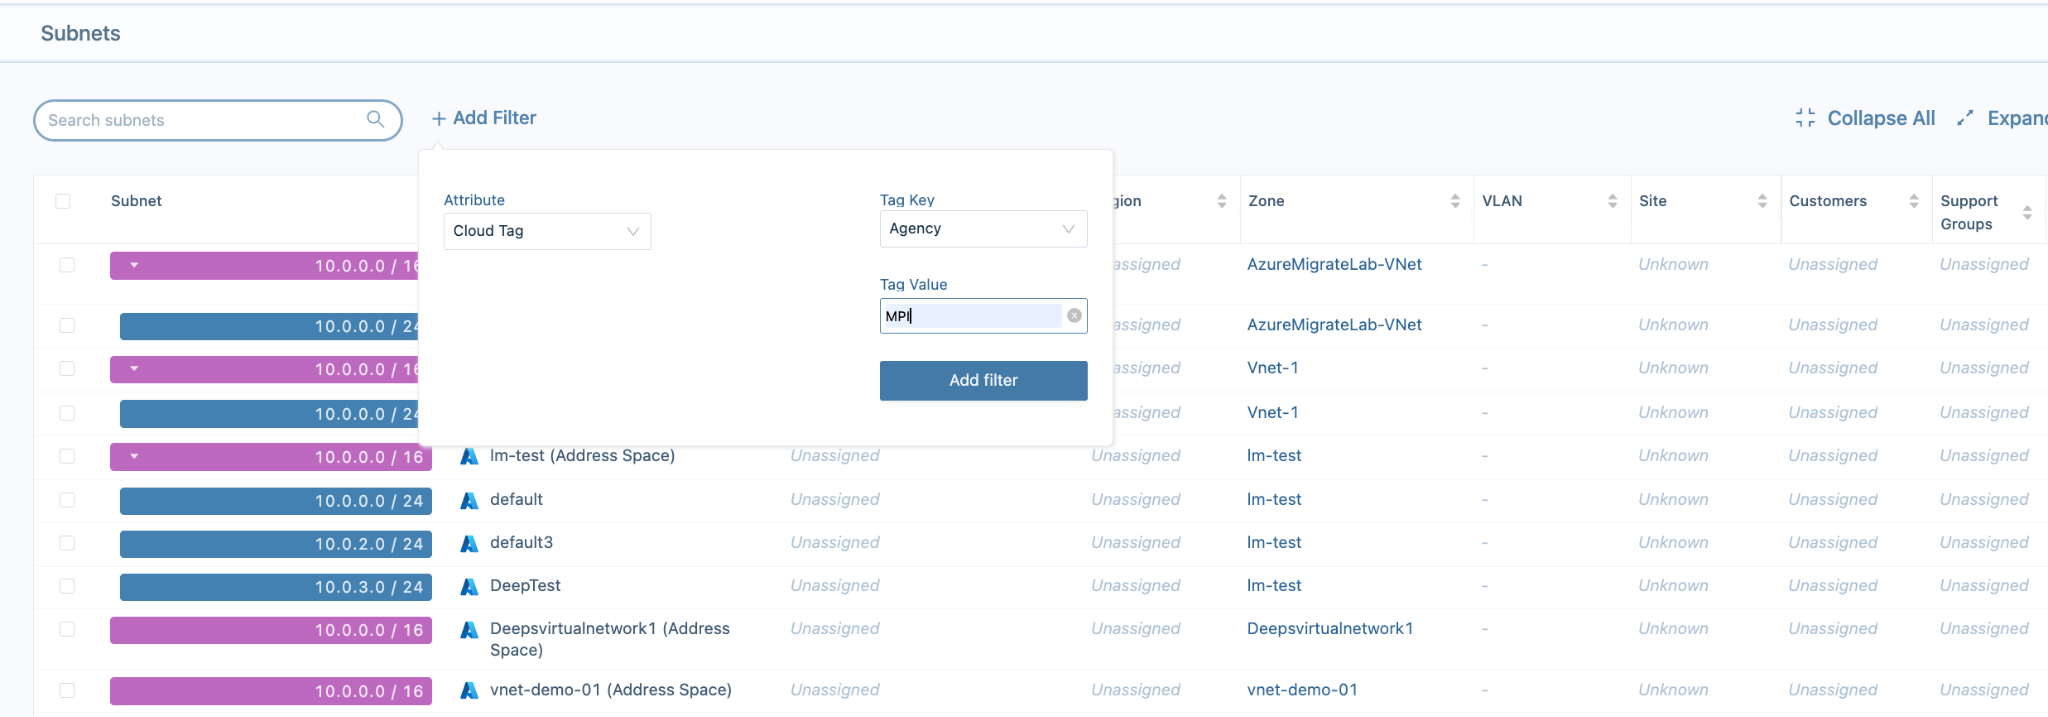
Step 3: View results
The subnet list updates to matching resources. Open a subnet to confirm cloud tags on the Summary view.

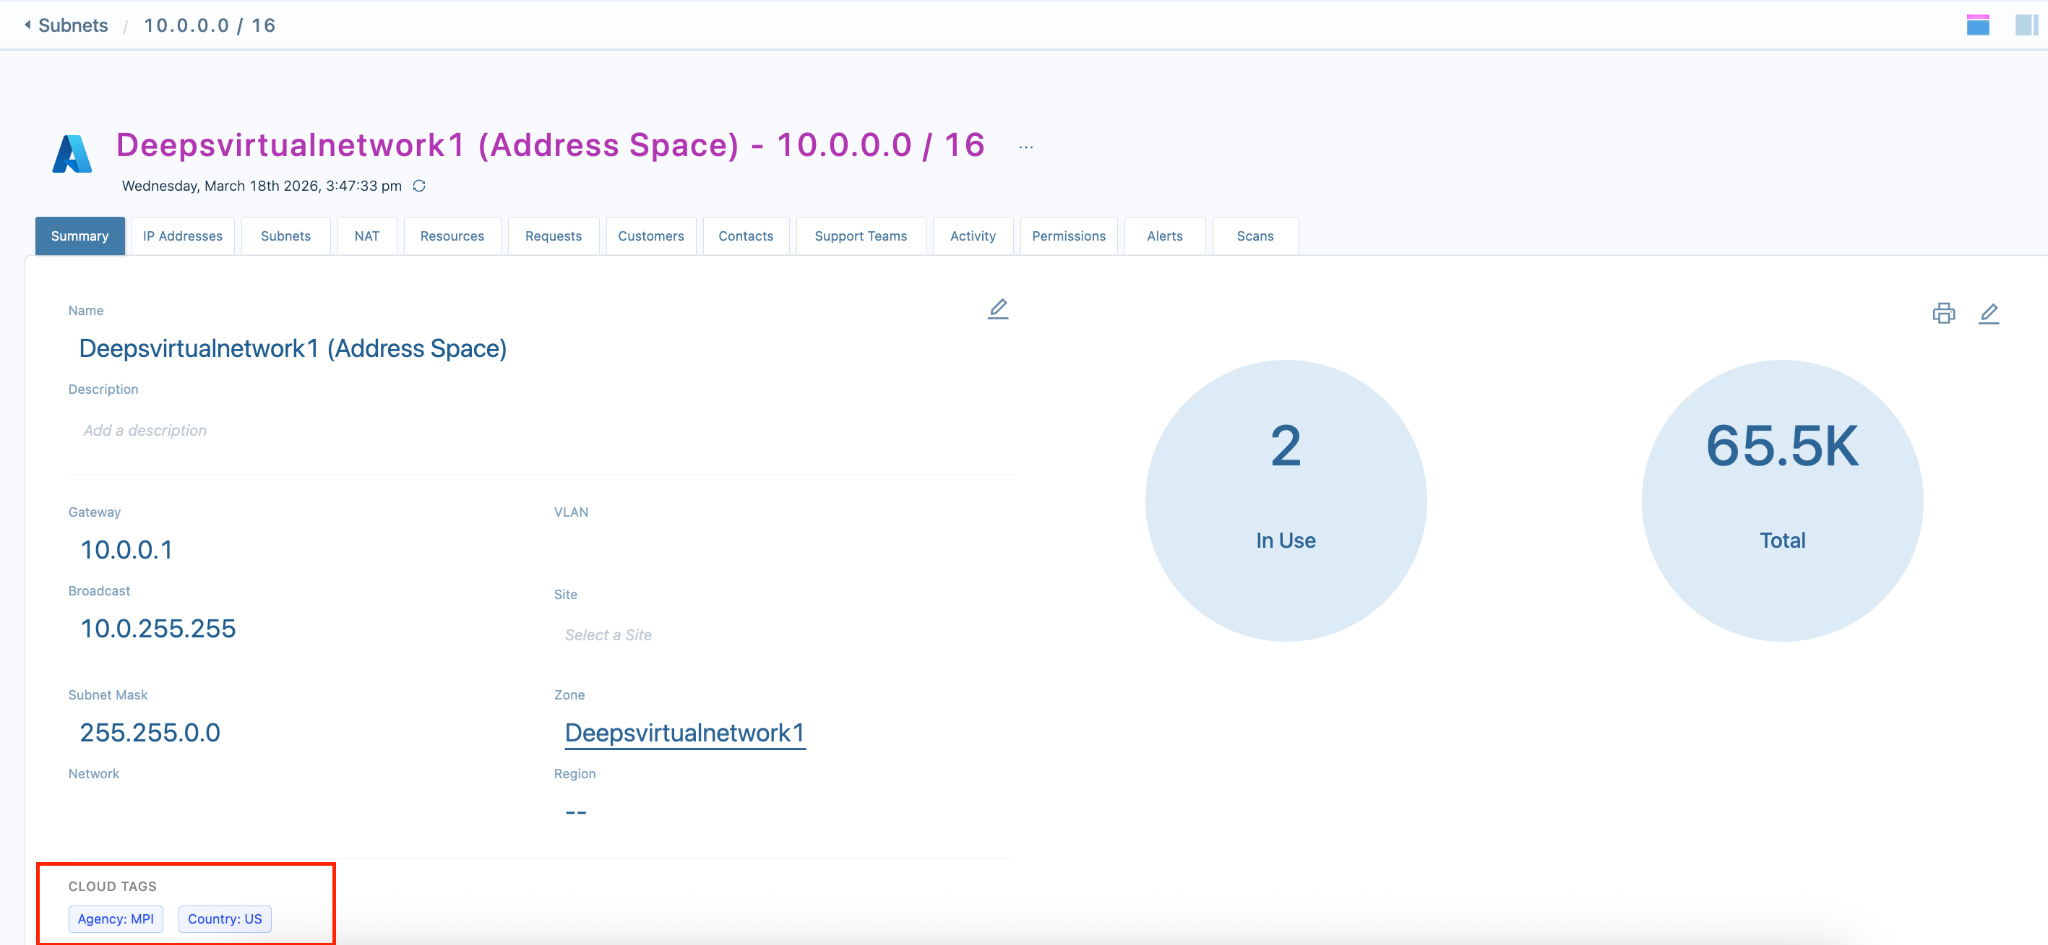
Notes
- Tag sync is non-blocking (async). You can keep working while sync runs.
- Initial sync may take a few minutes depending on Azure environment size.
- Tag mapping is user-controlled — enable Sync to Subnets for each key you want applied.
- Cloud Tag filters on Subnets are available only after tags have been synced and mapped.
- For service principal setup, multiple subscriptions, and management group access, see Azure Integration.