Configure organization-wide Okta single sign-on
Okta SSO
Okta SSO lets everyone in your LightMesh organization sign in with your company Okta instead of (or in addition to) personal LightMesh passwords and Google/Microsoft linking.
Okta is not a personal sign-in method you add from the Google/Microsoft list. It is configured once by organization Owners or Administrators and applies to all members.
Prerequisites
Before you start, confirm:
| Requirement | Details |
|---|---|
| Subscription | Team plan or higher. Free or lower tiers see an upgrade message instead of editable settings. |
| Role | Owner or Administrator in the organization you are configuring. |
| Okta access | Ability to create an OIDC app integration in your Okta Admin Console. |
Overview of the setup flow
- Create an OIDC Web Application in Okta.
- Copy Organization ID and Redirect URI from LightMesh.
- Enter Okta domain, Client ID, and Client Secret in LightMesh.
- Save → Test connection → Enable SSO.
- Share the organization login link with your team.
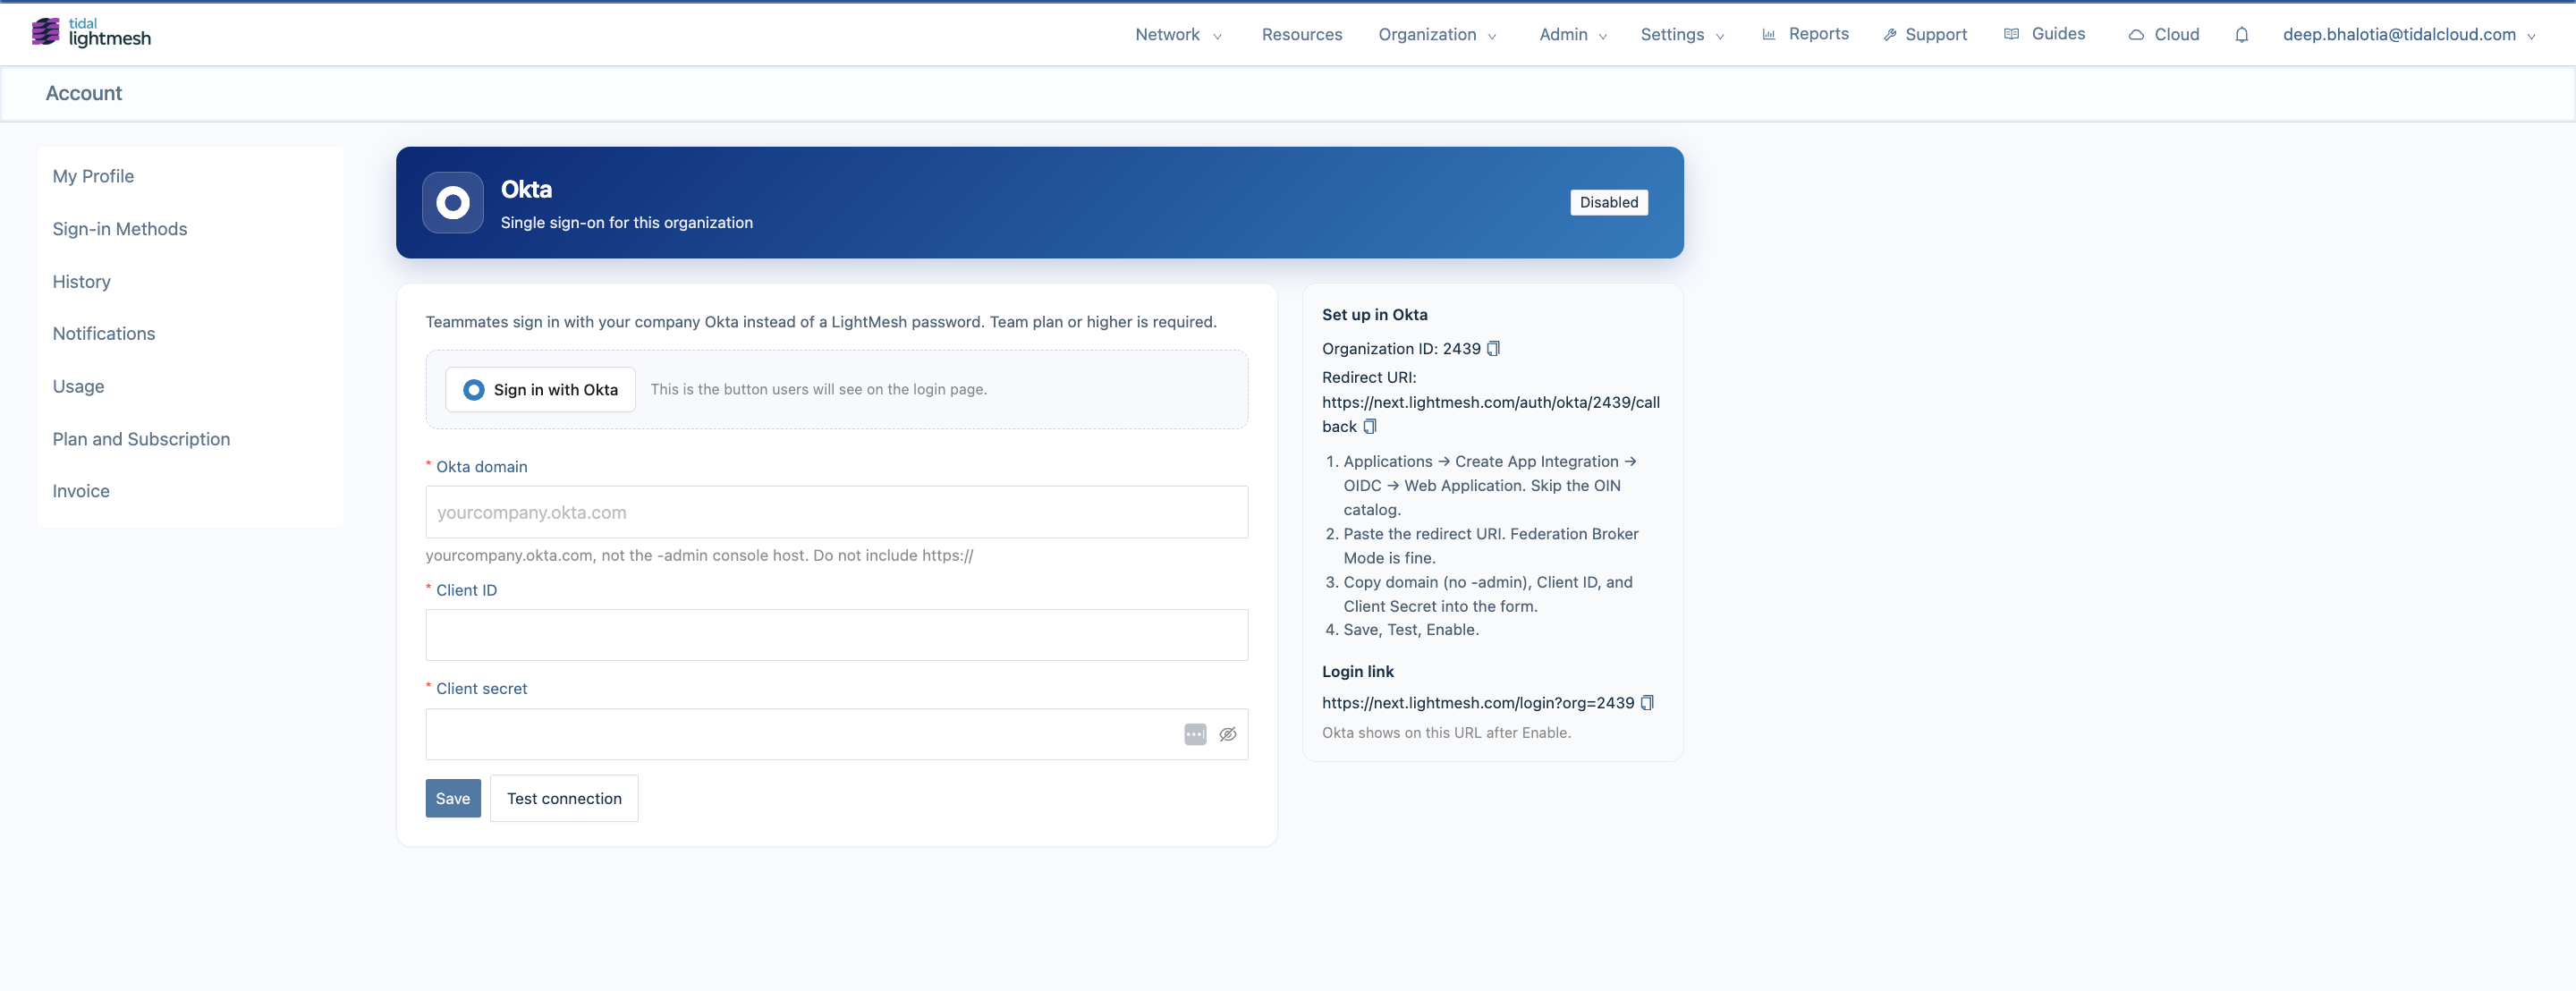
Step 1 — Open Okta SSO settings in LightMesh
- Sign in to next.lightmesh.com as an organization Owner or Administrator.
- Go to Account → Sign-in Methods (
/account/sign-in-methods). - Scroll to Organization SSO.
- Click Configure Okta SSO.
You land on /account/sso — the Okta configuration page.
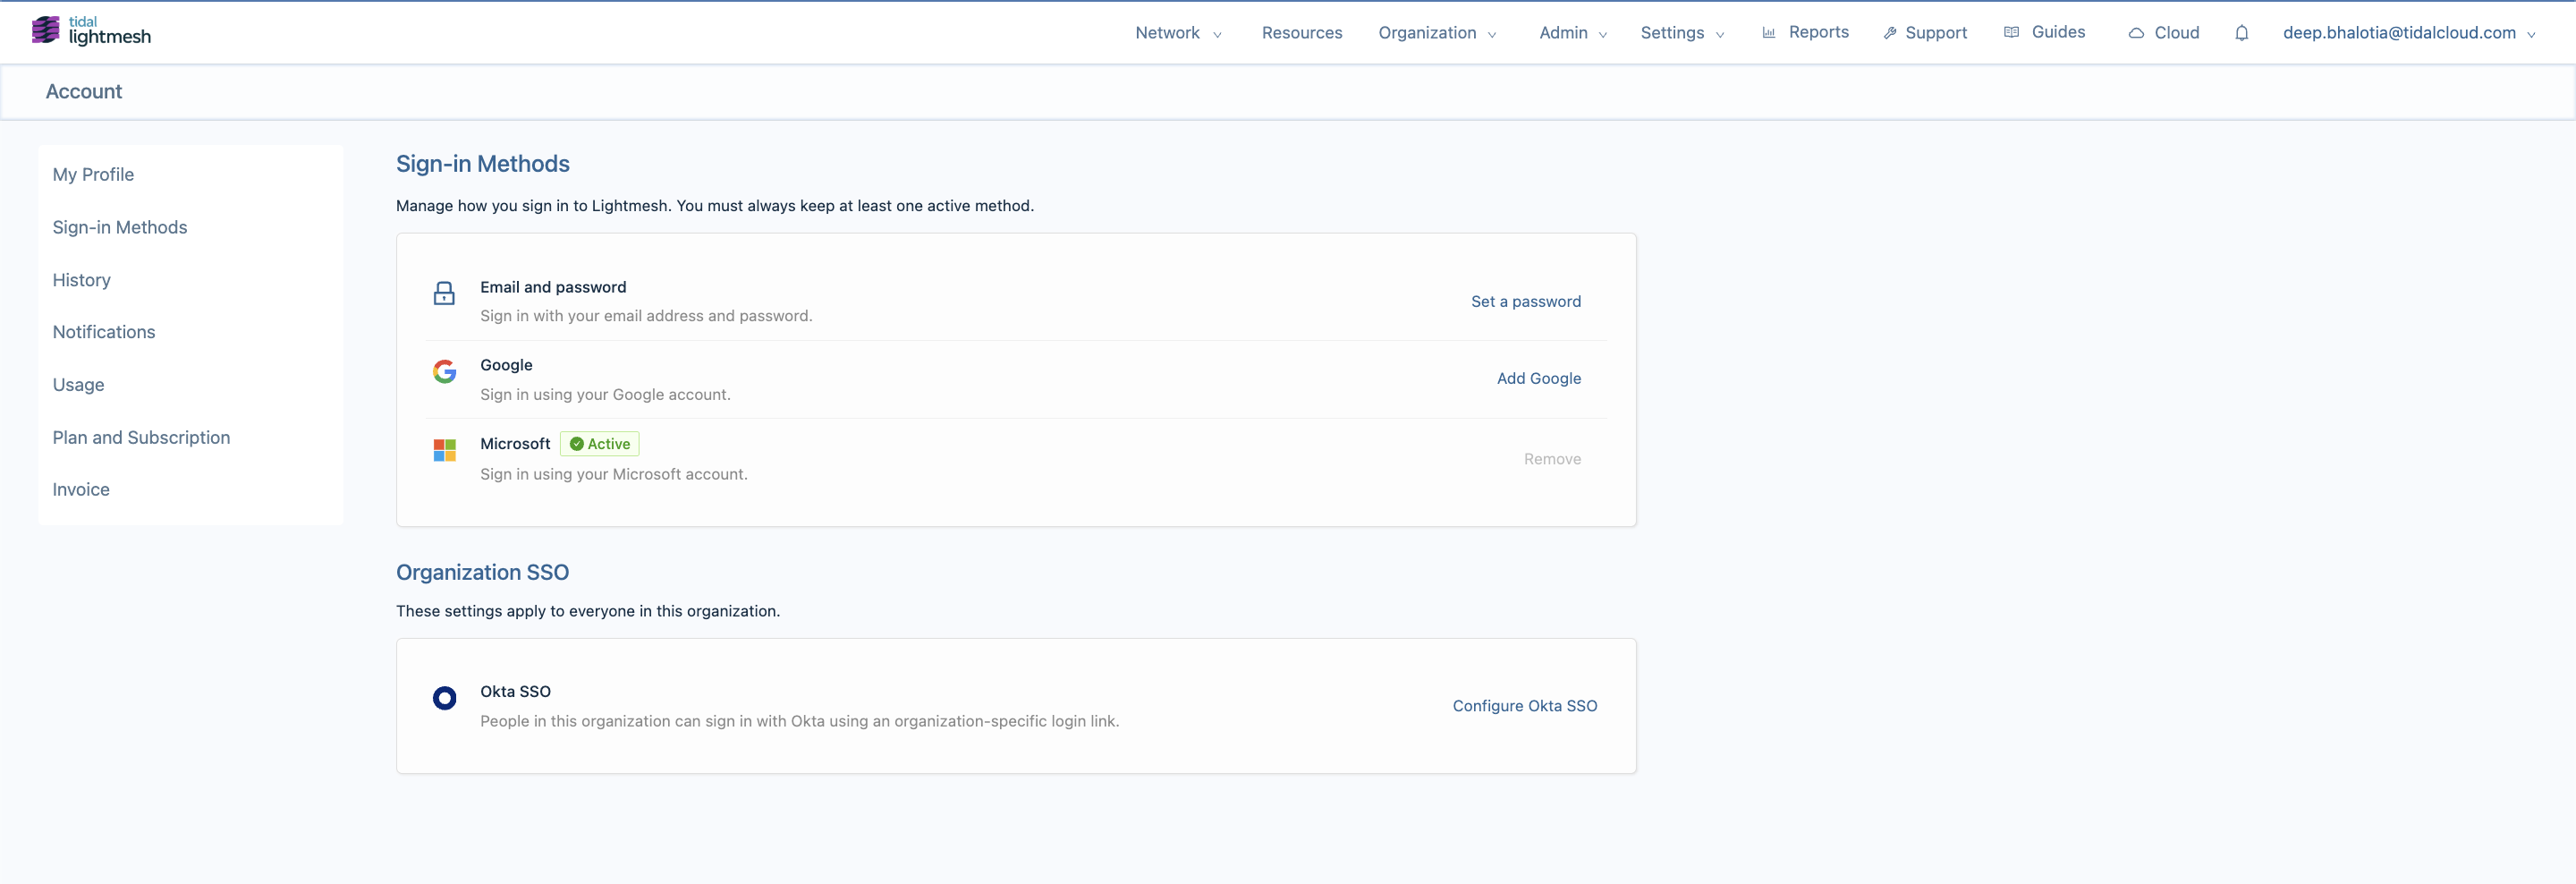
Step 2 — Note your Organization ID and Redirect URI
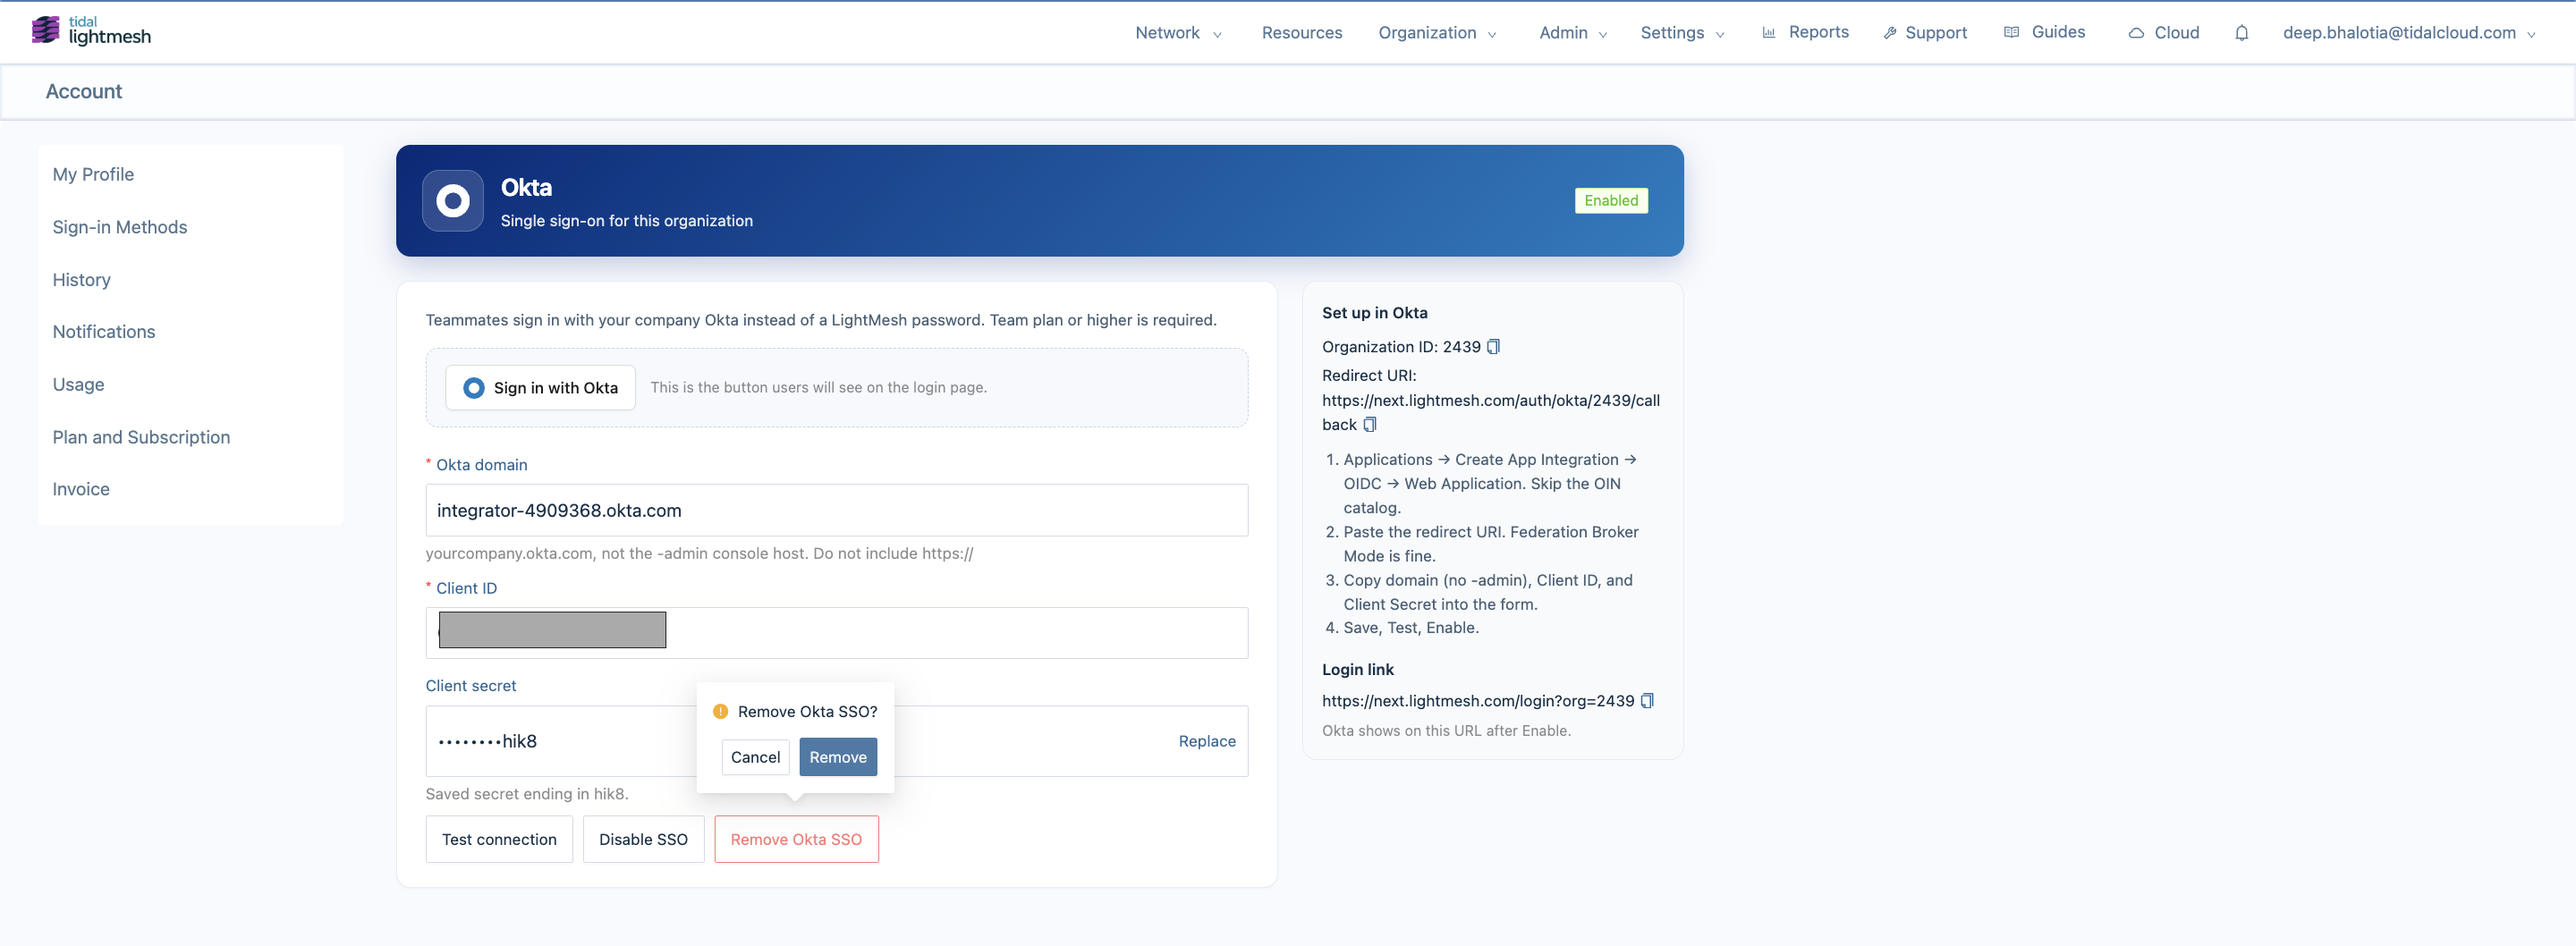
On the Okta configuration page, the Set up in Okta sidebar on the right shows two values you need when creating the Okta app. Both are copyable:
- Organization ID — numeric ID for your LightMesh organization.
- Redirect URI — callback URL LightMesh sends users to after Okta authentication.
Redirect URI format:
https://next.lightmesh.com/auth/okta/{organizationId}/callbackUse the exact URI shown in your sidebar. Staging or local dev URLs differ if you are not on production.
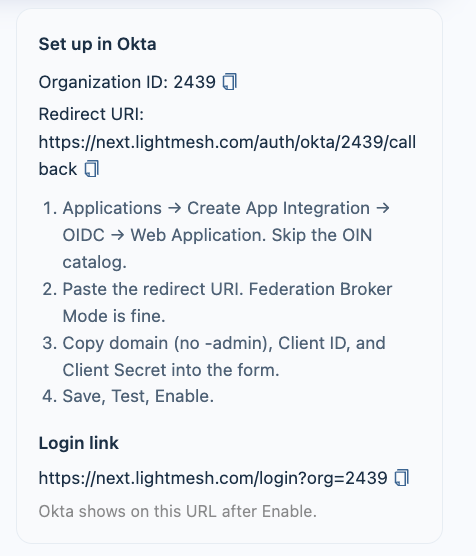
Step 3 — Create an app integration in Okta
In the Okta Admin Console:
- Go to Applications → Applications.
- Click Create App Integration.
- Choose OIDC — OpenID Connect as the sign-in method.
- Choose Web Application as the application type.
- Click Next. Skip browsing the OIN catalog — create a custom integration.
On the app settings page:
- App integration name — e.g.
LightMeshorTidal LightMesh IPAM. - Sign-in redirect URIs — paste the Redirect URI from LightMesh (Step 2).
- Sign-out redirect URIs — optional for basic setup.
- Controlled access — assign who can use the app per your Okta policy.
- Federation Broker Mode — acceptable; LightMesh uses standard OIDC.
- Click Save.
After saving, Okta shows:
- Client ID — copy for LightMesh.
- Client secret — copy for LightMesh (shown once; store securely).
Also note your Okta domain — e.g. yourcompany.okta.com. Use the standard domain, not the -admin console host, and do not include https://.
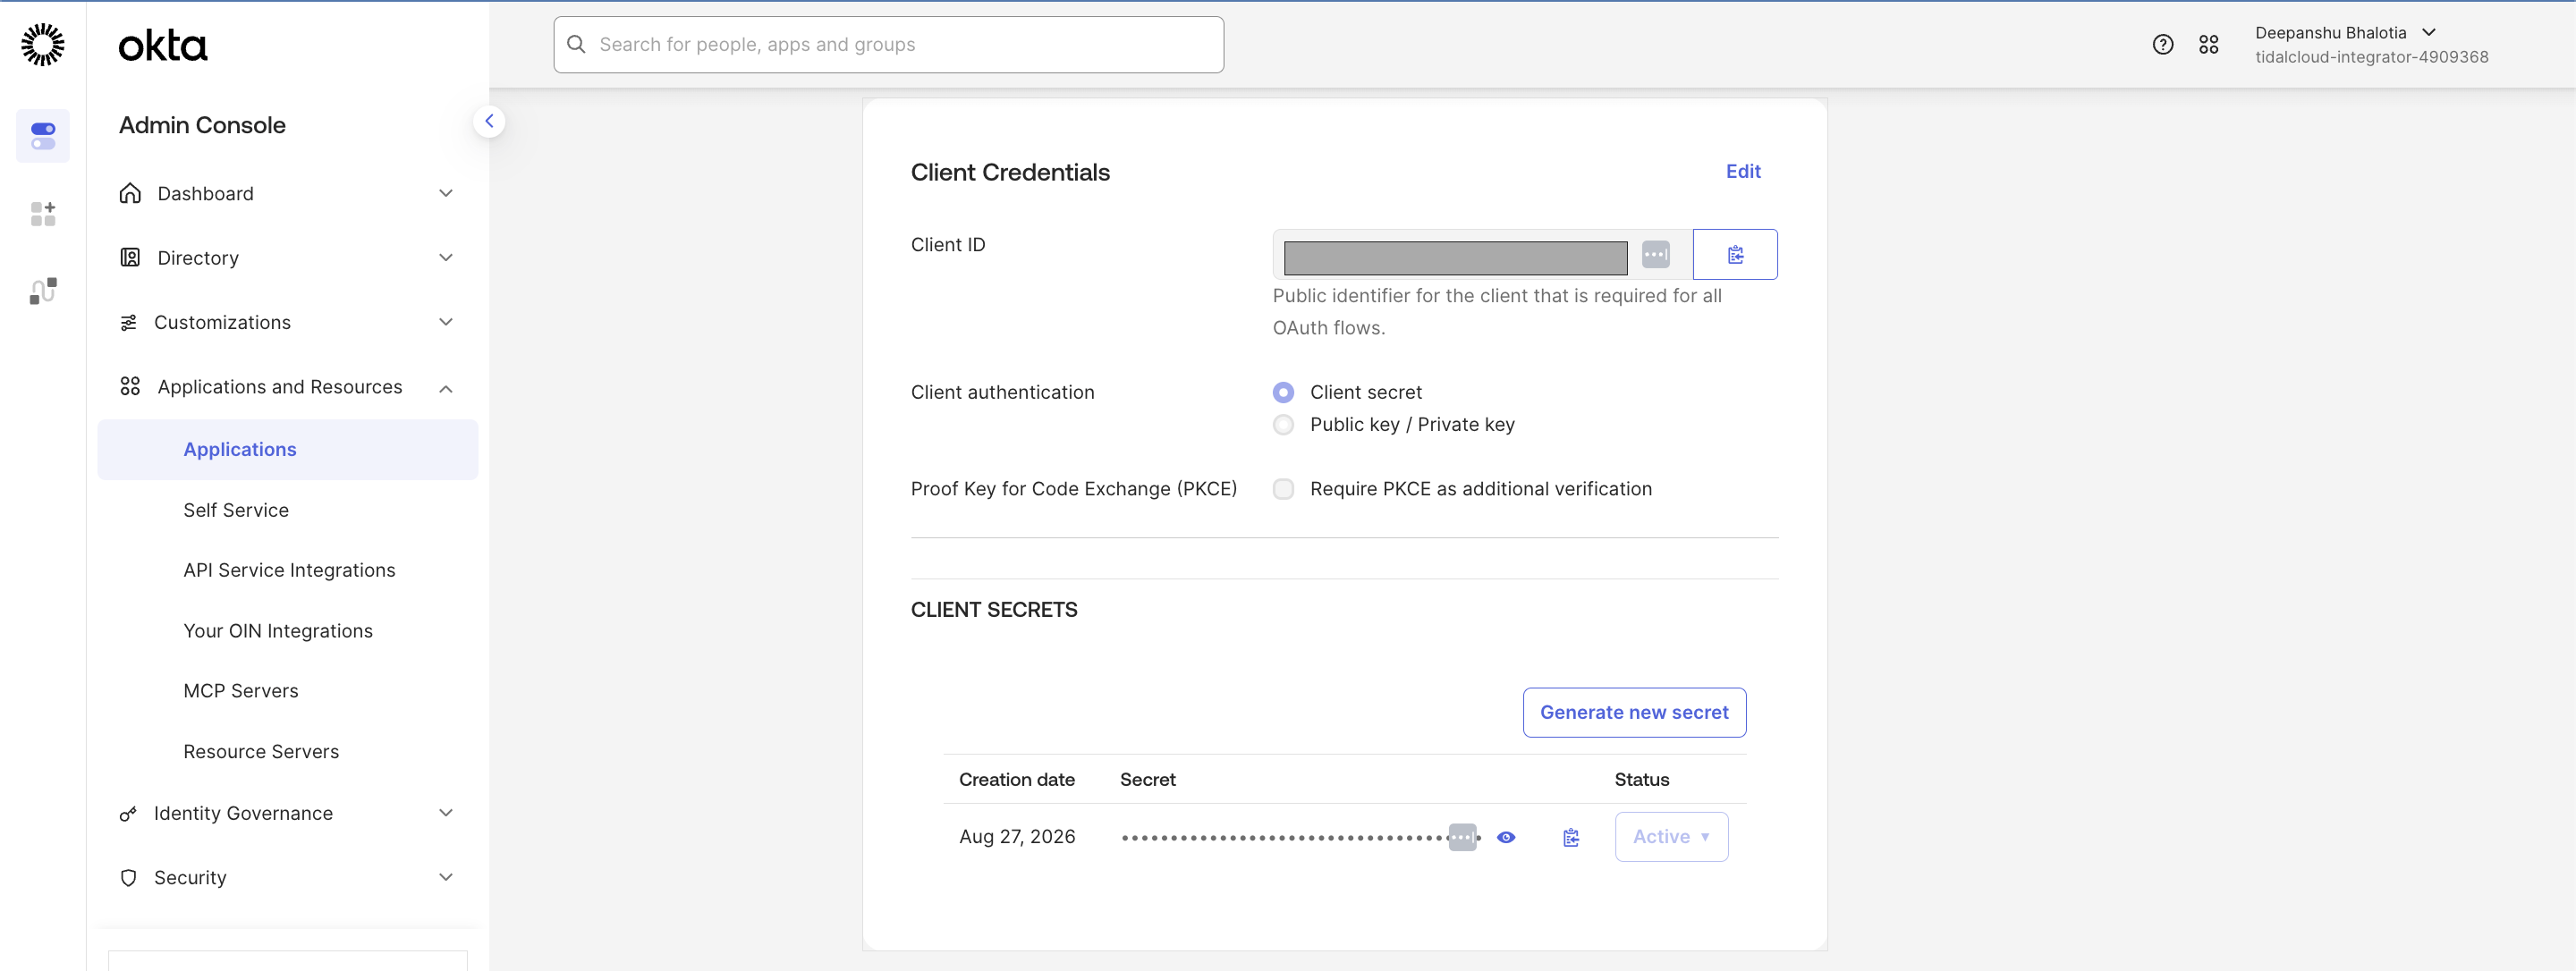
Step 4 — Enter credentials in LightMesh
Back on Account → Configure Okta SSO (/account/sso):
- Okta domain — enter
yourcompany.okta.com(nohttps://, notyourcompany.okta.com-admin). - Client ID — paste from Okta.
- Client secret — paste from Okta (required on first save).
- Click Save.
On success you see a message such as Okta SSO saved. Test it before enabling. The configuration is stored but not yet active for users until you enable it.
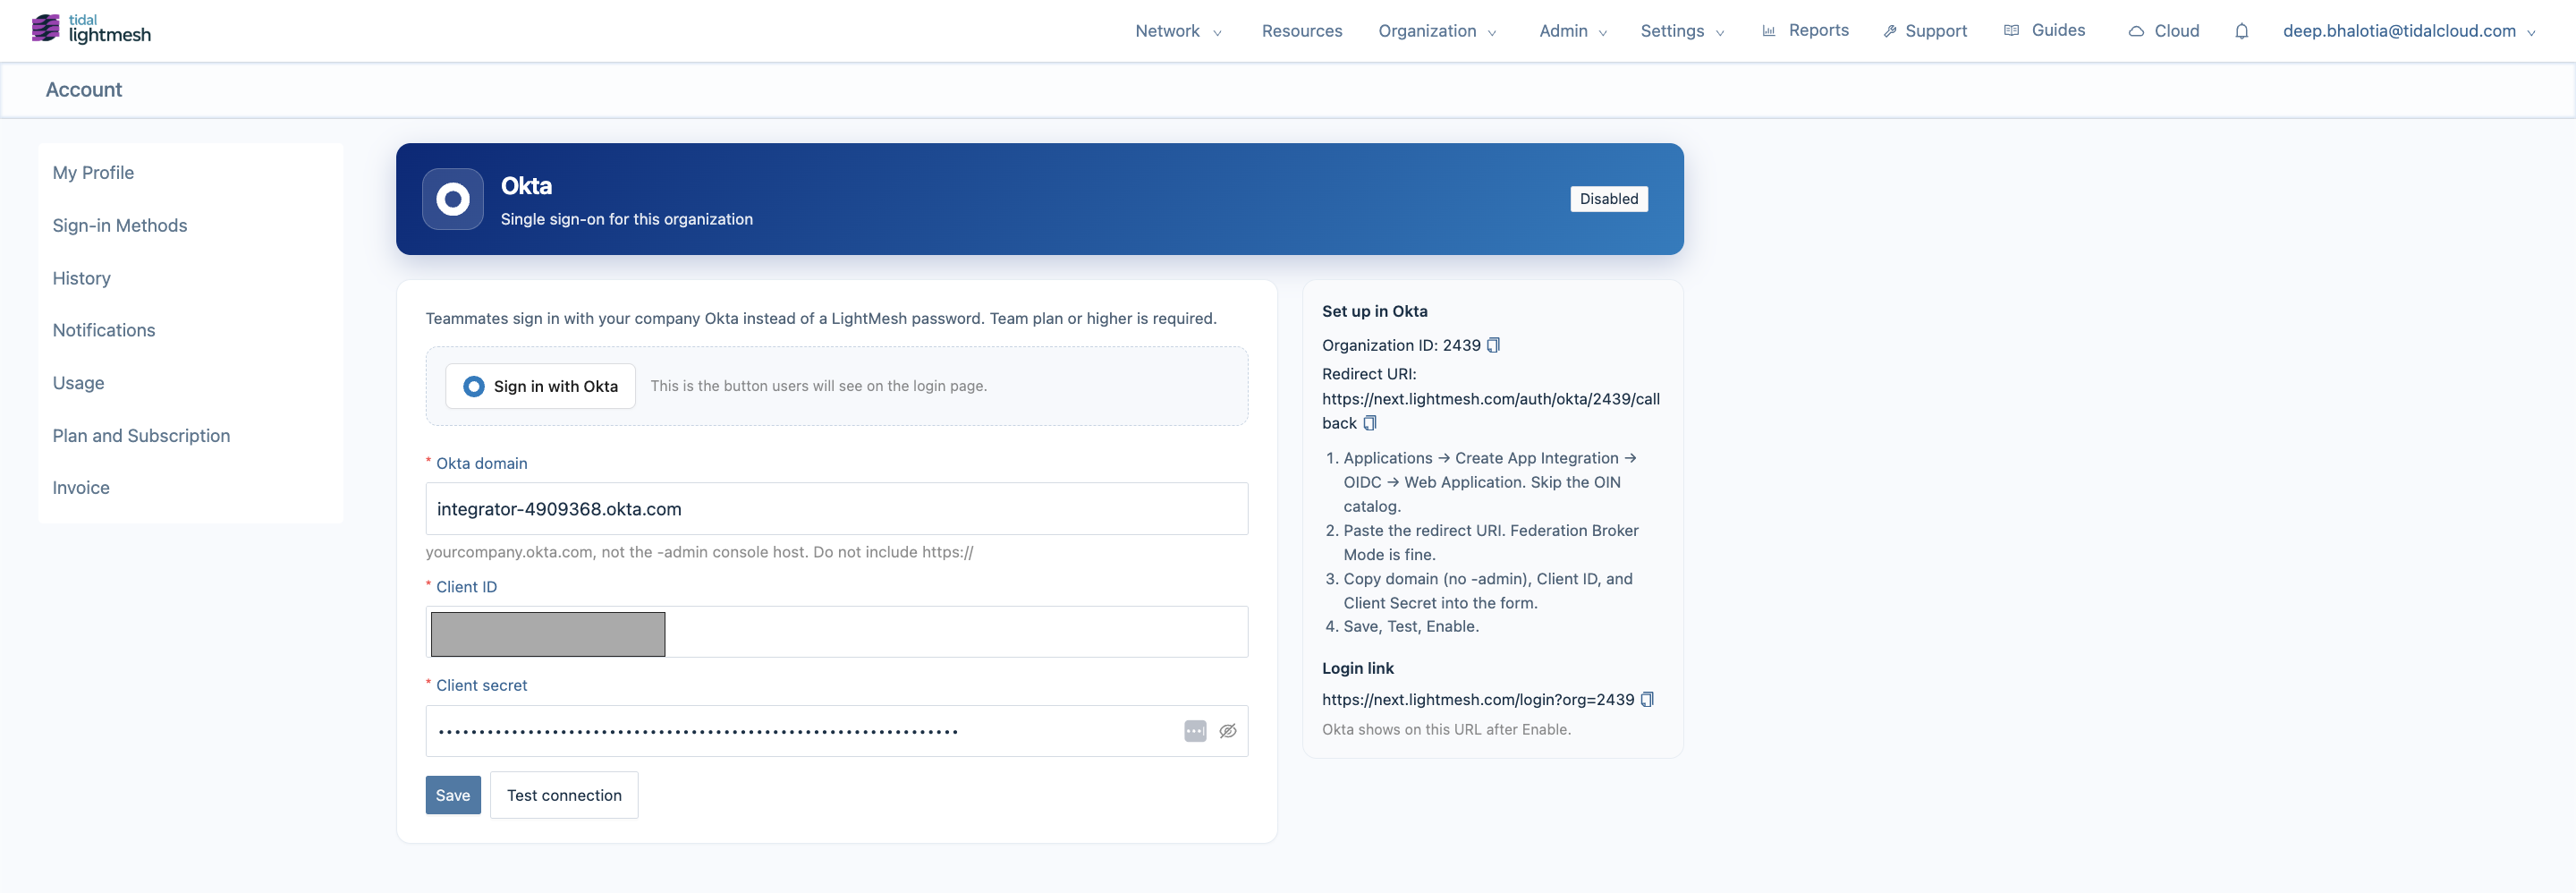
Step 5 — Test the connection
Before enabling SSO for your organization:
- Click Test connection.
- LightMesh validates the domain, client ID, and secret against Okta’s OIDC discovery endpoints.
If the test succeeds, you see a success message such as Okta configuration looks valid.
If the test fails, check:
- Domain spelling (no
-admin, nohttps://). - Client ID and secret match the Okta app.
- Redirect URI in Okta exactly matches the URI in the LightMesh sidebar.
- The Okta app is assigned to the users who will sign in.
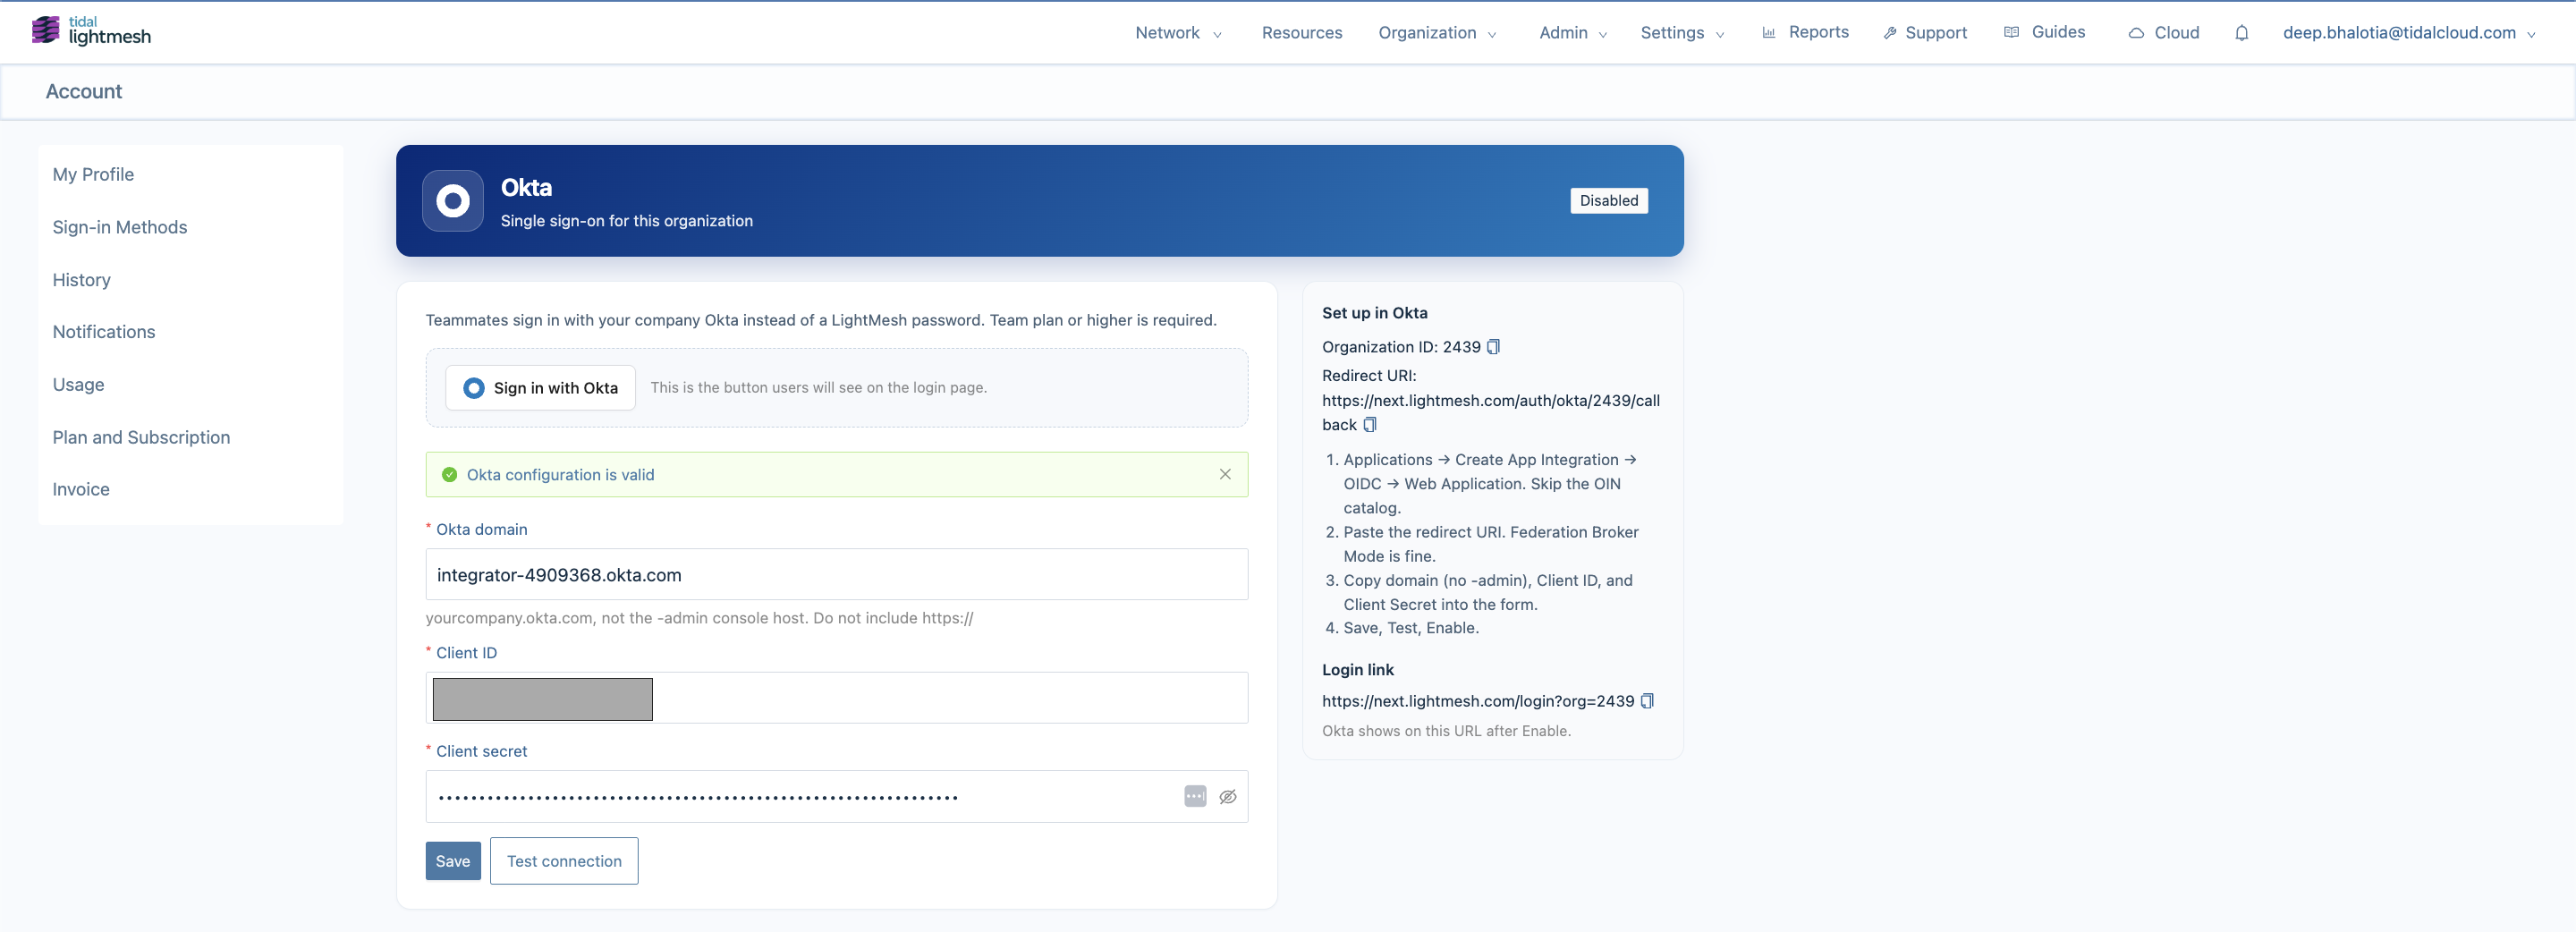
Step 6 — Enable SSO
After a successful test:
- Click Enable SSO.
- The hero tag changes from Disabled to Enabled.
Users can now sign in with Okta using your organization’s login link (Step 7). The login page shows a Sign in with Okta button for URLs that include your organization context.
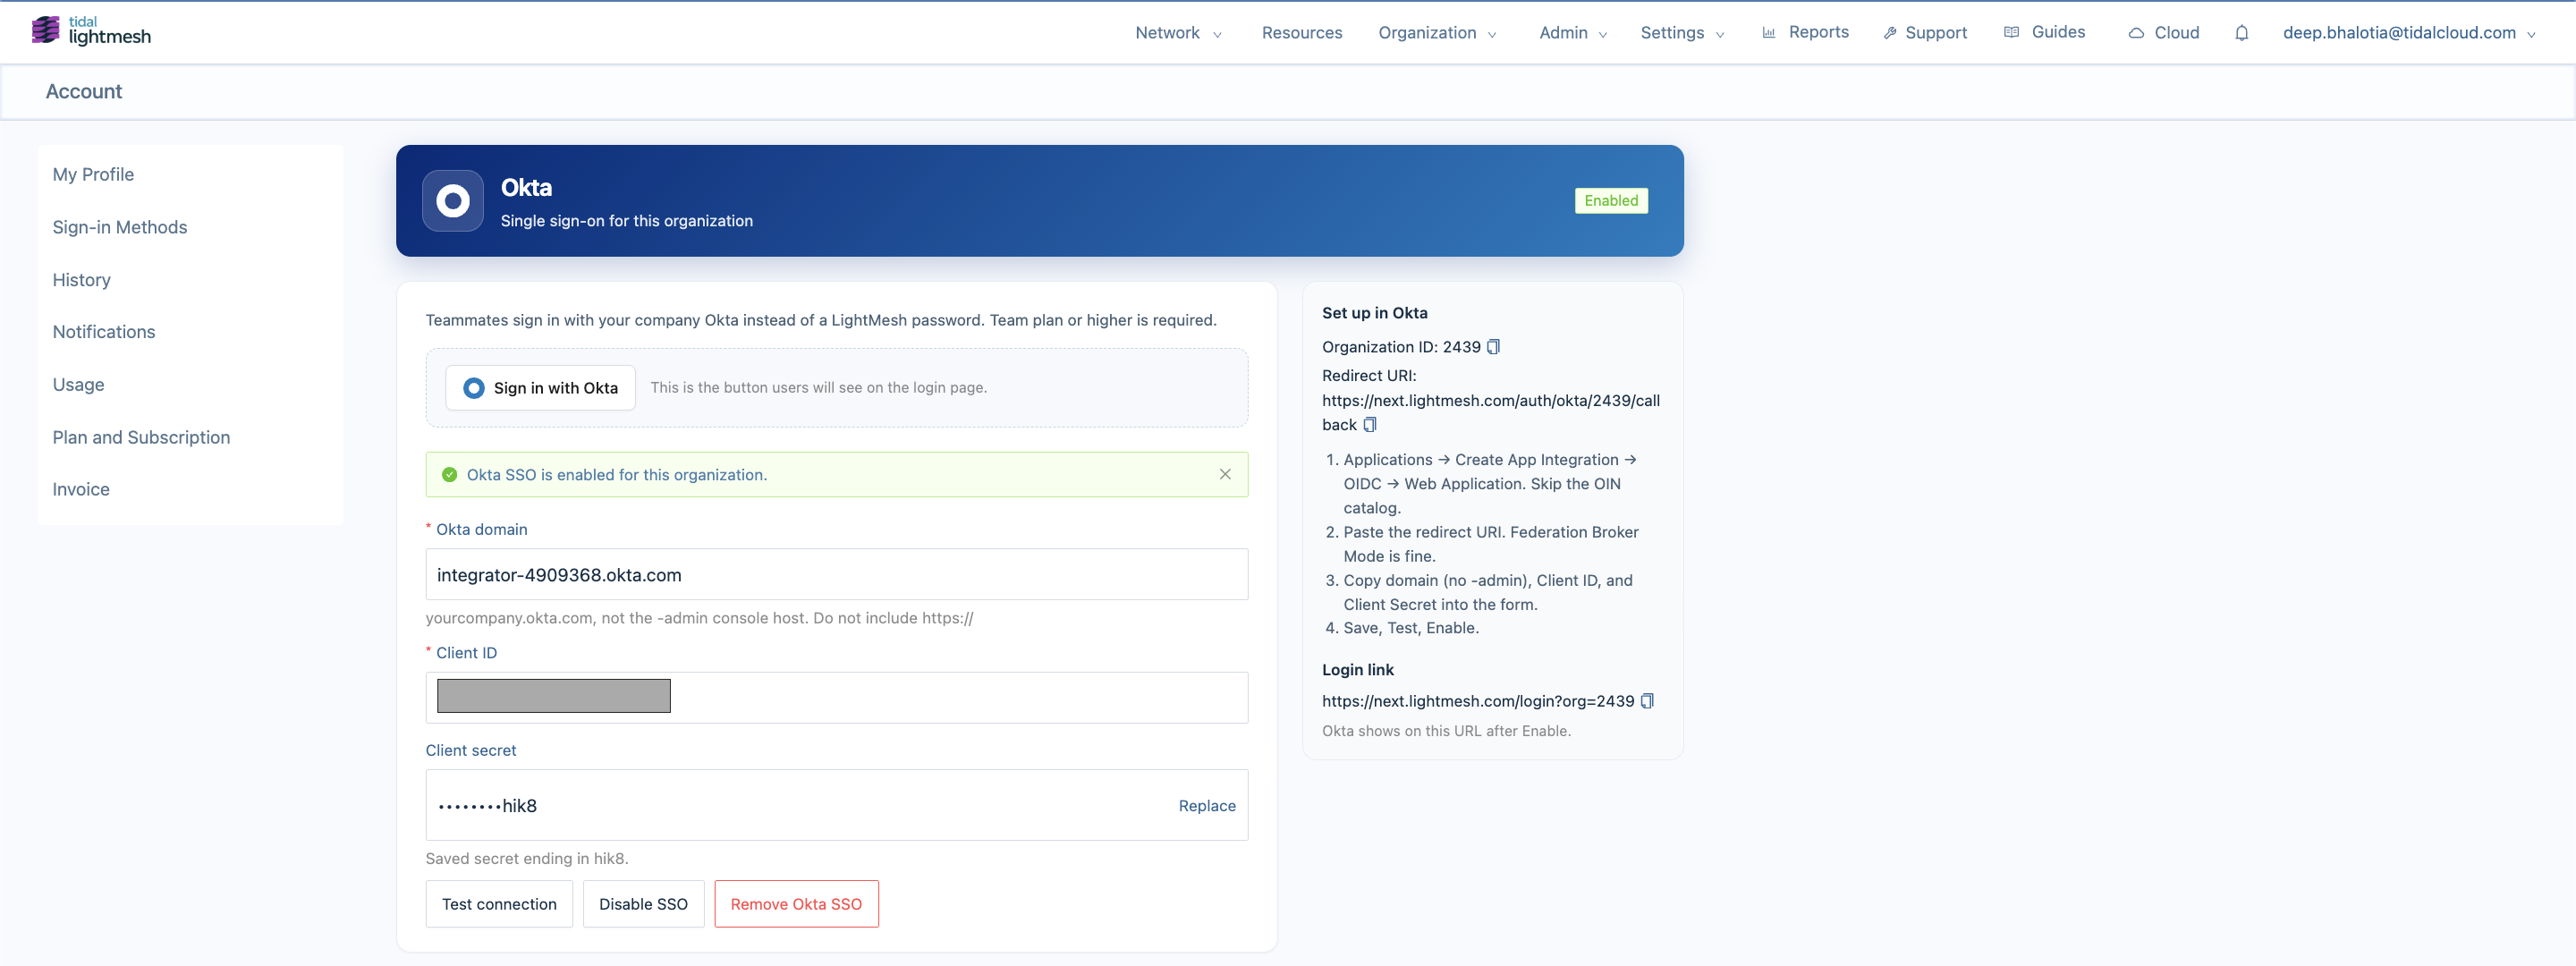
Step 7 — Share the organization login link
The sidebar shows a Login link after configuration:
https://next.lightmesh.com/login?org={organizationId}Share this URL with teammates. Okta sign-in appears on this page after SSO is Enabled.
Users who bookmark the generic login page may not see the Okta button unless they use the organization-specific link or your org is selected.
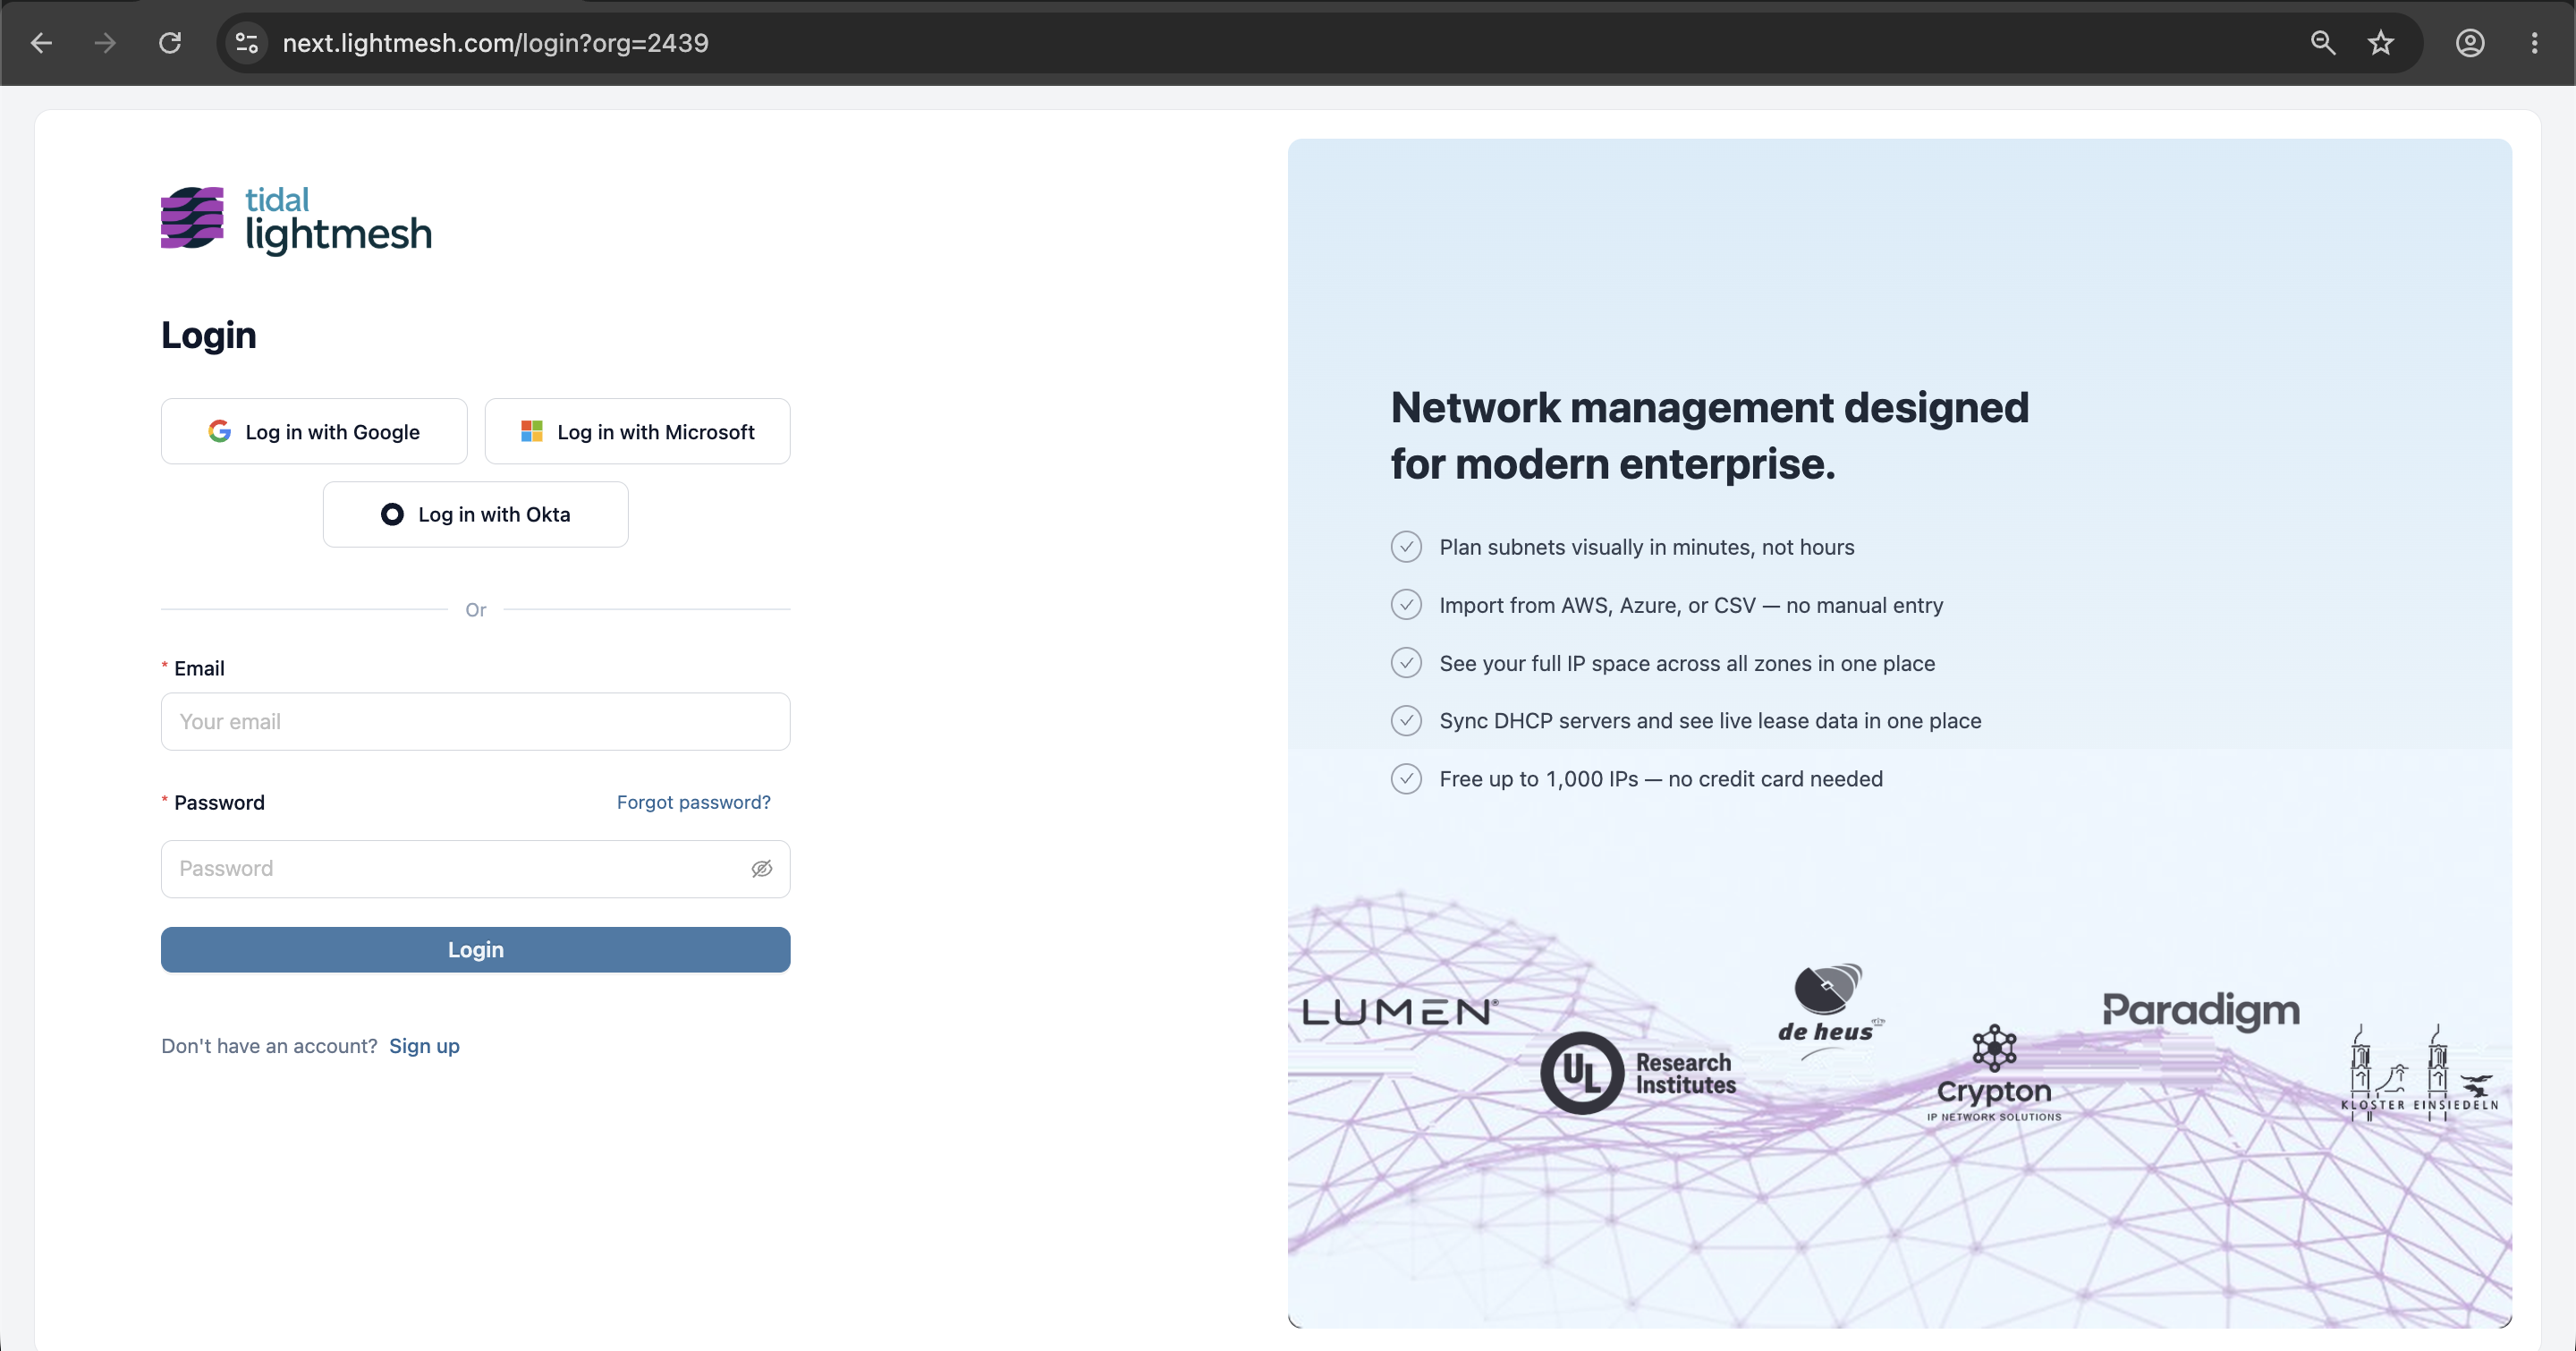
What users see
- Before Enable: Okta settings exist in LightMesh but users cannot sign in with Okta.
- After Enable: The login page preview on the config page matches what users see — a Sign in with Okta button with the Okta mark.
- Sign-in Methods page: All users see Okta SSO under Organization SSO with an Active tag when enabled. Only owners/admins see Configure Okta SSO.
Teammates sign in with Okta using their corporate identity. This is separate from linking a personal Google or Microsoft account on the same Sign-in Methods page.
Manage existing configuration
After initial setup, use these actions on Account → Configure Okta SSO (/account/sso):
Update domain or Client ID
Edit the fields and click Save. Run Test connection again before relying on the change in production.
Rotate the client secret
- Generate a new secret in Okta for the same app integration.
- In LightMesh, click Replace next to the saved client secret.
- Enter the new secret and click Save.
- Run Test connection.
Disable SSO temporarily
Click Disable SSO to stop Okta sign-in without deleting configuration. The tag returns to Disabled; you can Enable SSO again later without re-entering credentials.
Remove Okta SSO entirely
Click Remove Okta SSO and confirm. This:
- Disables Okta sign-in for the organization.
- Deletes the stored SSO configuration.
- Unlinks Okta accounts for all organization members (
oktaIdcleared).
Confirm only if you intend to fully tear down Okta integration. Members need another sign-in method (password, Google, or Microsoft) to access LightMesh.
Plan and permission gates
| Situation | What you see |
|---|---|
| Below Team plan | Info alert: Upgrade to Team plan or higher to use Okta SSO. Form and actions are disabled. |
| Team+ but not Owner/Admin | Info alert: Only organization owners and administrators can configure Okta SSO. |
| Self-hosted deployment | SSO configuration UI is not available; see Self-Hosted Authentication. |
Upgrade via Account → Plan and Subscription if your organization needs Okta on SaaS.
Troubleshooting
Common Okta SSO setup and login issues:
Test connection fails
- Verify redirect URI character-for-character in Okta.
- Confirm the Okta app is Active and assigned to test users.
- Check domain format:
company.okta.com, notcompany.okta.com-admin. - Rotate the client secret in Okta and Replace in LightMesh if the secret was lost or expired.
Okta button missing on login page
- Confirm SSO is Enabled (not just saved).
- Use the organization login link:
/login?org={organizationId}. - Confirm the organization is on Team plan or higher.
Users cannot access Configure Okta SSO
Only Owners and Administrators can configure SSO. Other roles should ask an admin or use personal sign-in methods (Google, Microsoft, email/password).