New API Key
This guide walks you through adding API keys in LightMesh. API keys provide secure access to LightMesh’s API and can also be used for CLI access, enabling automated workflows and streamlined command-line operations. With the correct API key, users can perform a wide range of actions, including subnet management and data retrieval, directly from their applications or terminal.
1. Introduction
Follow the instructions to set up your API key efficiently and securely.
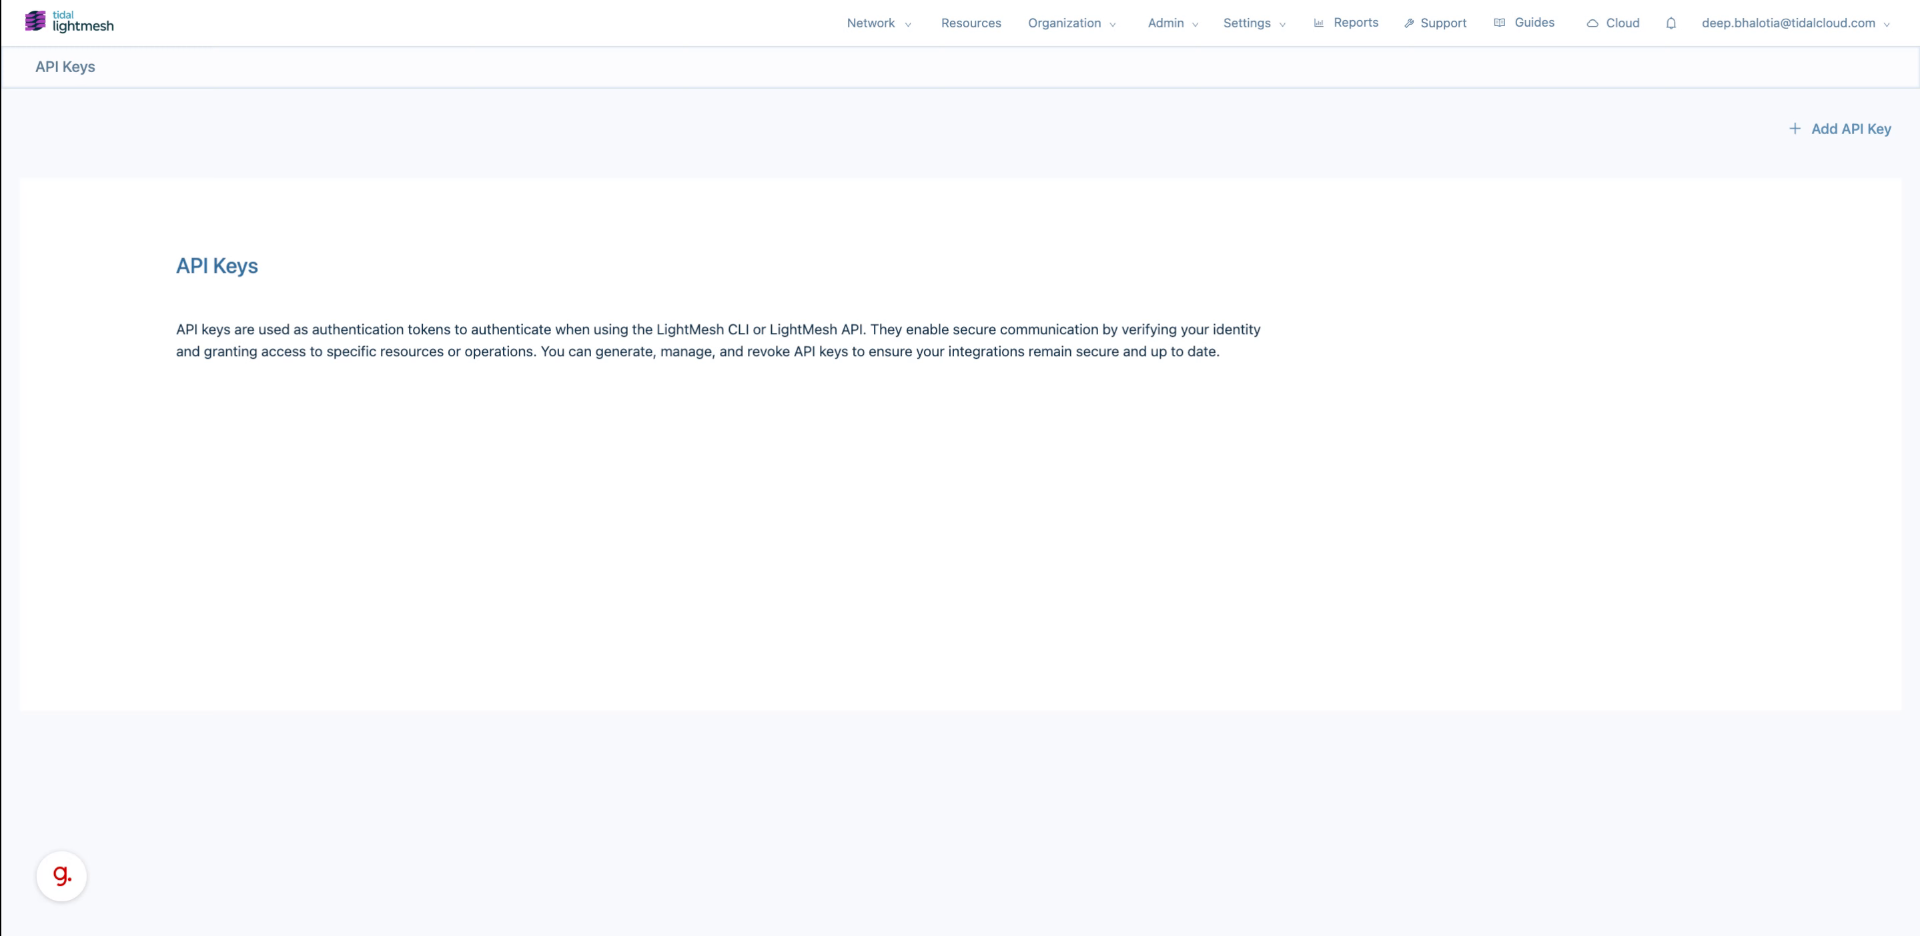
2. Click “Add API Key”
Initiate the API key creation process by clicking on “Add API Key”.

3. Click “Enter a name for the API key”
Name the API key by selecting “Enter a name for the API key”.

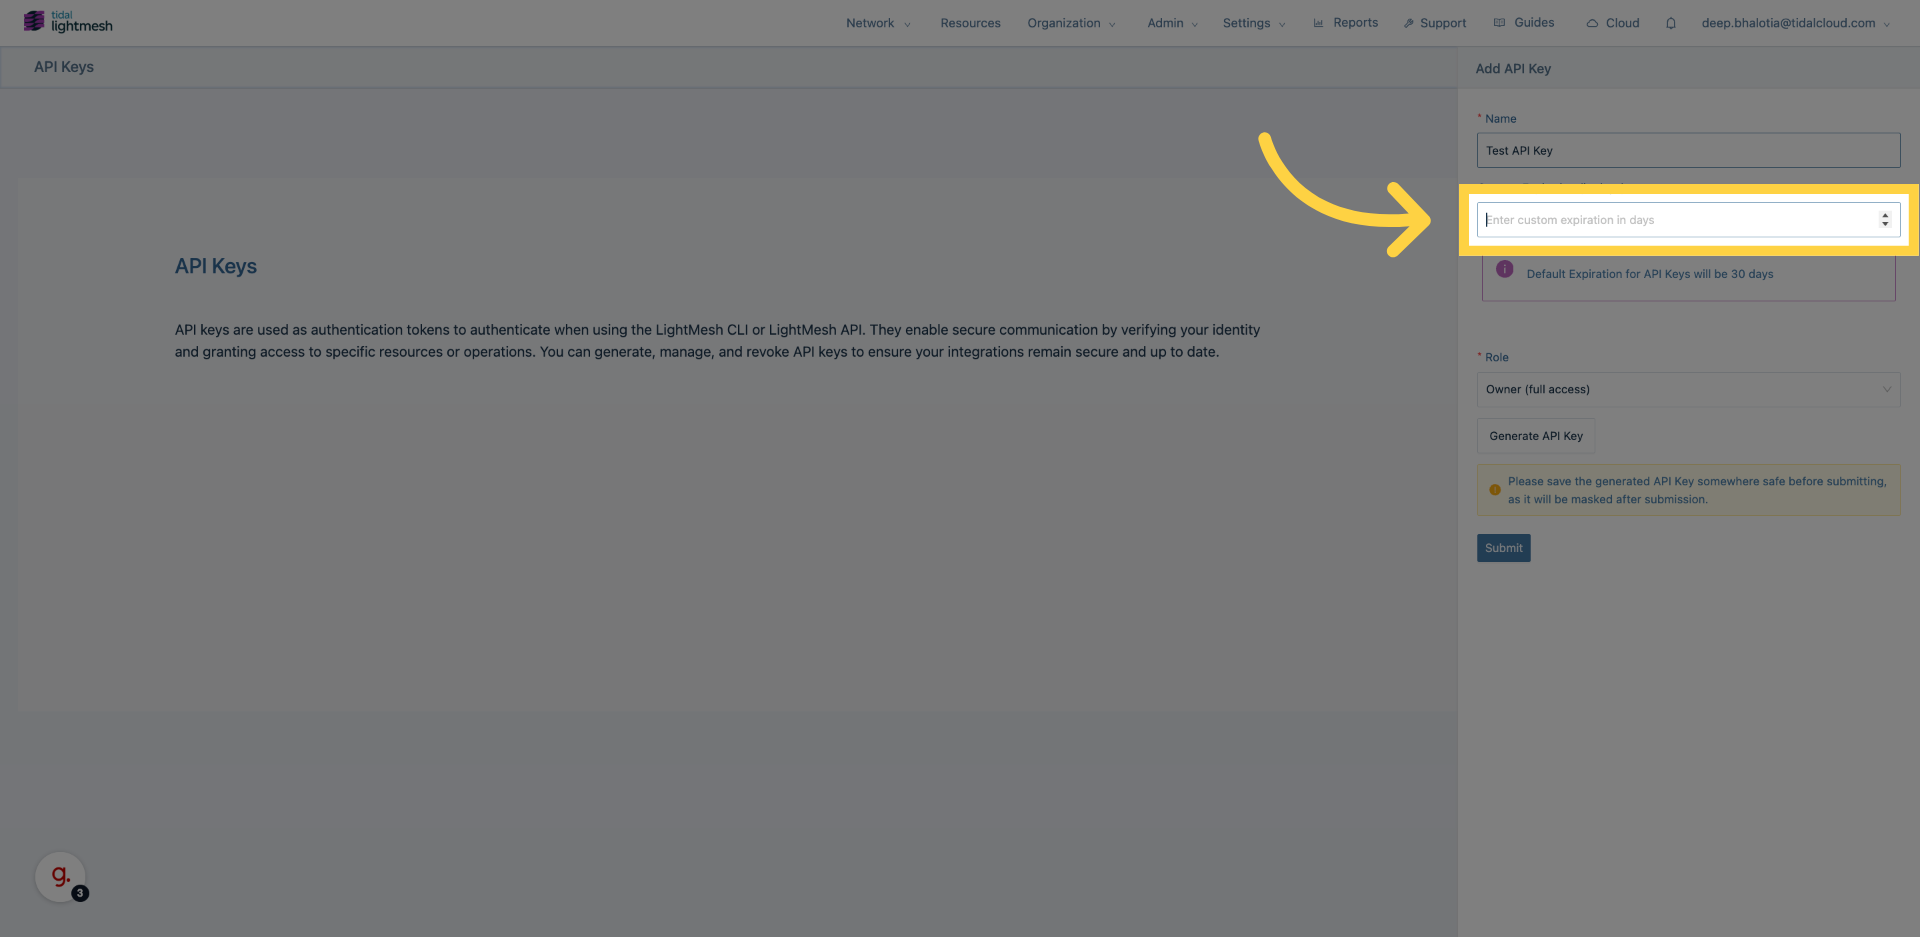
4. Click “Enter custom expiration in days”
Set a custom expiration period in days by clicking on “Enter custom expiration in days”.
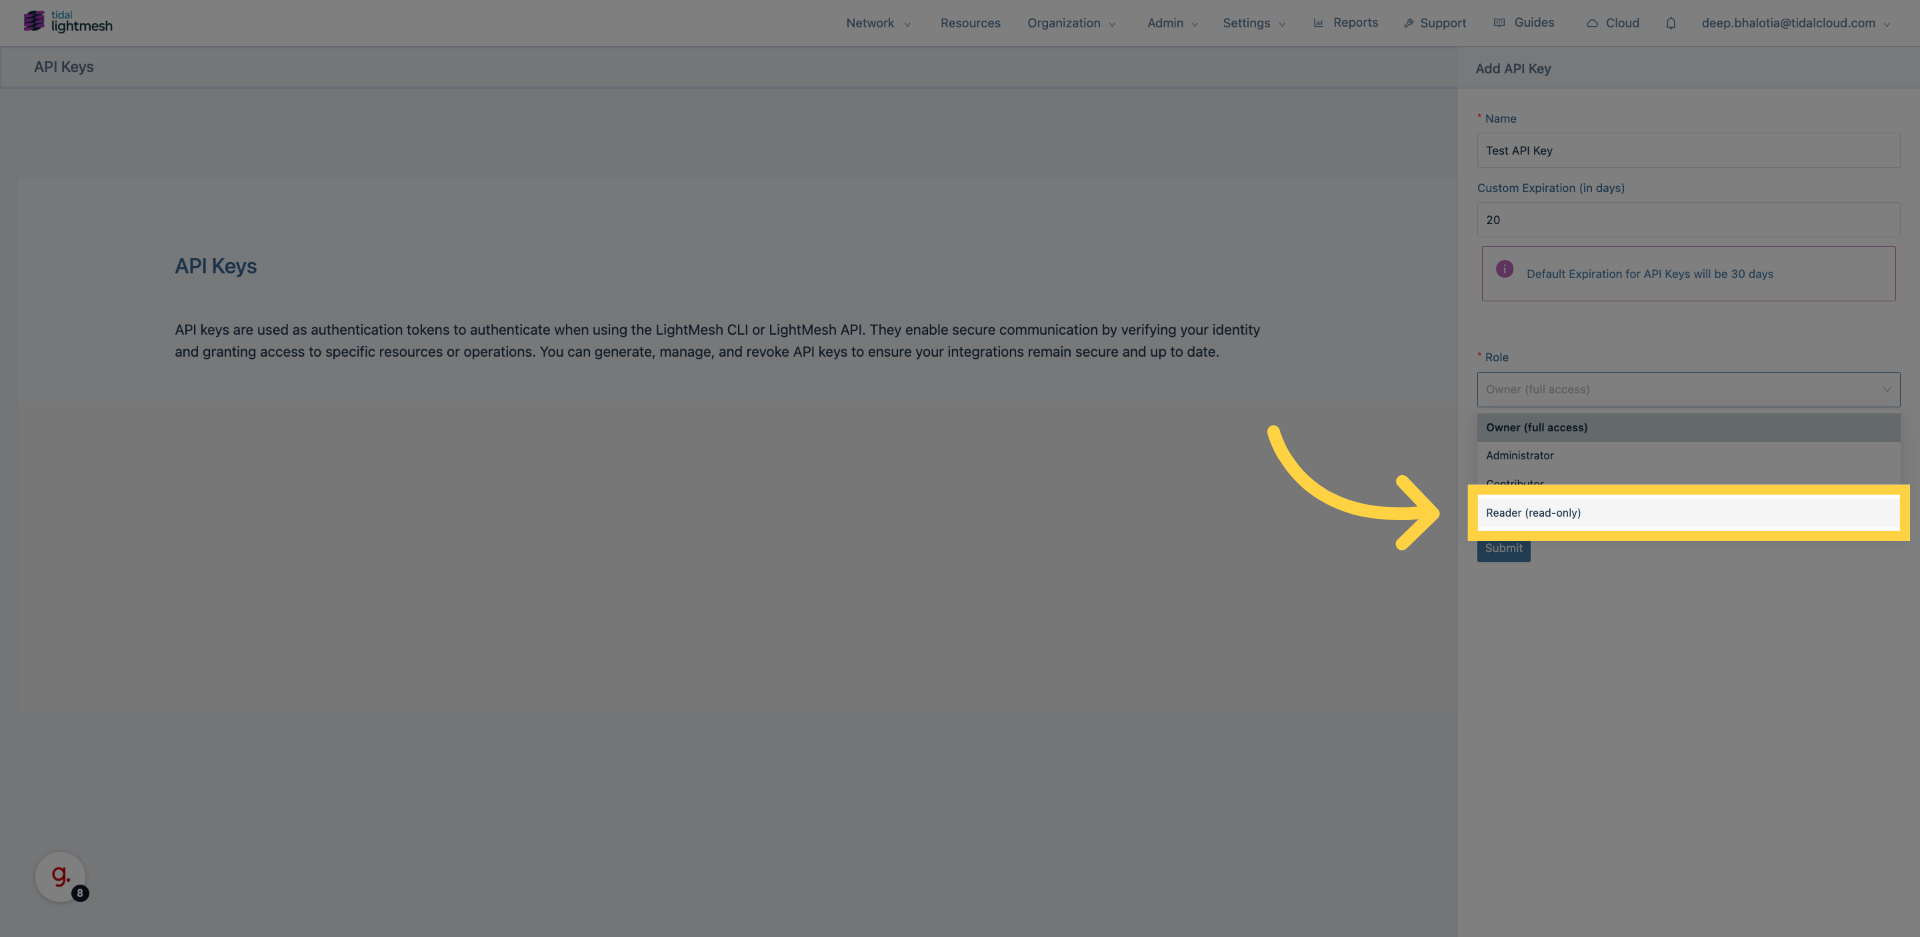
5. Click “Role”
Click “Role” to select the Access Level.
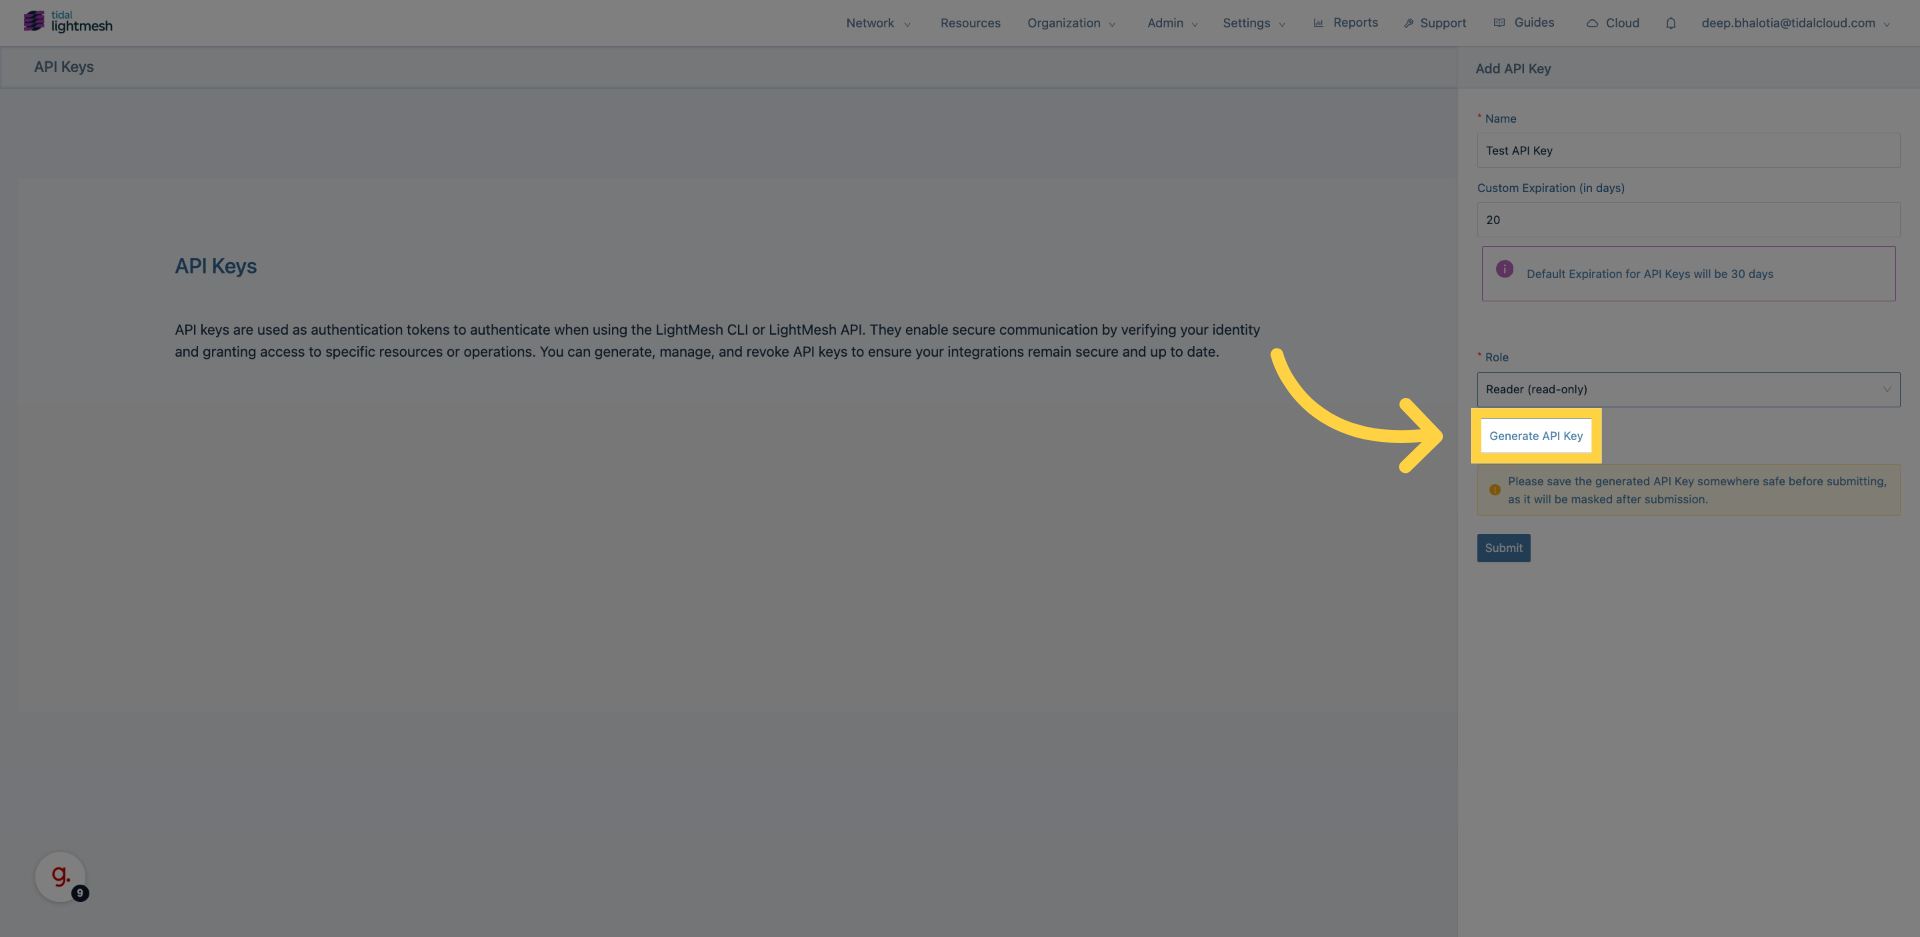
6. Click “Generate API Key”
Generate the API key by selecting “Generate API Key”.
Review the key details displayed and ensure to save the API key securely.
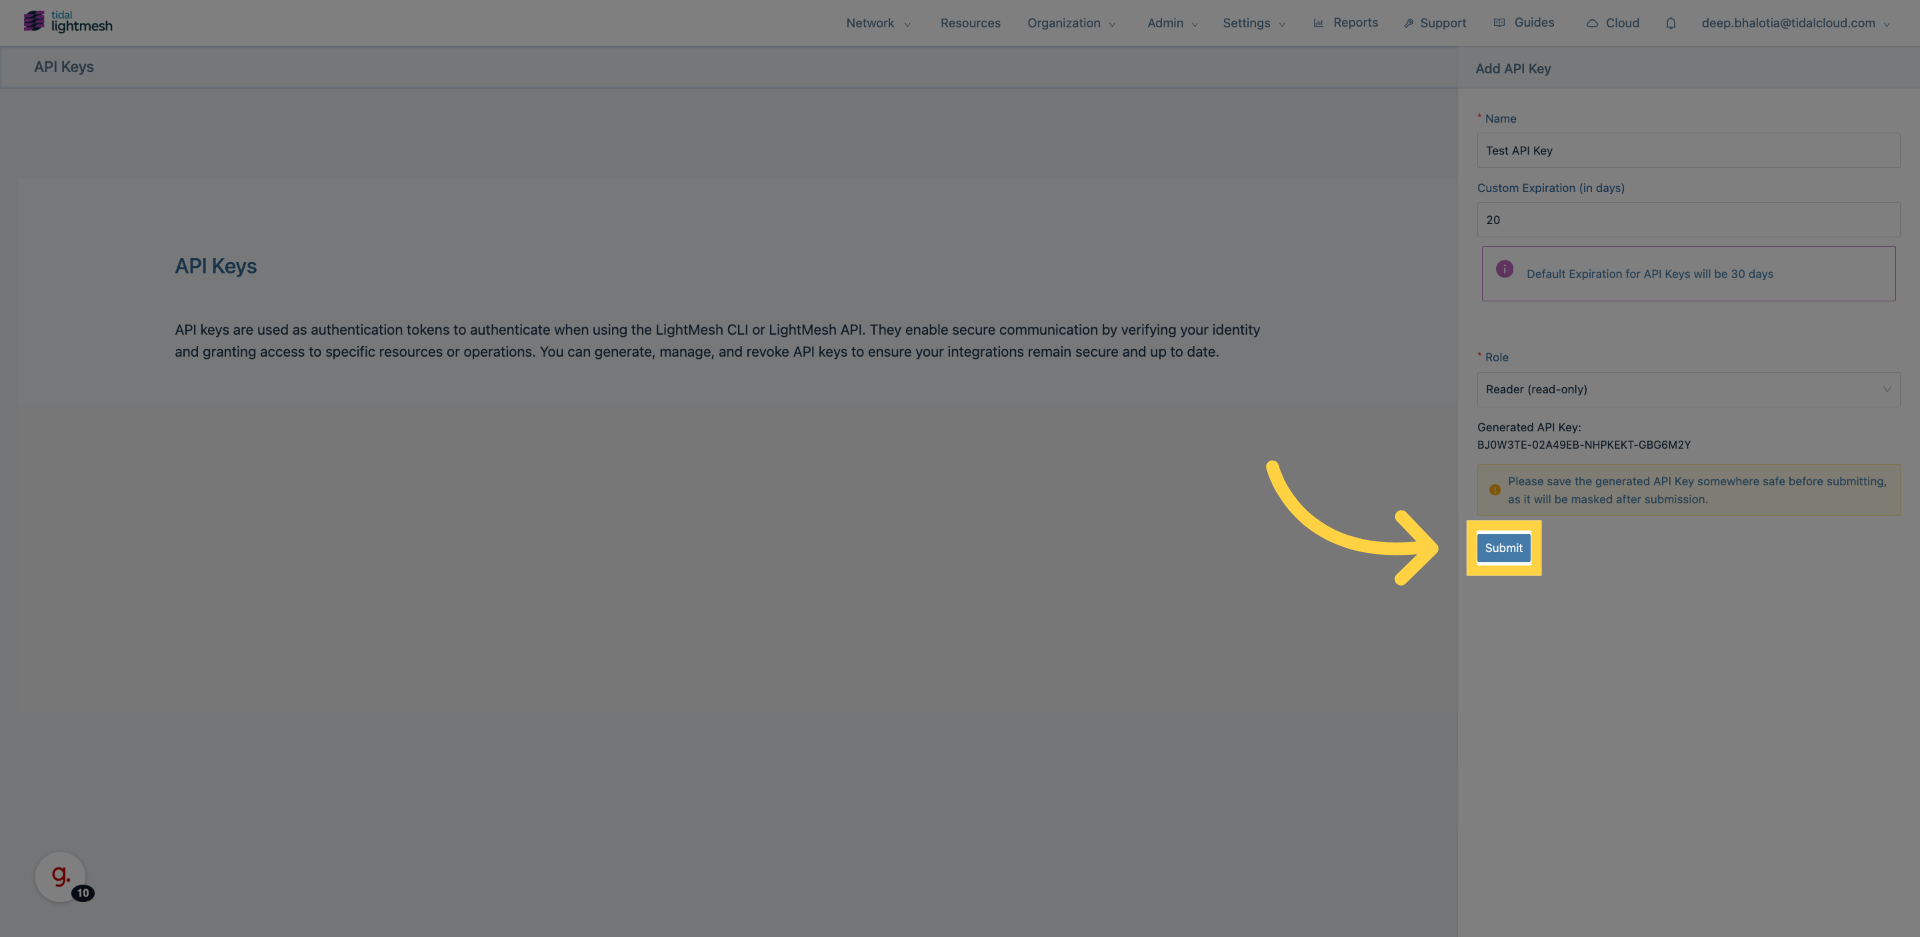
7. Click “Submit”
Finalize the API key creation process by clicking on “Submit”.
This guide covered the process of creating an API Key in Lightmesh, from initiating the key creation to finalizing and submitting it.