Edit Subnet
This guide provides quick video tutorials on managing subnets within LightMesh IPAM. Watch the steps below to learn essential tasks for editing the subnet.
1. Introduction
From updating descriptions to assigning subnets to various locations, departments, or teams, ensure all changes are made accurately and efficiently before saving your modifications.
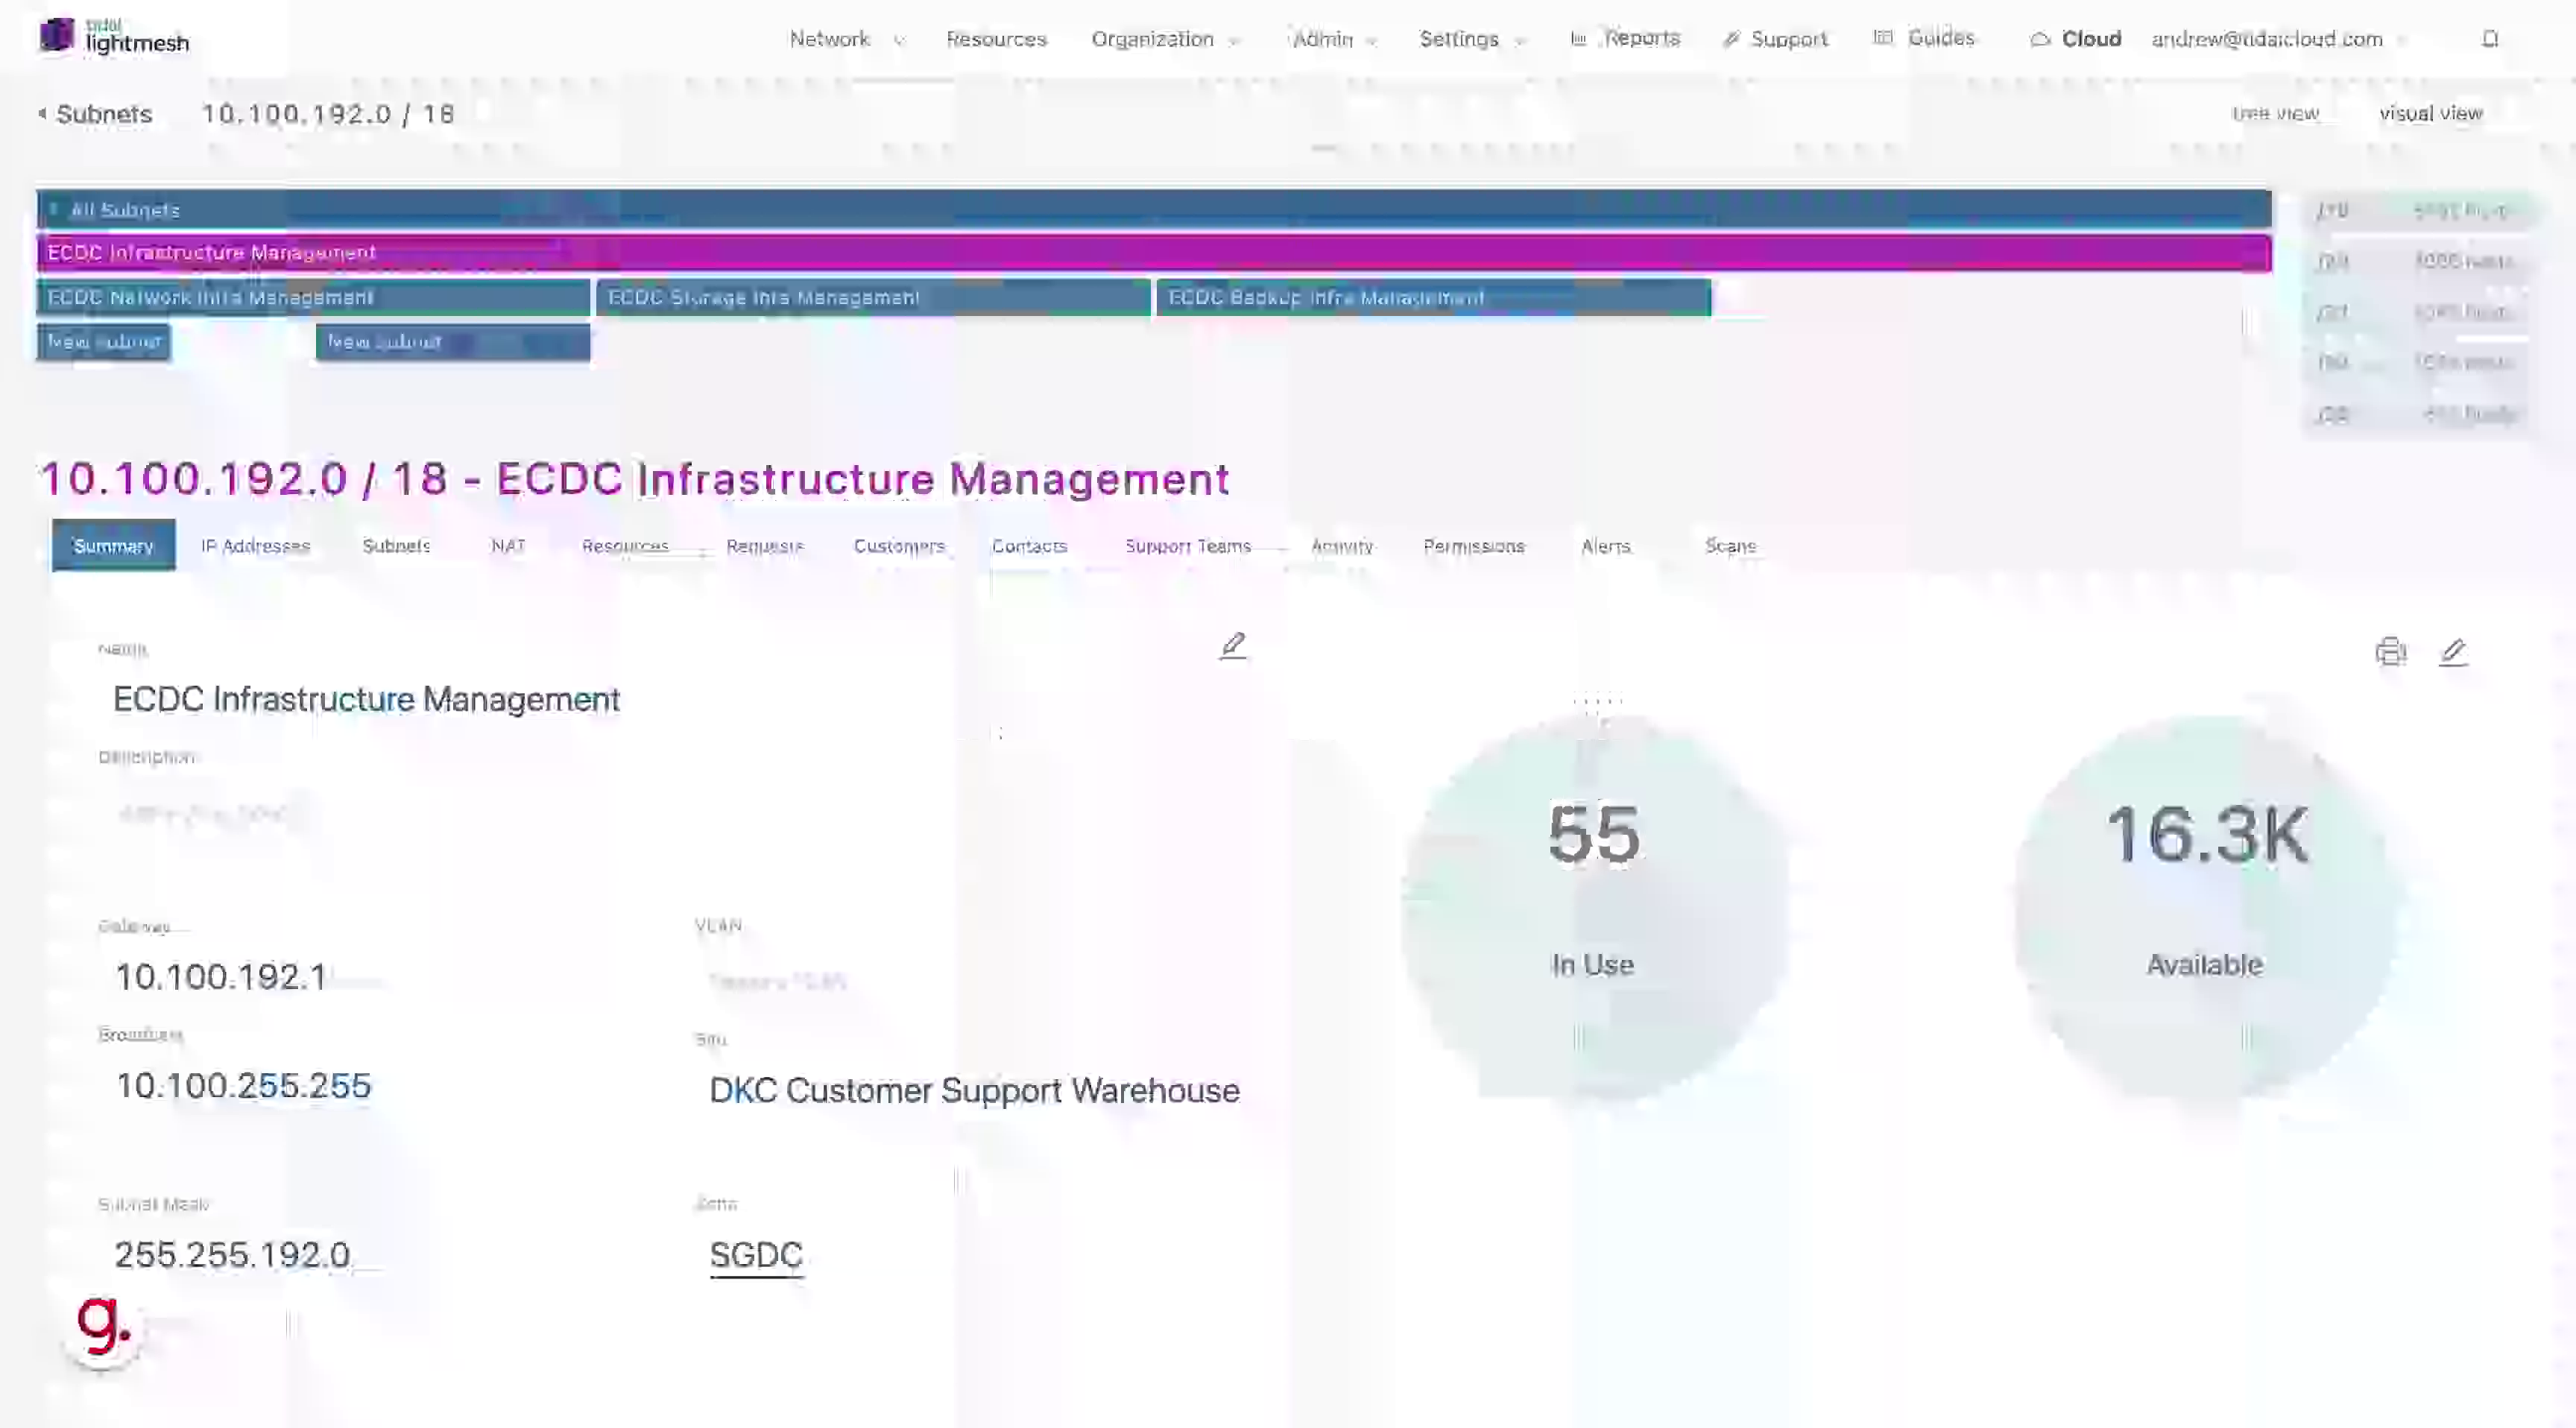
2. Click Edit button
Navigate to the subnet details section.

3. Click “Description”
Input the new subnet description.
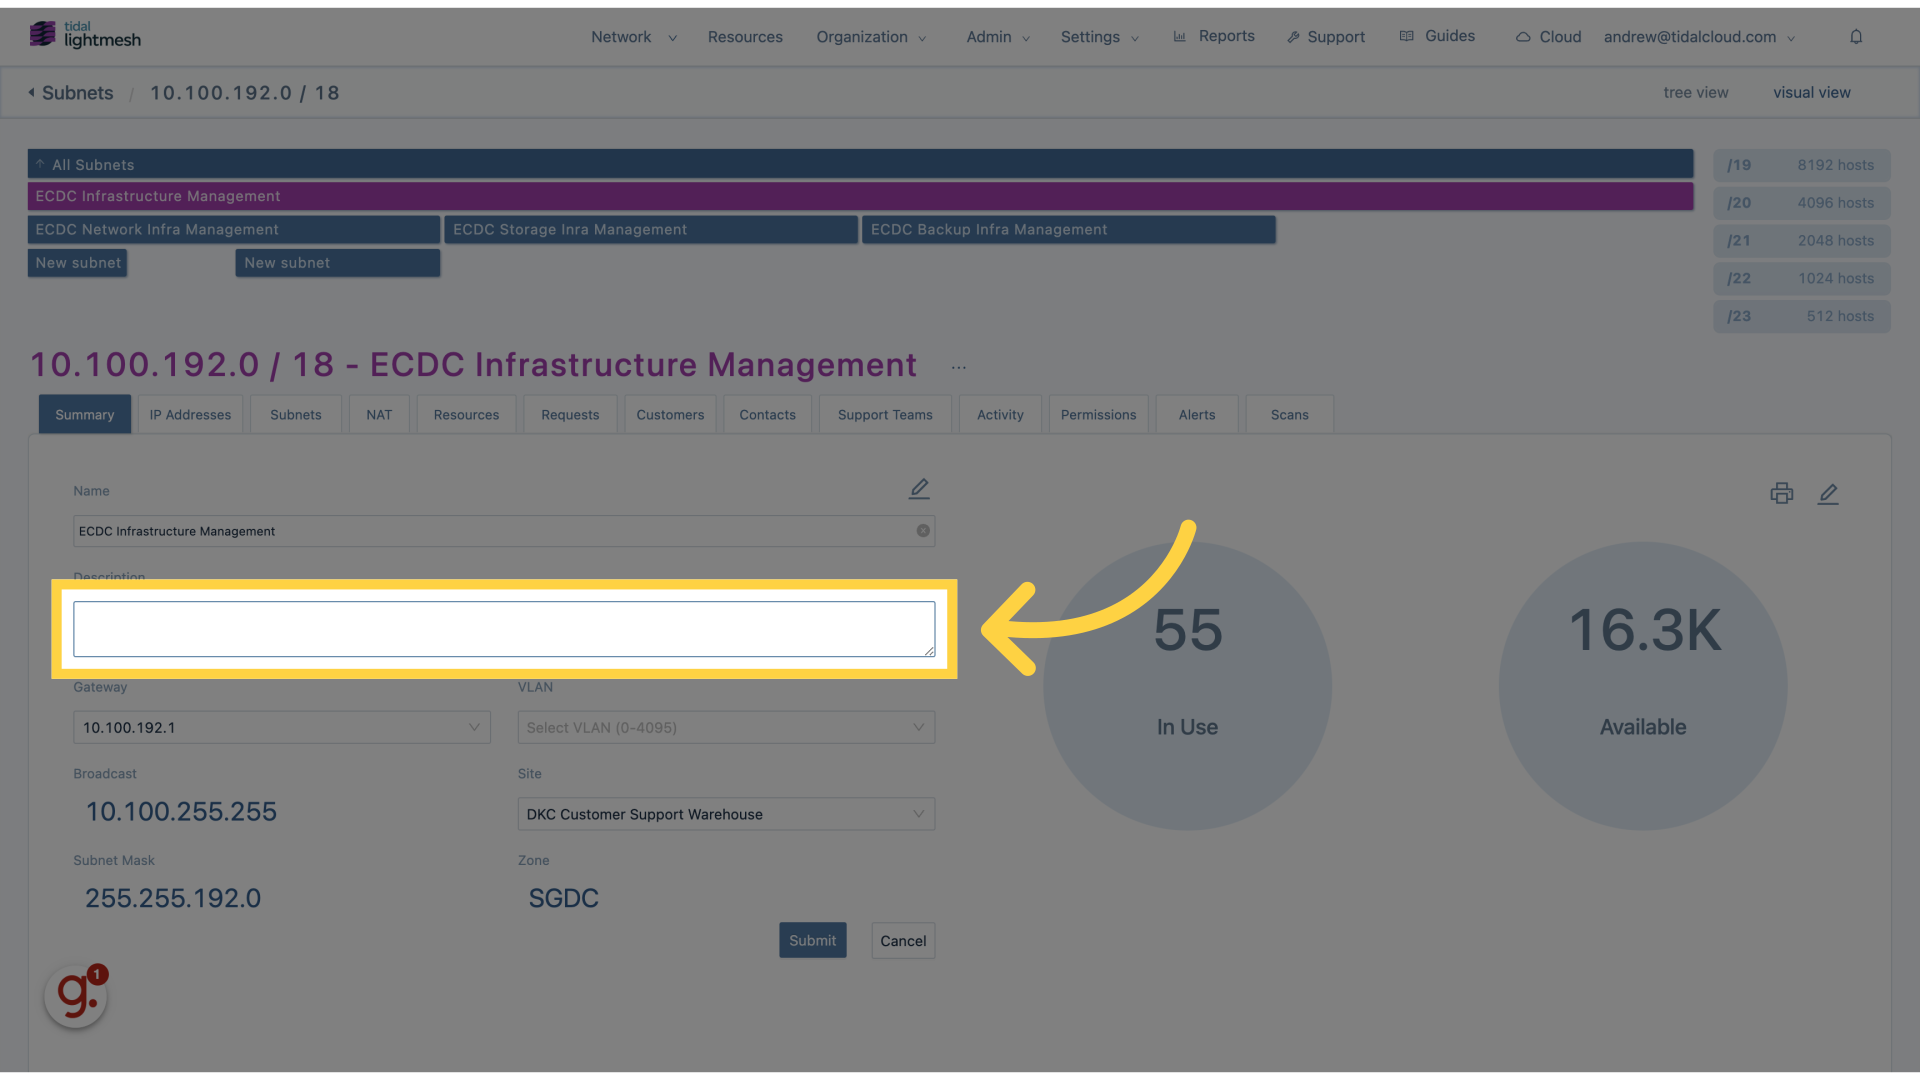
4. Fill “This is a legacy environment”
Fill in “This is a legacy environment”
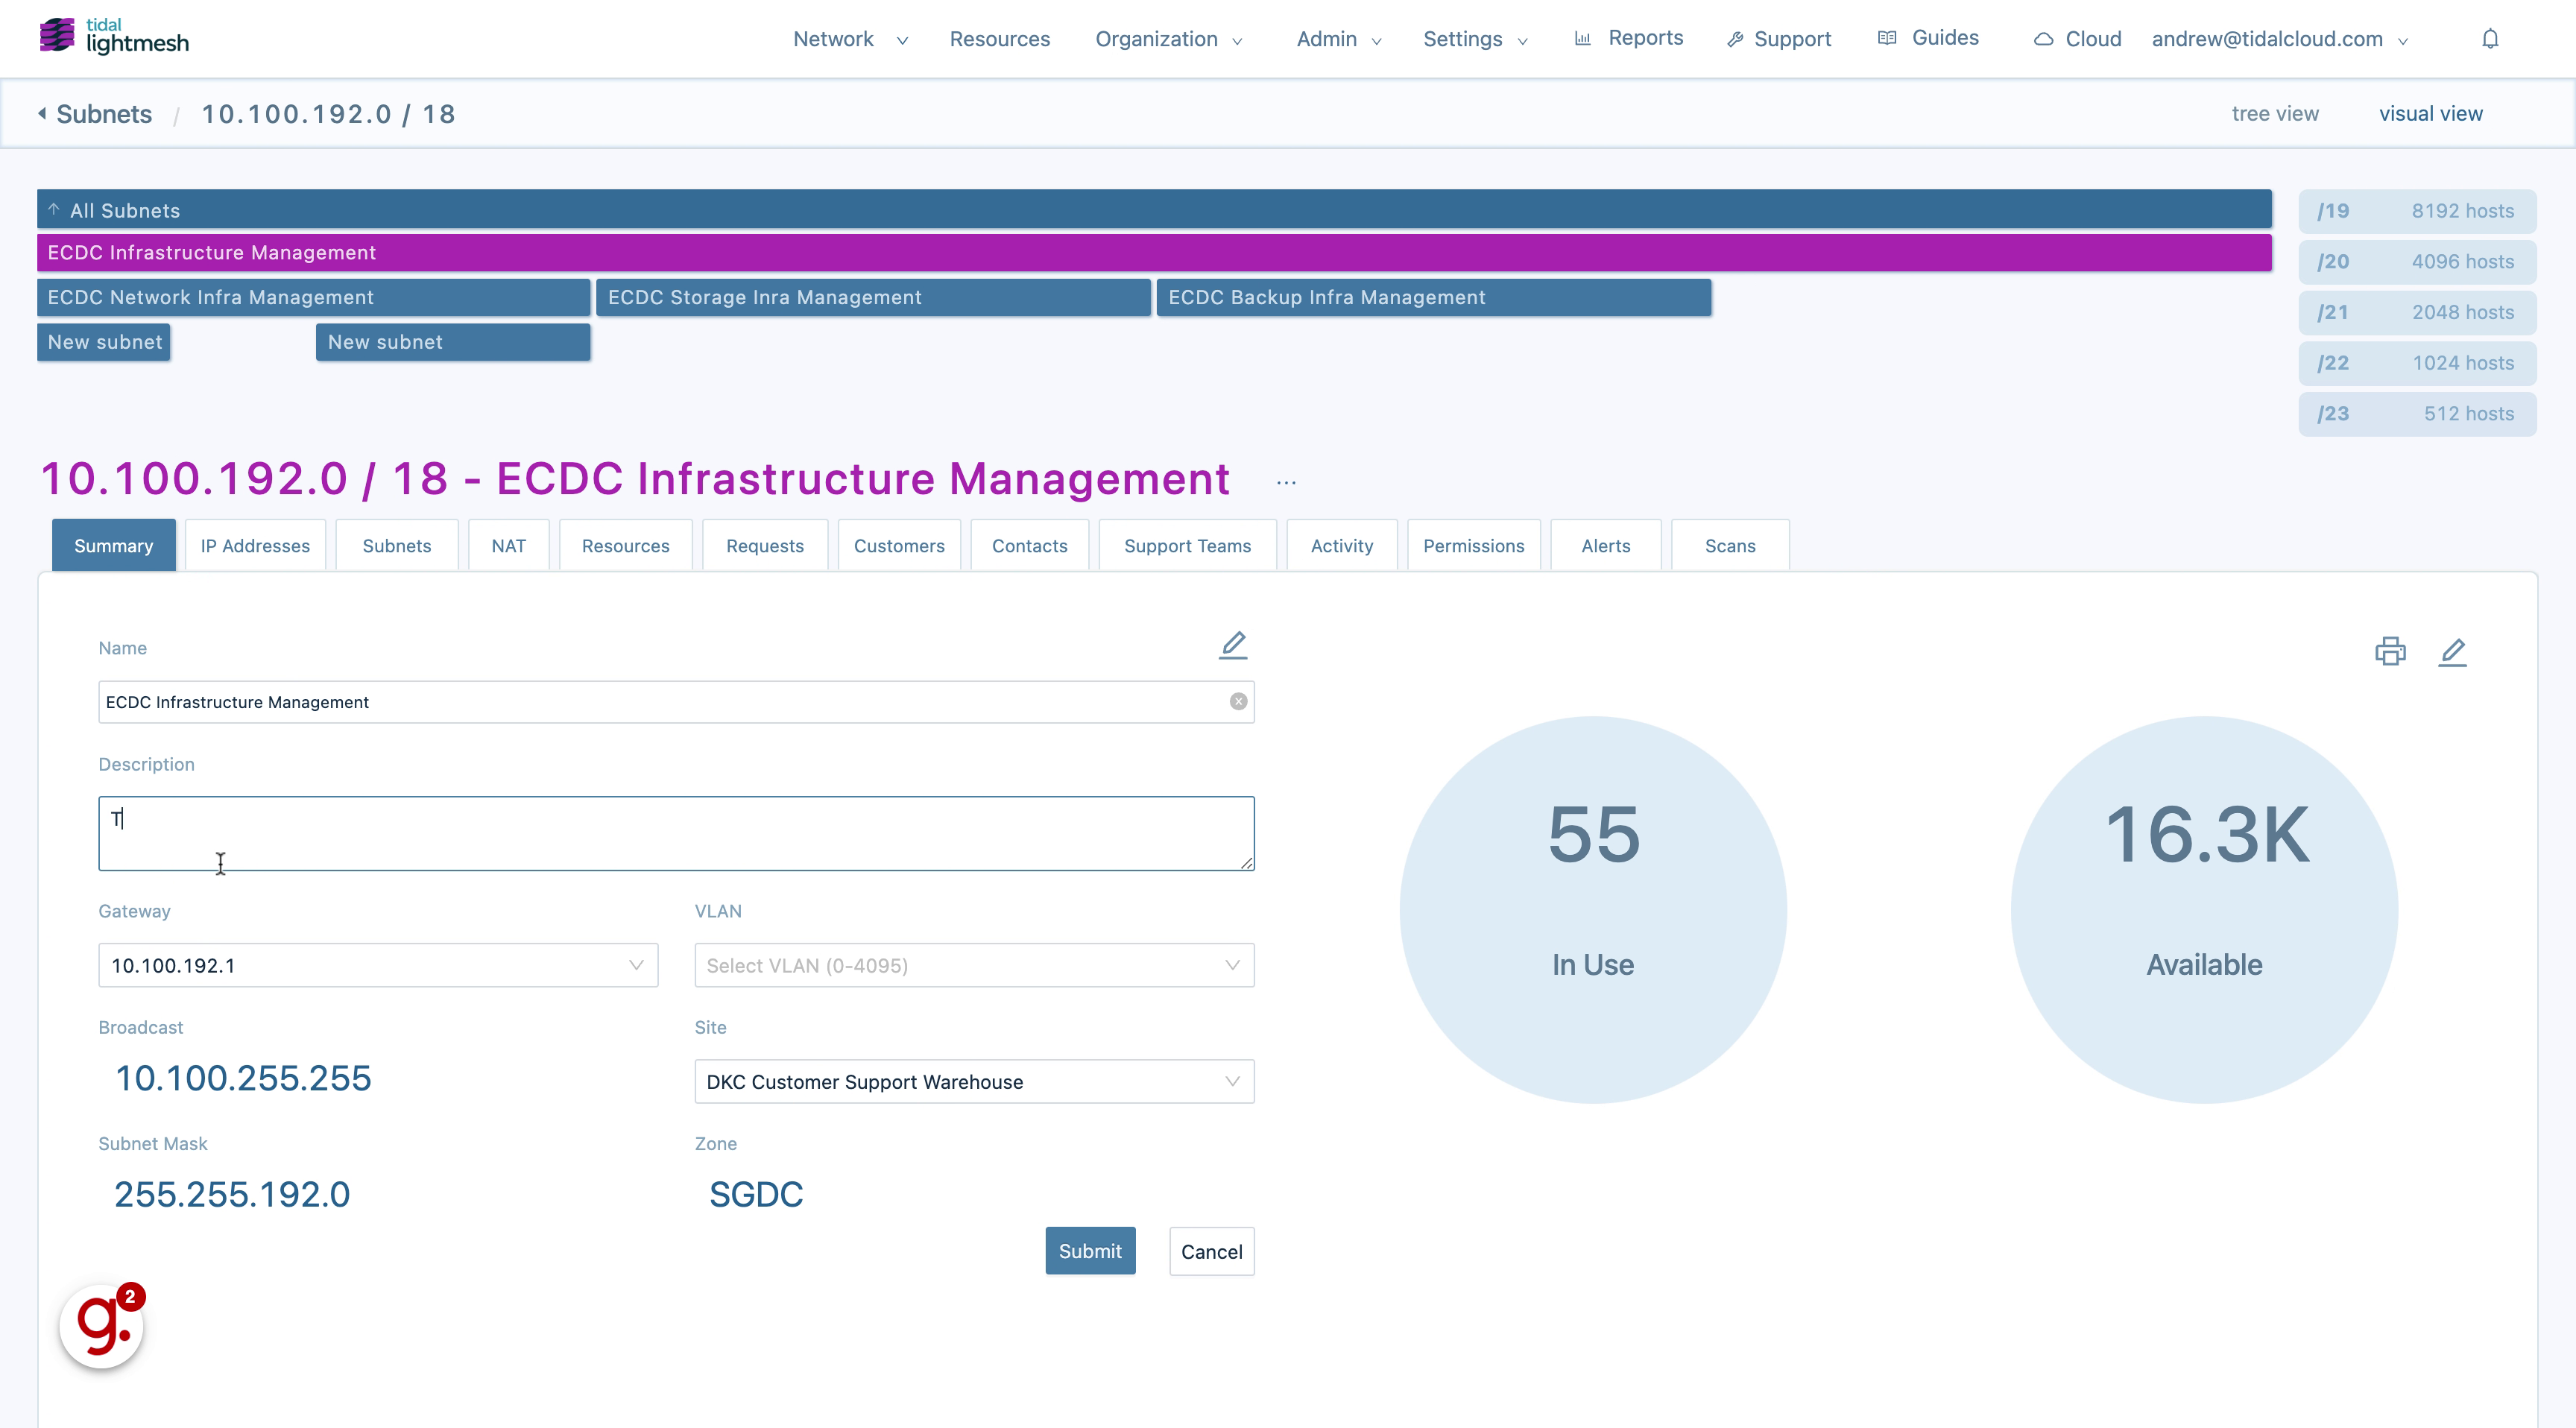
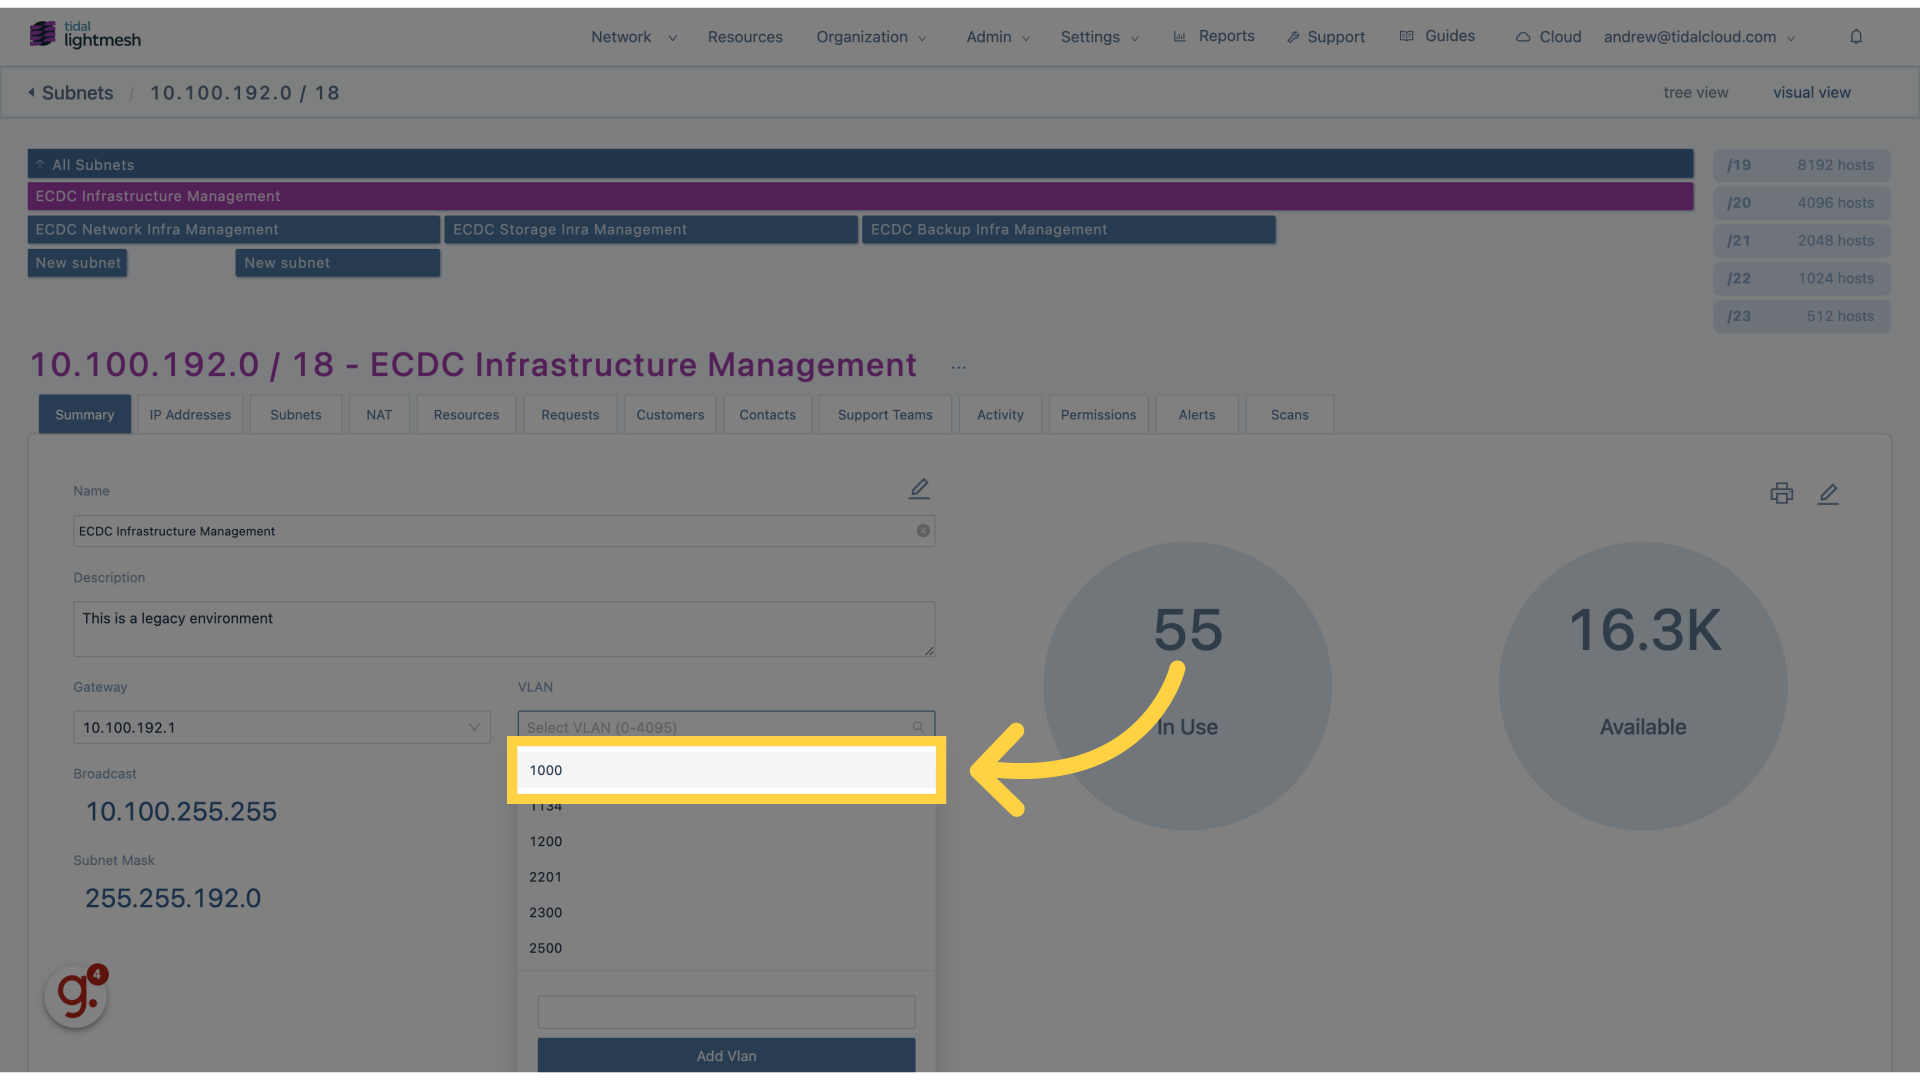
5. Click “VLAN”
Select the appropriate VLAN for the subnet.
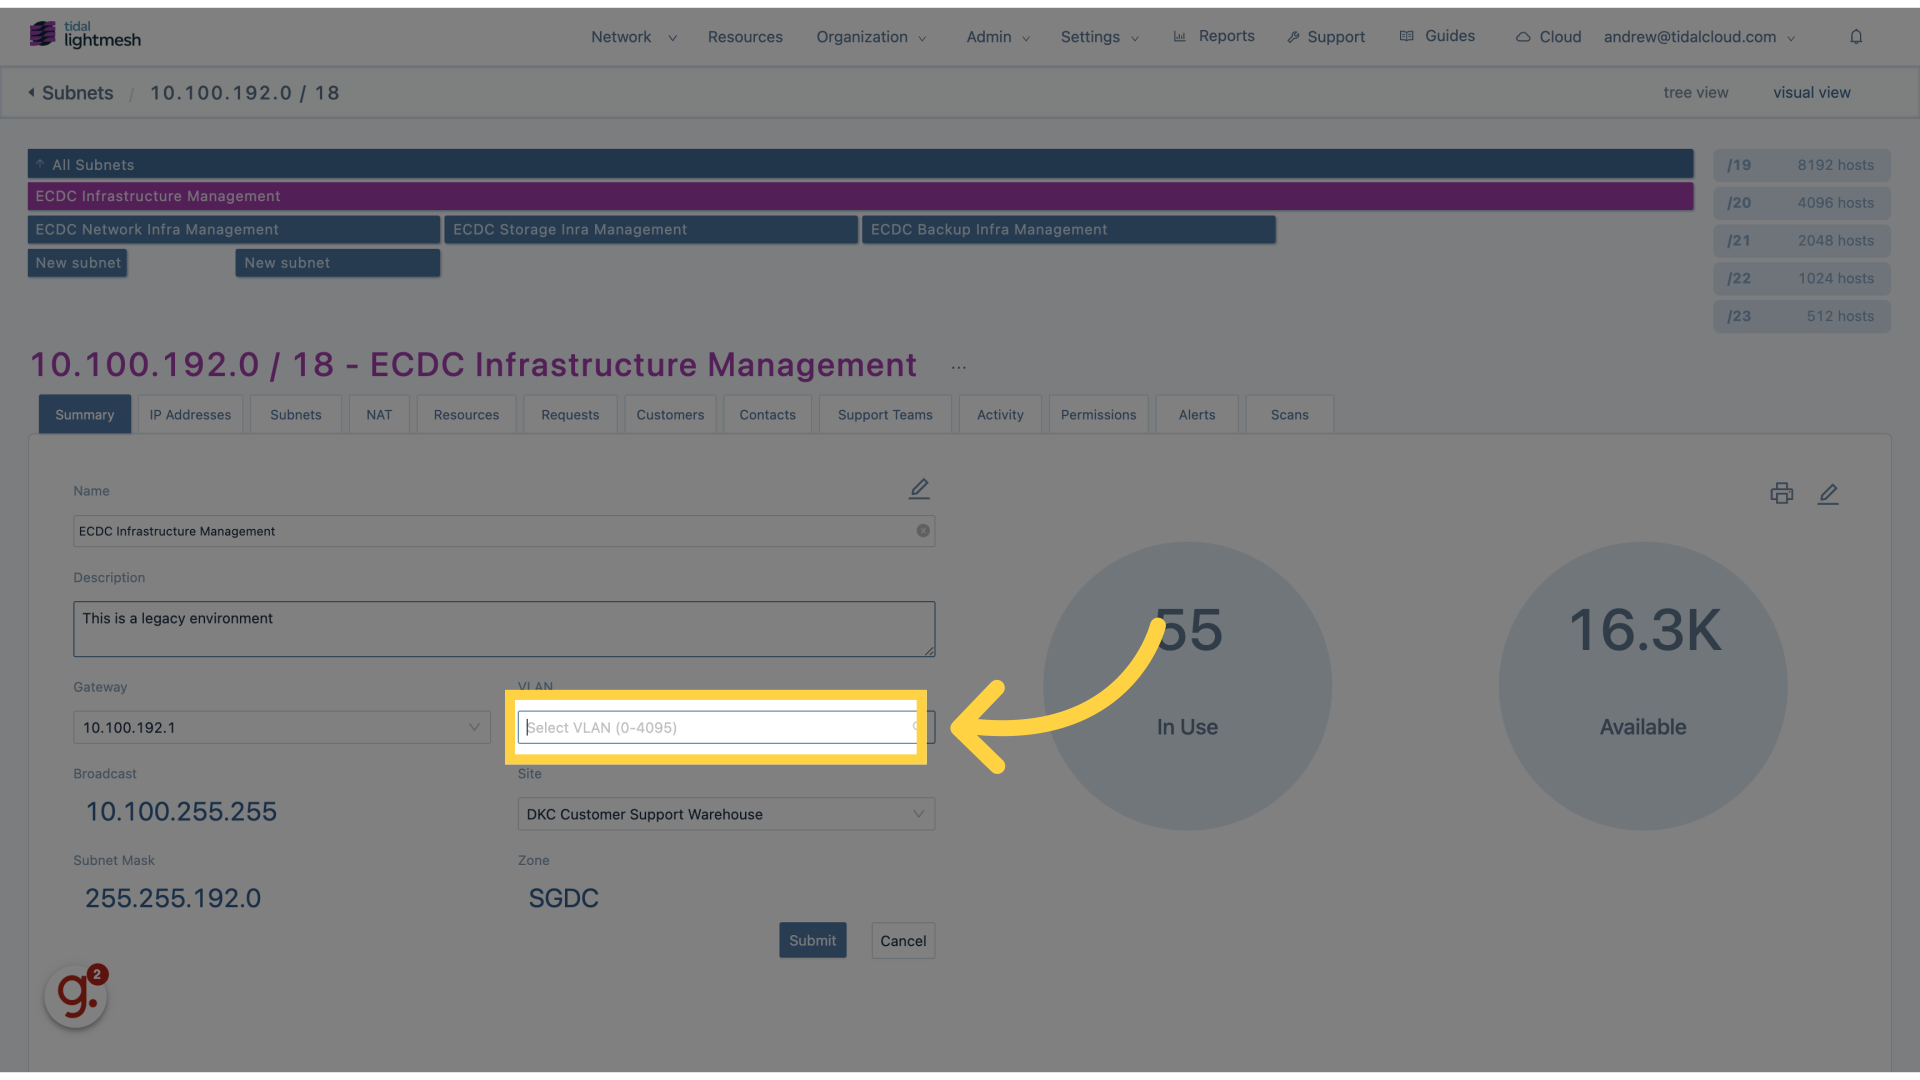
6. Click “1000”
Choose the specific subnet ID.
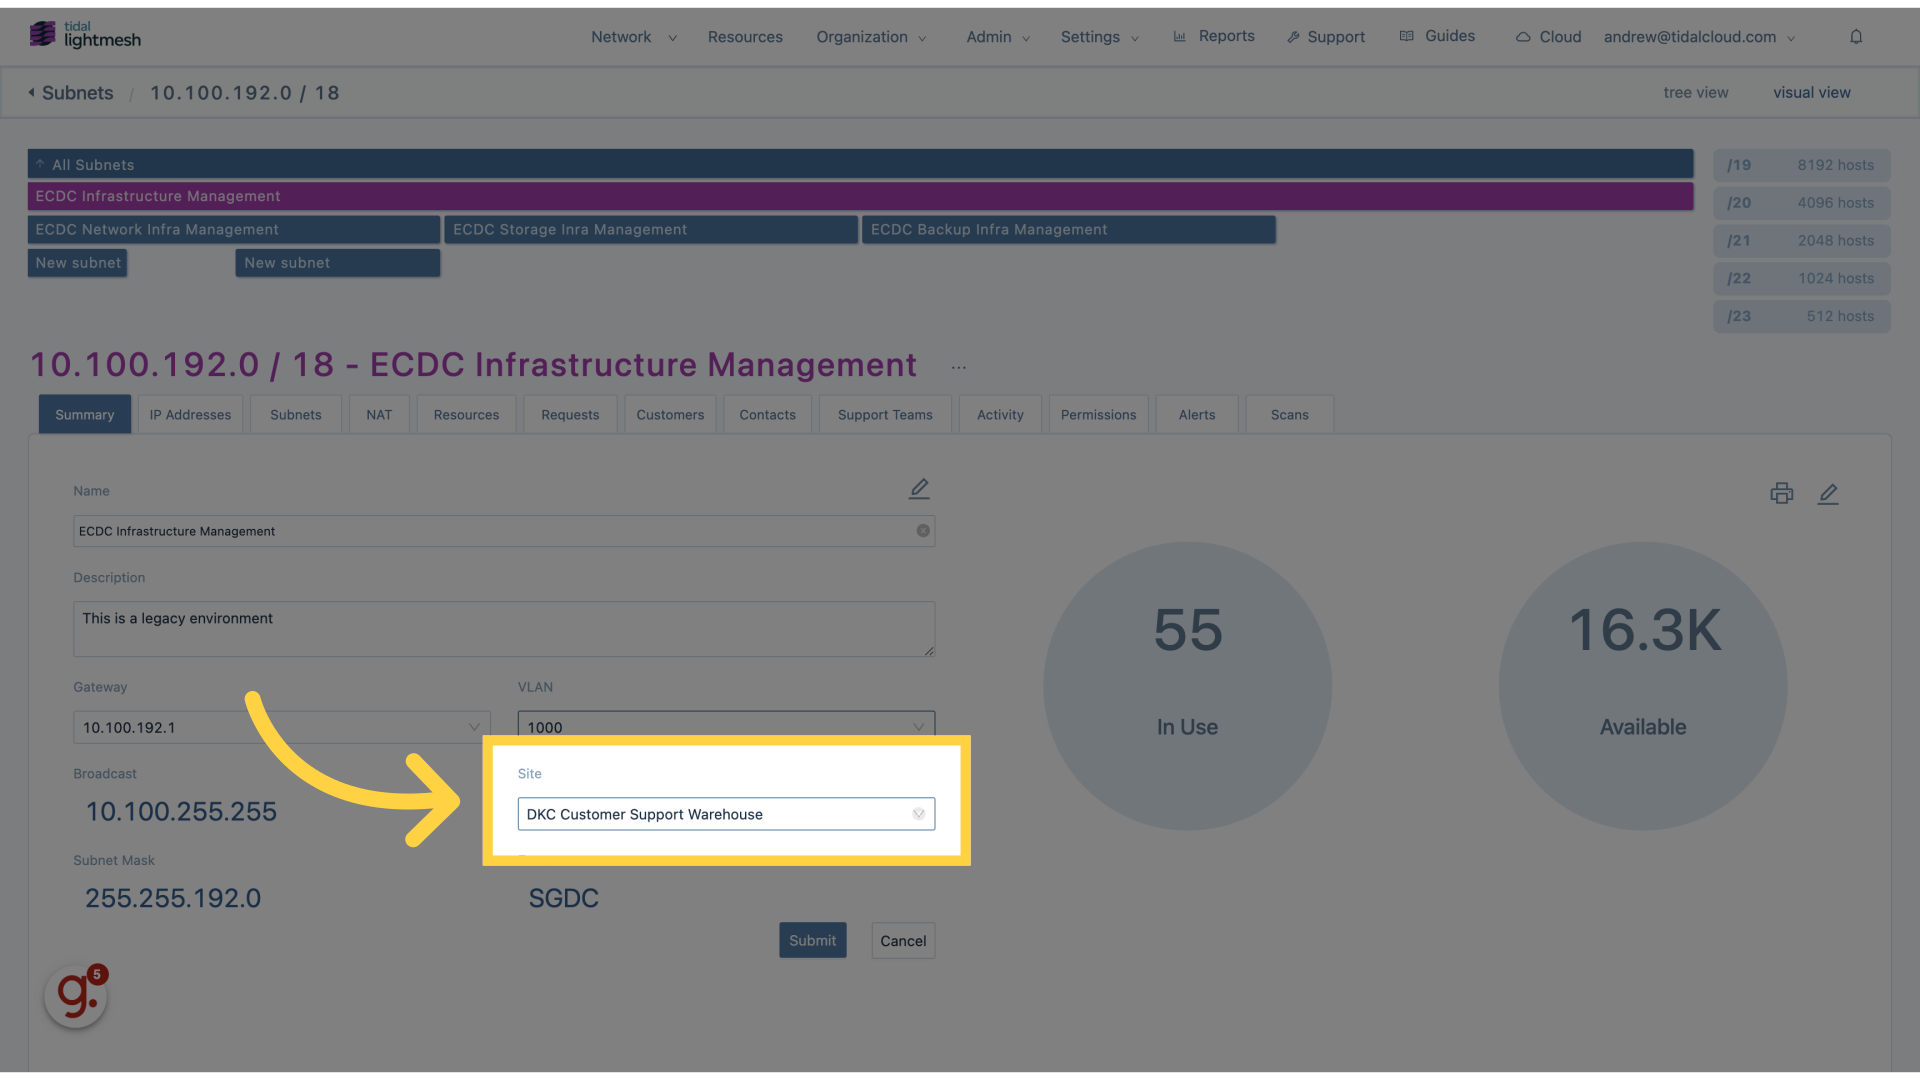
7. Click “SiteDKC Customer Support Warehouse”
Assign the subnet to a specific location.
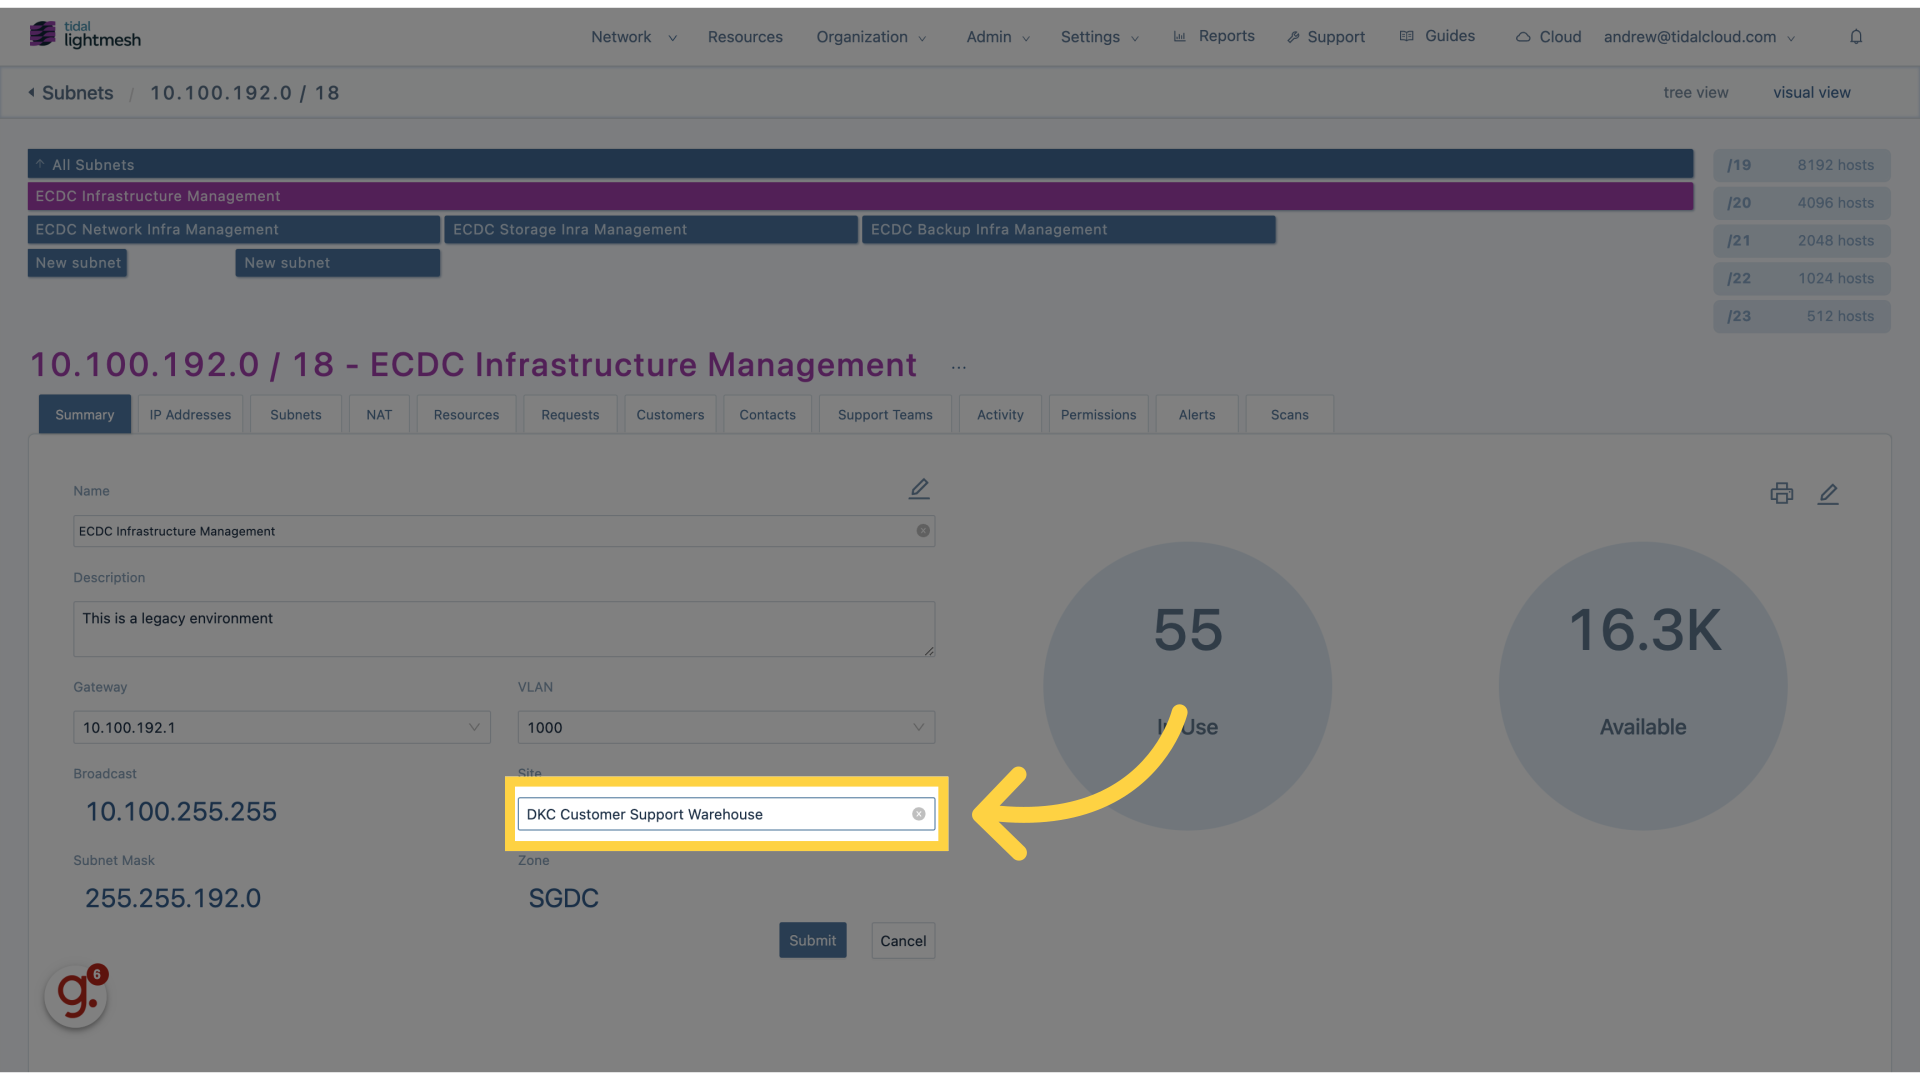
8. Click “DKC Customer Support Warehouse”
Assign the subnet to a specific department.
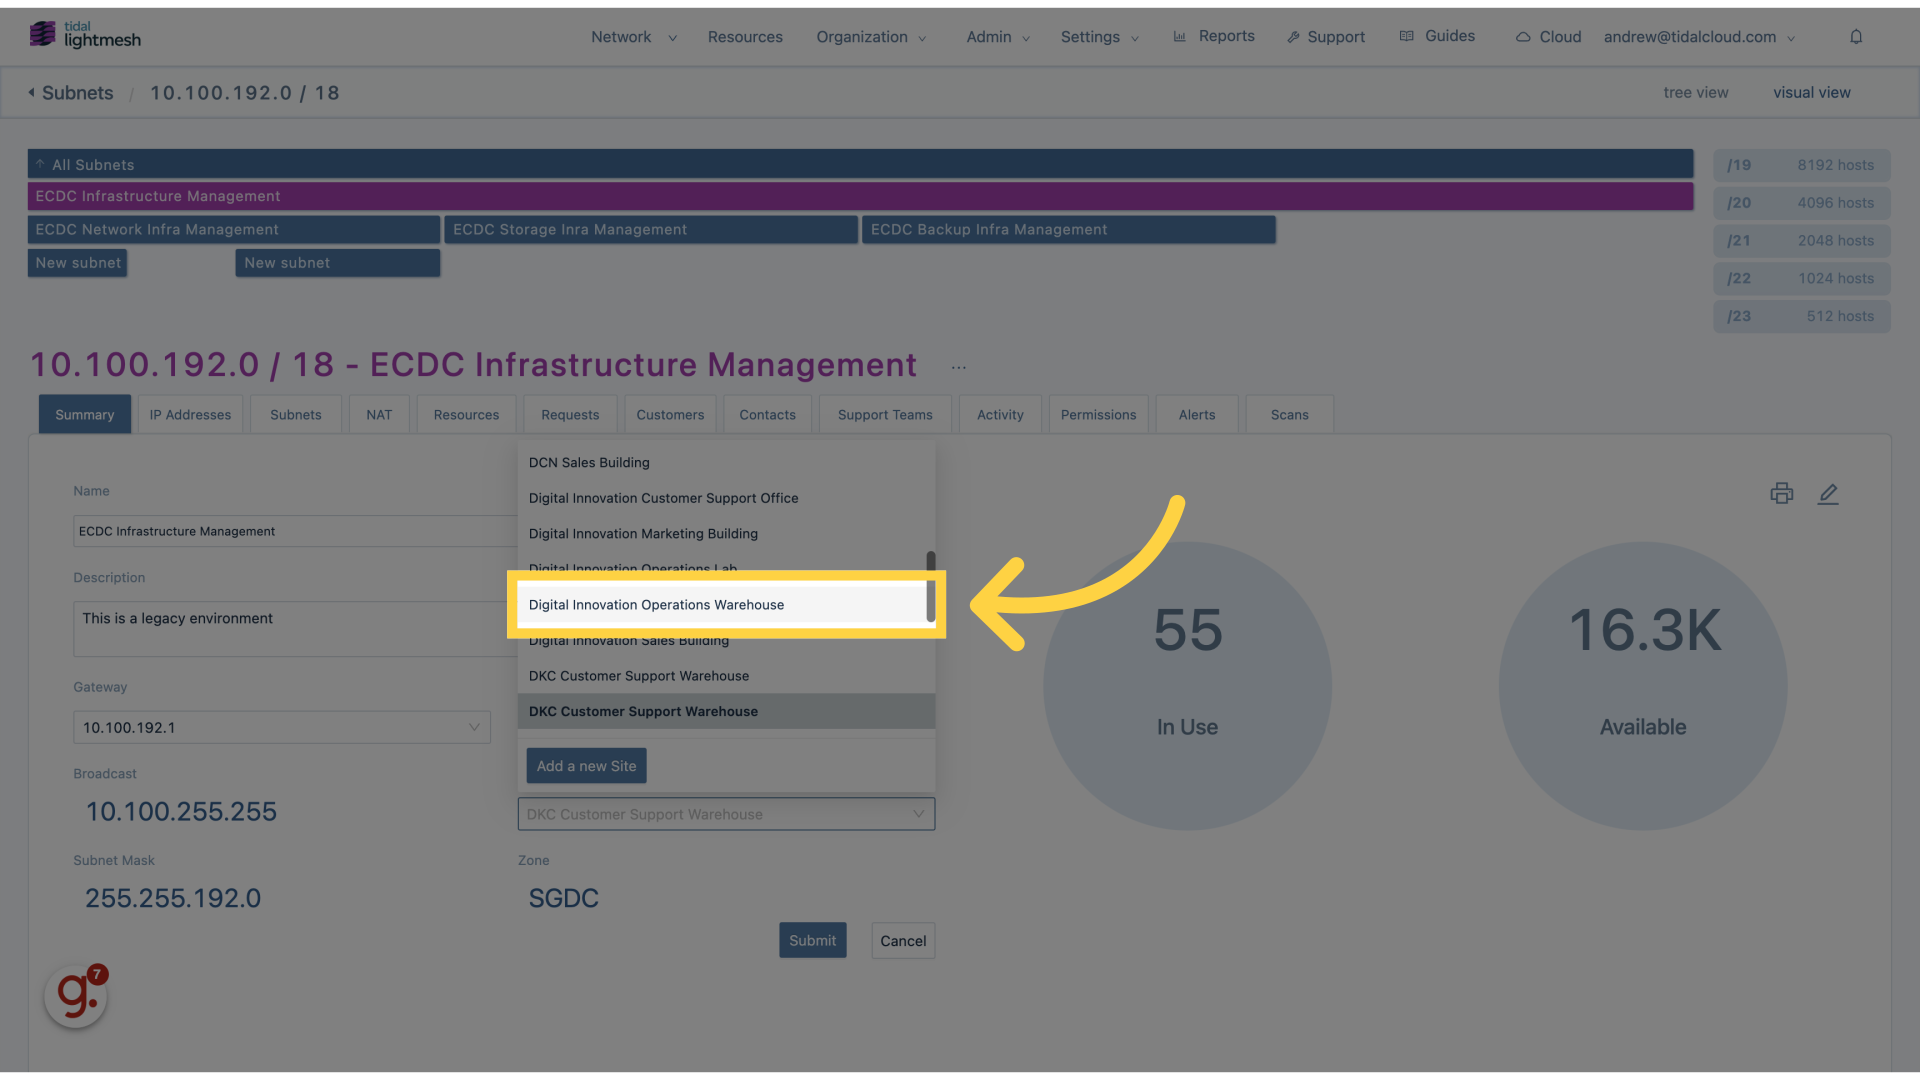
9. Click “Digital Innovation Operations Warehouse”
Assign the subnet to a specific team.
10. Click “Submit”
Save the updated subnet details.

This guide walks you through the process of editing subnet details in Lightmesh.