Azure Integration
Overview
The LightMesh Azure integration enables automated discovery and management of Azure networking resources, including Virtual Networks, Subnets, and IP address allocations. This integration provides a unified view of your Azure network infrastructure through a secure, read-only connection using a service principal.
Prerequisites
- Azure Account with an active subscription
- LightMesh account with Cloud Integration permissions
- Azure CLI installed (for creating the service principal)
Supported Azure Resources
| Resource Type | Discovery | Management |
|---|---|---|
| Virtual Networks | ✓ | Read-only |
| Subnets | ✓ | Read-only |
| IP Addresses | ✓ | Read-only |
Configuration
1. Integration Setup
Step 1: Create Service Principal
- Open Azure CLI and ensure you’re logged in
- Run the following command, replacing
xxxxxx-xxxx-xxxwith your subscription ID:az ad sp create-for-rbac --role reader --scopes /subscriptions/xxxxxx-xxxx-xxx - Save the output credentials securely. You’ll need:
- App ID (client_id)
- Password (client_secret)
- Tenant ID (tenant)
Additional Access Options
Multiple Subscriptions
If you need to grant access to multiple subscriptions, you can assign the same service principal to additional subscriptions using:
az role assignment create \
  --assignee <appId> \
  --role Reader \
  --scope /subscriptions/<subscription-id-2>
Management Group Access
For organizations using Azure Management Groups, you can assign access at the management group level. This ensures the service principal has access to all current and future subscriptions within the management group. This requires Owner or User Access Administrator permissions on the management group:
az role assignment create \
  --assignee <appId> \
  --role Reader \
  --scope /providers/Microsoft.Management/managementGroups/<mg-name>
To verify the role assignments for your service principal, use:
az role assignment list --assignee <appId>
This approach provides dynamic, secure access to your evolving cloud infrastructure without requiring intrusive agents.
Step 2: Add Azure Account in LightMesh
- Navigate to
Cloud > Add Cloud Account > Azure - Enter the following details:
- Connection Name
- App ID (from service principal creation)
- Password (from service principal creation)
- Tenant ID (from service principal creation)
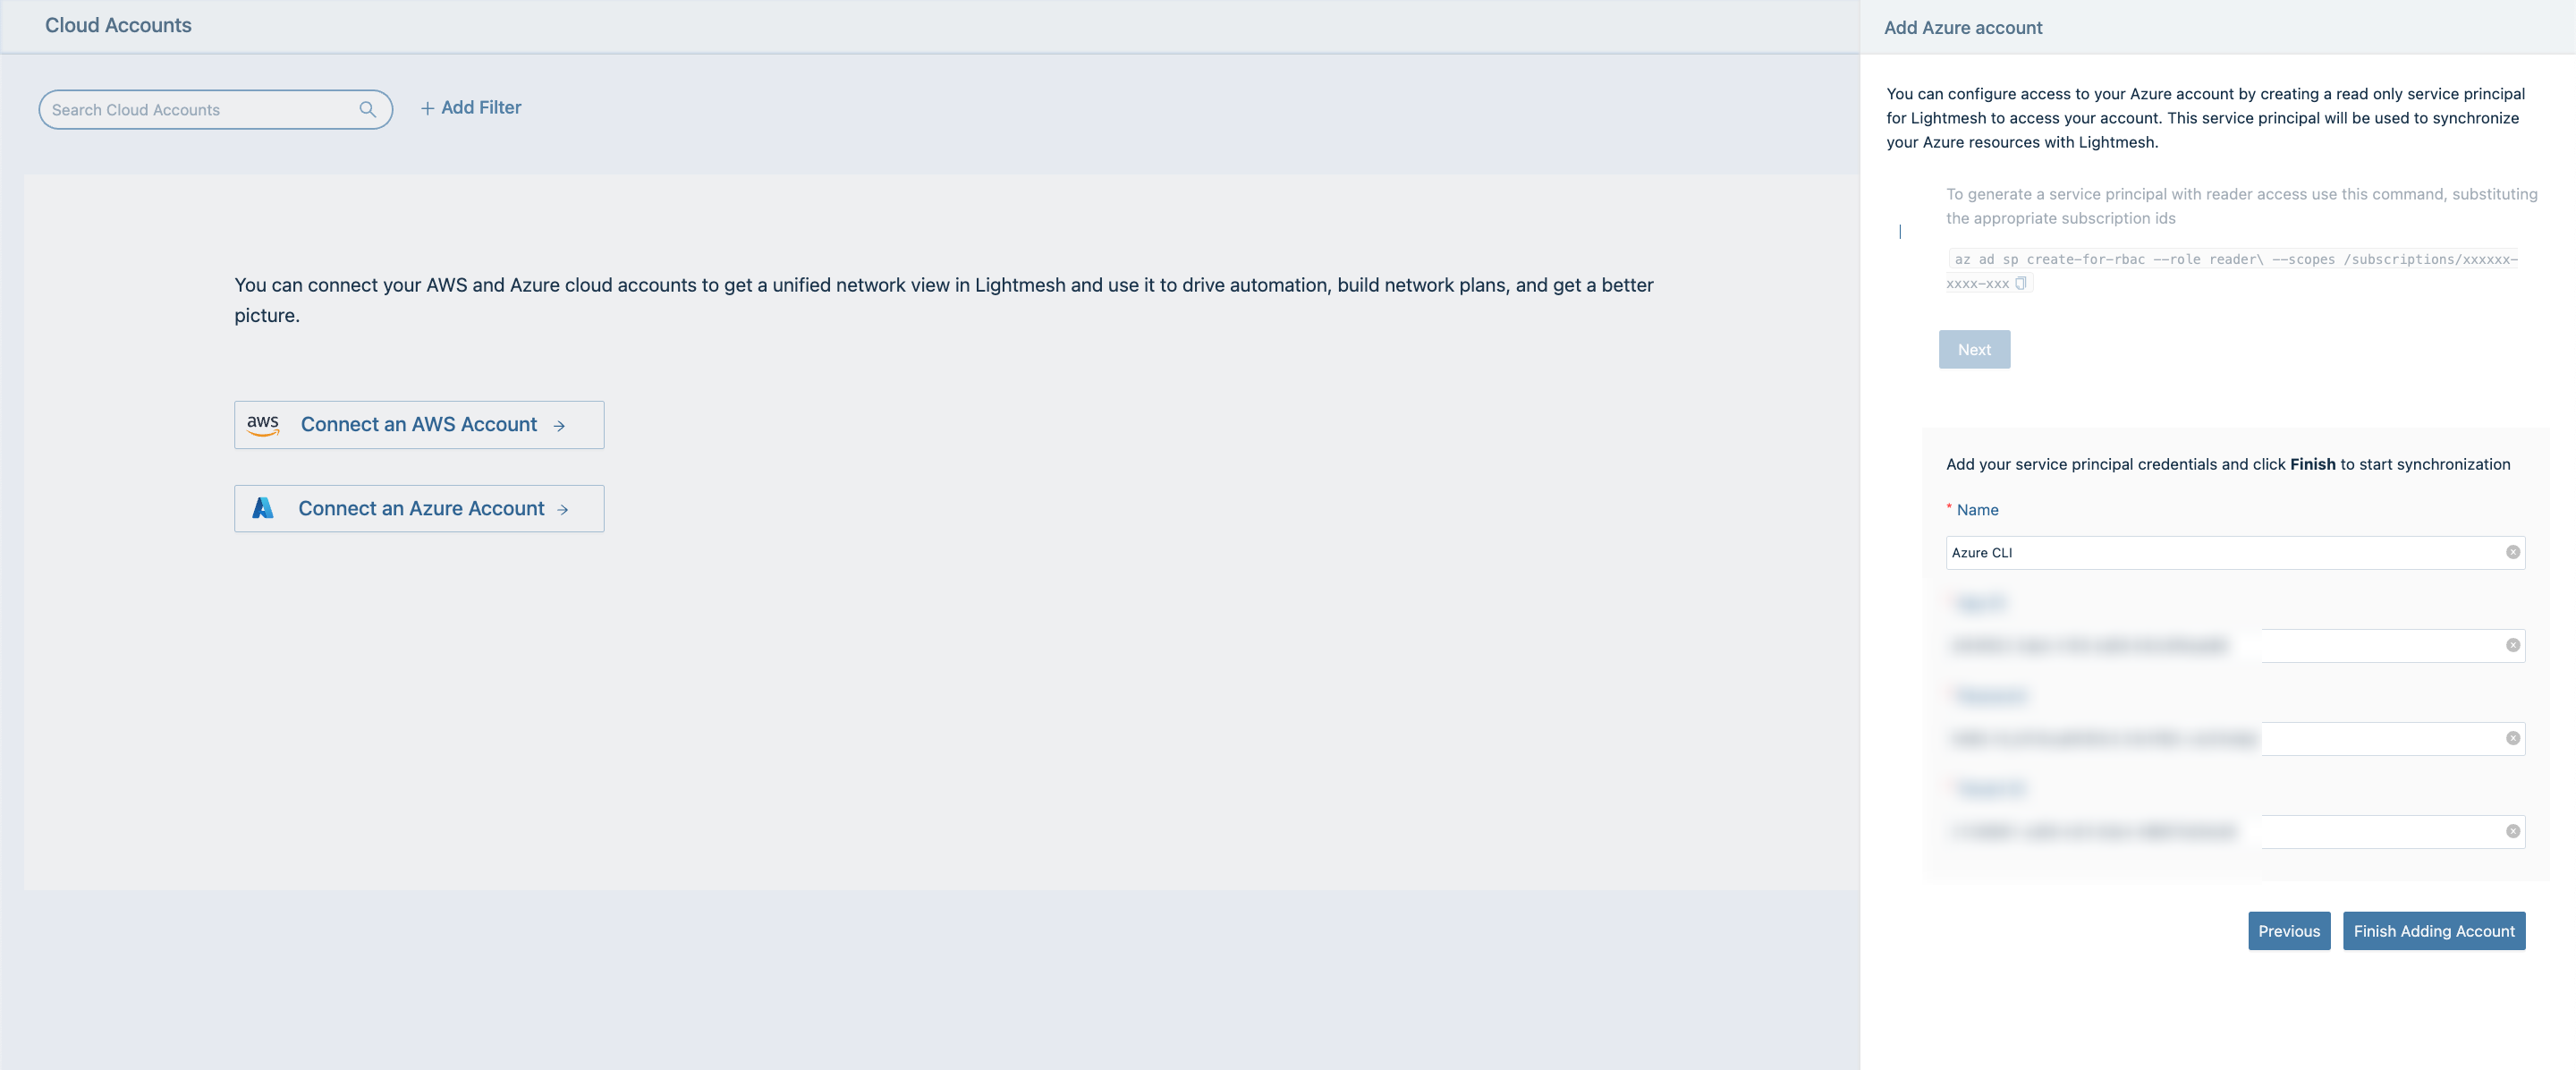 3. Click “Finish Adding Account” to begin synchronization

Synchronization
Default Behavior
- Free Plan: On Demand synchronization
- Pro Plan: Hourly synchronization
- Team Plan: Hourly synchronization
- Enterprise Plan: 5 minutes synchronization
Note: You can manually trigger synchronization at any time by navigating to Cloud Accounts and clicking the refresh button next to your Azure account.
Sync Process
- LightMesh authenticates using the service principal credentials
- API calls are made to Azure endpoints
- Resource data is collected and normalized
- Changes are reflected in the LightMesh dashboard
Security Considerations
- The service principal is created with the Reader role, ensuring read-only access to your Azure resources
- Credentials are encrypted and stored securely in LightMesh
- The service principal can be revoked at any time through the Azure portal
Conclusion
LightMesh’s Azure integration provides a seamless solution for managing and documenting your Azure network infrastructure. Whether you’re working with multiple Virtual Networks, subnets, or IP allocations across different regions, LightMesh’s intuitive interface makes it easy to maintain visibility and control over your entire Azure network environment.
The integration’s automated discovery and synchronization capabilities ensure that your network documentation stays current, while the unified view helps prevent IP conflicts and streamlines network management across your Azure infrastructure.
Start leveraging the power of LightMesh’s Azure integration today to optimize your cloud network management. If you haven’t already, start a trial and explore the full spectrum of features LightMesh has to offer.